Woodcut Stamps And Conductive Ink

circuit

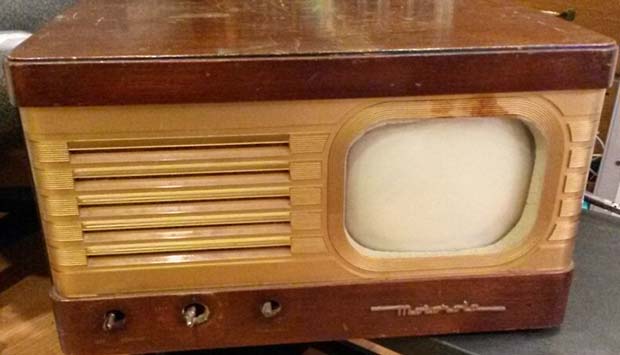
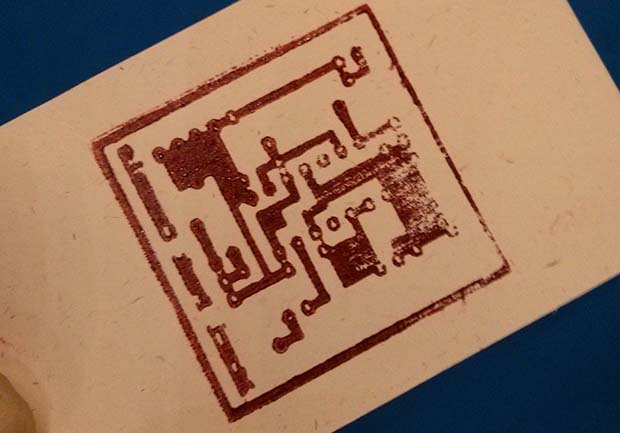
Even though it’s been a while since the Rome Maker Faire, we’re still getting some tips from the trenches of Europe’s largest gathering of makers. One of these is a 30-minute experiment from [Luong]. He wondered if it would be possible to create SMD circuit boards by using a 3D printer to fabricate a stamp for conductive ink.

[Luong] told this idea  to a few folks around the faire, and the idea eventually wound up in the laps of the guys from TechLab. the Chieri, Italy hackerspace. They suggested cutting a wooden stamp using a laser cutter and within 30 minutes of the idea’s inception a completed stamp for an Atari Punk Console PCB was in [Luong]’s hands.

As an experiment, the idea was a tremendous success. As a tool, the stamp didn’t perform as well as hoped; the traces didn’t transfer properly, and there’s no way this wooden laser cut stamp could ever create usable PCBs.

That being said, we’re thinking [Luong] is on the right track here with printed PCBs. One of the holy grails of home fabrication is the creation of printed circuit boards, and even a partial success is too big to ignore.

This idea for CNC-created PCB stamps might work with a different material – linoleum or other rubber stamp material, or even a CNC milled aluminum plate. If you have any ideas on how to use this technique for PCB creation, leave a note in the comments, or better yet, try it out for yourself.

Quadruped Robot Thinks It’s A Puppy

puppybot
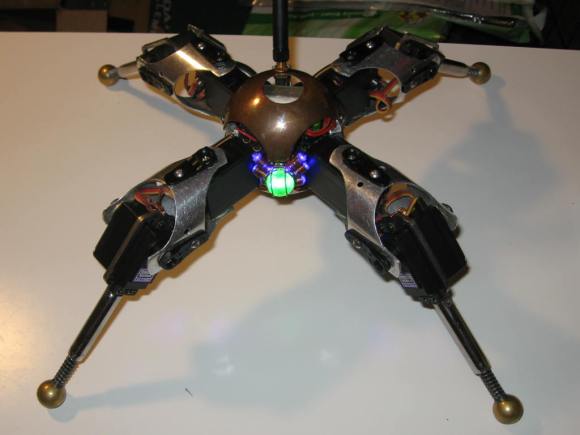
Back at New York MakerFaire 2012, we noticed an amazing little steampunk quadruped robot walking around in the crowd outdoors. The robot was amazingly well executed, and had a unique ability to draw children over with it’s puppy like animations. It turns out this is [Drew’s] Little Walking Robot (AKA Puppy Bot).

Puppy Bot has actually been around for quite a while. He was born from the spare parts [Drew] had left over after competing in Robot Wars and Battlebots. The robots in these competitions were often controlled by Radio Control plane or car transmitters. Most of these systems are sold as packs for an RC car or plane. In addition to the transmitter and receiver, the pack usually included a battery and 3 or 4 servos. Standard RC servos were much too weak for use in battle robots, so they remained in his parts box.

On what [Drew] calls a slow weekend, he started putting the servos together, and ended up with a basic robot that could crawl around the room. After that the robot took on a life of its own. [Drew] improved the battery system, and added a microcontroller to automate the various gaits and animations. He brought the robot along with him to one of his battlebot competitions, and it took home the “Coolest Robot” award – even though it wasn’t actually competing!

Continue reading “Quadruped Robot Thinks It’s A Puppy”

Rebuilding A 1940s TV

TV

There’s a lot of cool stuff to be found under piles of trash in an antique store. [dijt] discovered this when he found a tiny 7″ Motorola television from the 1940s under a stack of trinkets from earlier eras. We can understand [dijt]’s impulse buy, and the trials of rebuilding this ancient TV more than qualifies it as a hack.

If you know where to look, there are hundreds of resources available for old televisions, Hi-Fis, and radio equipment from the dawn of the electrical era to the modern day. After consulting with a few forums, [dijt] got his hands on a schematic for his television set and began work on diagnosing what was wrong with it.

It turned out the original ballast tube in this set had long since given up the ghost. Luckily, this is a common problem in old TVs, and after consulting some forums [dijt] had a schematic to replace this ballast tube with some newer caps and resistors.

After constructing the circuit and testing it out, [dijt] mounted it in the old ballast tube to replicate the original look and feel of the 1949 television. Interestingly, this is the second time this TV had been restored; the 1960s-era caps and resistors told [djit] this TV had once went into a television repair shop. Let’s just hope [djit] remembered to glue the schematics to the inside of the chassis this time.

FlightDeck: A “Touchless” MIDI Controller

flightdeckmidi

[Edward] wanted a different way to modulate notes on his MIDI controller, so he decided to go touchless. Inspired by the pressure-sensing modulation on his Edirol keyboard, [Edward] aligned eight sensors into a row of playable notes and used infrared to sense the distance of a player’s hand from the keys. He also included some function buttons to cycle through 10 octaves and RGB LEDs beneath the table that perform alongside the music.

He chose SHARP GP2D120 sensors (direct link to datasheet) for their low threshold, which allowed the board to detect distance close to the sensor. Each is mounted onto a sheet of frosted acrylic along with its own “hold note” button and an LED to indicate the key is playing. The lower panel houses an Arduino Mega that drives the system along with an RGB LED strip and its driver board. [Edward] used Maxuino and OSC-Route to interface the Mega to a Max/MSP patch which runs the show.

Learn more about the FlightDeck’s features in a video demonstration of the controller and the software after the break, then check out some other MIDI hacks like this organ pedal or the Arduino-driven MIDI sequencer.

Continue reading “FlightDeck: A “Touchless” MIDI Controller”

Guest Rant: From Bits To Atoms

I’ve been a software developer for quite a while. When you spend long enough inside a particular world, it’s easy to wind up with an ever-narrowing perspective. You start seeing everything from a software point of view. As the saying goes, when your only tool is a hammer, you tend to treat every problem as NP-Complete. Or something. I forget how that goes.

Anyway, the point is, it’s always good to broaden one’s horizons, and solve as many different kinds of problems as possible. To that end, I started to get into hobby electronics recently. The journey has been very enlightening in a number of ways.

Continue reading “Guest Rant: From Bits To Atoms”

HHH: CNC Storage Base From The Rabbit Hole

henchmen-rabbithole-cnc-storage-base

Remember when we announced the Hackaday Hackerspace Henchmen program and asked you to send in the best CNC hacks from your Hackerspace? Well so far this is the only entry, which puts [Mazz] in the top spot to take all the loot for himself. Send in your projects by 10/31/13 if you want a shot at stickers, shirts, and a parts vendor gift card.

What he sent in is a storage cabinet base built for his hackerspace — The Rabbit Hole in Rochester, Minnesota. The group managed to get their hands on a CarveWright CNC machine but didn’t have a spare bench to put it on. The thought of dropping a lot of cash into something wasn’t appealing to them. But as luck would have it, about the same time this arrived at the space one of the members spied a free filing cabinet curbside.

The cabinet was a vertical four-drawer unit. It was chopped in half, with the resulting two-drawer units bolted side-by-side to each other. From here a frame was built to support the cabinets, along with locking casters so that it’s easy to move around. The inaugural run with the new machine/cabinet combination was to mill a sign for the space:

rabbit-hole-carved-sign

Making A Diode Matrix ROM

Here is a nice project that allows youngsters (but also adults!) to actually see the data stored in a Read Only Memory (ROM). The memory shown in the picture above is made of diodes. [Scott] made it as a part of his Barcamp Fall 2013 presentation about visualizing ROMs. He starts his write-up by stating the obvious: this memory is not practical. Nonetheless, it still was a fun exercise to do. [Scott] then greatly described all the different kinds of read only memories that you can find out there, with a few words explaining how they work. In his diode ROM, bits are ‘programmed’ by adding (or not) a diode between a given data line (anode) and an address line (cathode). When pulling low a given address line, the corresponding data line will only be pulled low if a diode is present. [Scott] finally checked his circuit by using a very old device programmer which could only be run in DOS.