Investigating The Fourth Passive Component

When first learning about and building electronic circuits, the first things all of us come across are passive components such as resistors, capacitors, and inductors. These have easily-understandable properties and are used in nearly all circuits in some way or another. Eventually we’ll move on to learning about active components like transistors, but there’s a fourth passive circuit component that’s almost never encountered. Known as the memristor, this mysterious device is not quite as intuitive as the other three, so [Andrew] created an Arduino shield to investigate their properties.

Memristors relate electric charge and magnetic flux linkage, which means that their resistance changes based on the current that passes through them. As their name implies, this means they have memory, and retain their properties even after power is removed. [Andrew] is testing three different memristors, composed of tungsten, carbon, and chromium, using this specialized test set. The rig is based on an Arduino Uno and has a few circuit components that can be used as references and generates data on the behavior of the memristors under various situations.

The memristors used here do exhibit expected behavior when driven with positive voltage signals, but did exhibit a large amount of variability when voltage was applied in a negative direction. [Andrew] speculates that using these devices for storage would be difficult and would likely require fairly bespoke applications for each type. But as the applications for these seemingly bizarre circuit components increase, we expect them to improve much like any other passive component.

Continue reading “Investigating The Fourth Passive Component”

Upgrading A Classic Function Generator

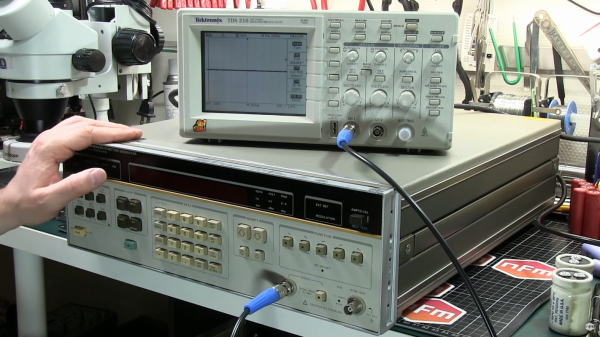
If you need an oscilloscope, function generator, or other piece of kit for your electronics workbench, there are plenty of modern options. Dropping $4,000 for a modern oscilloscope is nice if you have the money, but if you’d rather put it to better use there are great options that don’t cost a fortune. There are some addons that can turn a smartphone into an oscilloscope but one of the best values out there are older pieces of equipment from the 80s that still work great. You can even upgrade them with some more modern features too, like [NFM] did with this vintage function generator.

This function generator is an HP3325A and it is several decades old, so some work was needed just to restore it to original working condition. The cooling fan and capacitors all needed to be replaced, as well as a few other odds and ends. From there [NFM] set about adding one of the two optional upgrades available for this device, the high voltage output. This allows the function generator to output 40 volts peak-to-peak at 40 milliamps. While he did have an original version from HP, he actually had a self-made design produced that matches the function of the original.

Even if you don’t have this specific function generator, this guide goes into great details about the functioning of older equipment like this. Most of the parts are replaceable and upgrades aren’t completely out of the question like some modern equipment, and with the right care and maintenance these pieces of equipment could last for decades longer.

Continue reading “Upgrading A Classic Function Generator”

DIY PC Test Bench Puts Hardware Troubleshooting Out In The Open

If you’ve built a few PCs, you know how frustrating troubleshooting can be. Finding a faulty component inside the cramped confines of a case can be painful — whether its literal when sharp edges draw blood, or just figurative when you have to open that cramped case multiple times to make adjustments.

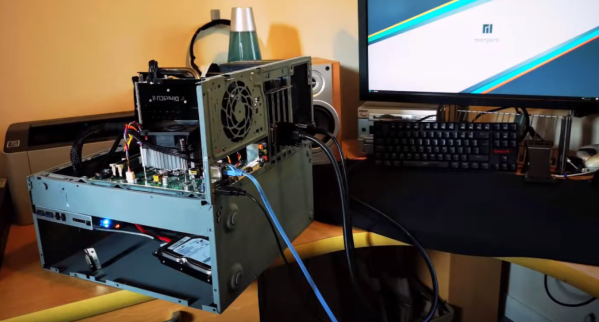
[Colonel Camp] decided to make life a bit easier by building this PC test bench which makes component troubleshooting much easier and can be built with old parts you probably have lying around. [Camp] was inspired by an old Linus PC Tech Tips video on the same topic. The key to the build is an old PC case. These cases are often riveted together, s a drill makes quick work of disassembling the chassis to easily get to all of the components. The motherboard pan and rear panel/card cage become the top shelf of the test bench, while the outer shell of the case becomes the base and a storage area. Two pieces of lumber support the upper shelf. The build was primed and painted with several coats of grey.

[Camp] built up his testbench with a modest motherboard, cooler and a 970 video card. He loaded up Manjaro Linux to verify everything worked. The basic hardware has already been replaced with a new system including a ridiculously huge cooler. But that’s all in a day’s work for a test bench PC.

We’ve seen some wild workbenches over the years, and this one fits right in for all your PC projects. Check out the video after the break!

Continue reading “DIY PC Test Bench Puts Hardware Troubleshooting Out In The Open”