3D Printed Braiding Machine Brings Back Some History

Mechanizing the production of textiles was a major part of the industrial revolution, and with the convenience of many people are recreating the classic machines. A perfect example of this is [Fraens]’ 3D printed braiding machine, which was reverse engineered from old photos of the early machines.

The trick behind braiding is the mesmerizing path the six bobbins need to weave around each other while maintaining the correct tension on the strands. To achieve this, they slide along a path in a guide plate while being passed between a series of guide gears for each section of the track. [Fraens] cut the guide plate components and the base plate below it from acrylic and mounted them together with standoffs to allow space for the guide gears.

Each of the six bobbins contains multiple parts to maintain the correct tension. The strands are fed through a single guide ring, where the braid is formed, and through pair of traction gears. All the moving parts are driven by a single 24 V motor and can produce about 42 cm of a braided cord per minute, and you can even set up the machine to braid around an inner core.

This braiding machine is just one in a series of early industrial machines recreated by [Fraens] using 3D printing. The others include a sewing machine, and a power loom, and a generator.

Continue reading “3D Printed Braiding Machine Brings Back Some History”

A Home Made Sewing Machine May Be The Only One

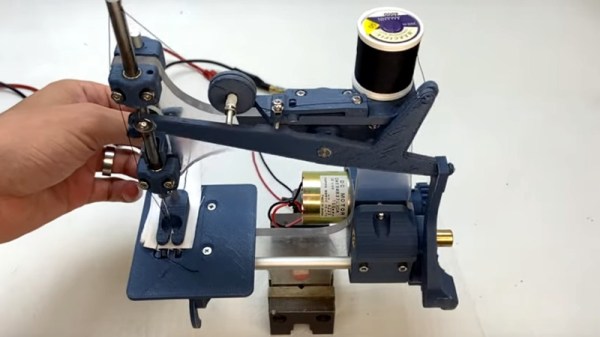
The sewing machine is a tool that many of us will have somewhere around our workshop. Concealed within it lies an intricate and fascinating mechanism. Some of us may have peered inside, but very few indeed of us will have gone to the effort of building our own. In case you had ever wondered whether it was possible, [Fraens] has done just that, with what he claims may be the only entirely homemade sewing machine on the Internet.

If you’ve ever studied the history of sewing machines you’ll notice that it bears a striking resemblance to some of the earliest commercial machines, with a relatively short reach and an entirely open construction. The main chassis appears to be laser-cut acrylic while all the fittings are 3D-printed, with machined brass bushes and aluminum rods for the other metal parts. The design utilizes a hand crank, but is also pictured with a DC motor. It makes for a fascinating illustration of how sewing machines work. Sadly we can’t see any design file links (Update: He’s contacted us to tell us they’re now on Thingiverse.), so you might have to be inventive if that’s the way you want to build your own. Take a look at it in the video below the break.

Fancy a sewing machine but don’t fancy making your own? We’ve got the guide for that, and for filling the rest of your textile bench.

Continue reading “A Home Made Sewing Machine May Be The Only One”

3D Printing Fabrics Is Easier Than You Think

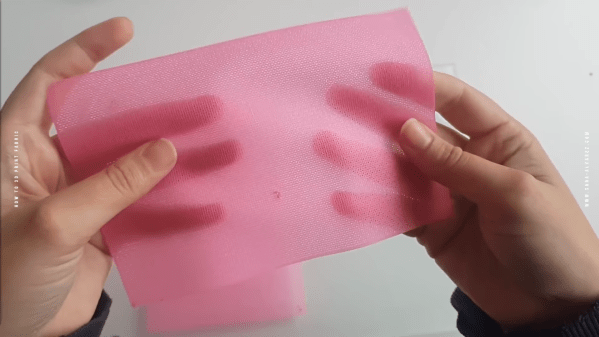
Conventional textiles made of woven threads are highly useful materials. [Sara Alvarez] has had some success creating fabric-like materials through 3D printing, and though they’re not identical, they have some similar properties that make them unique and useful.

Fabrics are made by the weaving or knitting together many threads into a cohesive whole. [Sara]’s 3D-printed fabrics are different, since the printer can’t readily weave individual fibers together. Instead, a variety of methods are used to create similar materials.

The simplest is perhaps the chainmail method, where many small individual links join together to make a relatively rigid material. Alternatively, G-code or careful modelling can be used to create fabric-like patterns, which are printed directly in flexible material to become a fabric-like sheet. Finally, the infill method takes advantage of code inbuilt to a slicer to create a pattern that can be 3D-printed to create a fabric like material by removing the top and bottom layers of the print.

[Sara] demonstrates creating a simple “fabric” swatch using the slicer method, and demonstrates the qualities of the finished product. She also shows off various applications that can take advantage of this technique.

If you’re a 3D-printing enthusiast who also loves making clothes and apparel, consider printing up some shoes – like these we’ve seen before. Video after the break. Continue reading “3D Printing Fabrics Is Easier Than You Think”

Robotic Tufting Gun Fires Off CNC Textiles

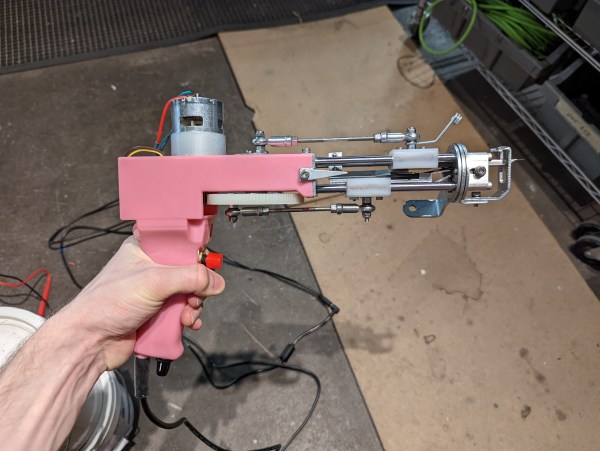
Often used to make rugs, tufting is a process wherein a hollow needle is used to cram thread or yarn into fabric in some kind of pattern. This can be done by hand, with a gun, or with big machines. Some machines are set up to punch the same pattern quickly over and over again, and these are difficult to retool for a new pattern. Others are made to poke arbitrary patterns and change easily, but these machines move more slowly.

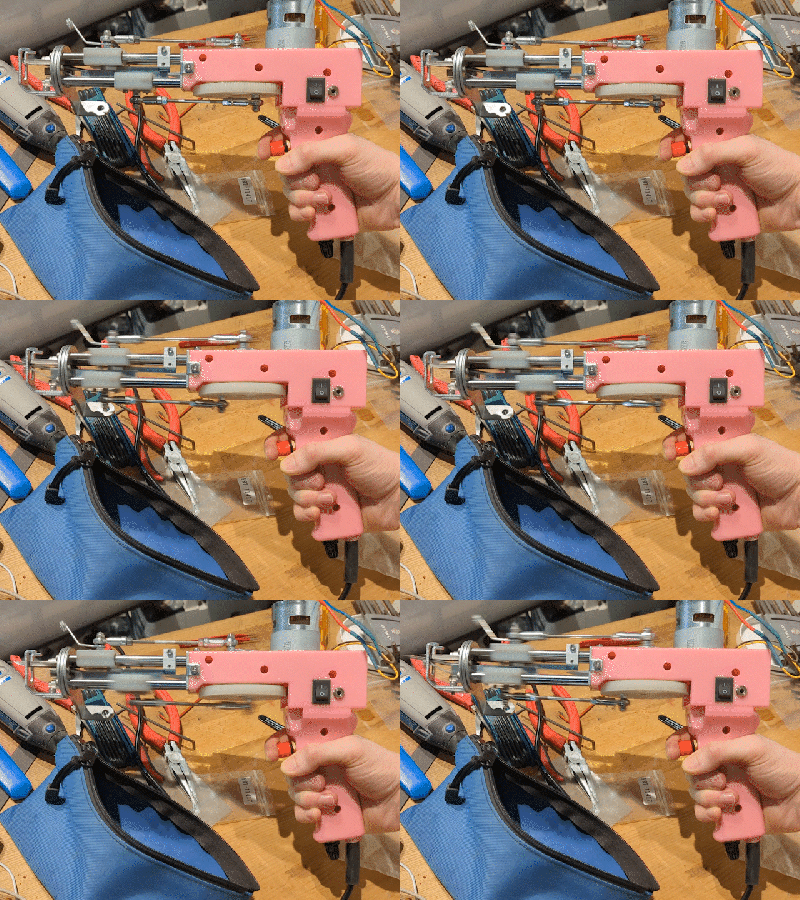
This robotic tufting system by [Owen Trueblood] is of the slow and arbitrary type. It will consist of a modified tufting gun strapped to a robot arm for CNC textile art. Tufting guns are manufactured with simple controls — a power switch, a knob to set the speed, and a trigger button to do the tufting. Once it’s affixed to the robot arm, [Owen] wants to remote control the thing.

The gun’s motor driver is nothing fancy, just a 555 using PWM to control a half H-bridge based on input from the speed control potentiometer. [Owen] replaced the motor controller with an Arduino and added an I/O port. The latter is a 3.5 mm stereo audio jack wired to GND and two of the Arduino’s pins. One is a digital input to power the gun, and the other is used as an analog speed controller based on input voltage. [Owen] is just getting started, and we’re excited to keep tabs on this project as the gun goes robotic.

This isn’t the first time we’ve seen robots do textiles — here’s a 6-axis robot arm that weaves carbon fiber.

Documentation Is Hard, Let The SkunkWorks Project Show You How To Do It Well

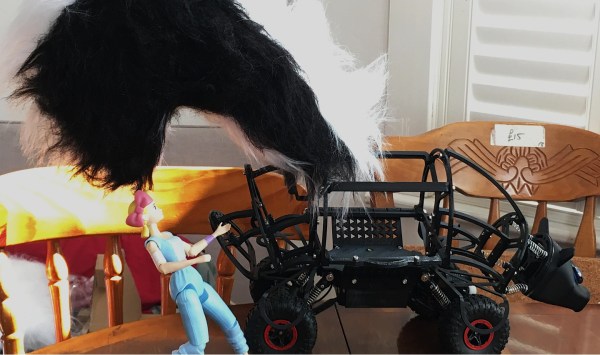
Documentation can be a bit of a nasty word, but it’s certainly one aspect of our own design process that we all wish we could improve upon. As an award-winning designer, working with some of the best toy companies around, [Jude] knows a thing or two about showing your work. In his SkunkWorks Project, he takes a maker’s approach to Bo Peep’s Skunkmobile and gives us a master class on engineering design in the process.

As with any good project brief, [Jude] first lays out his motivation for his work. He was very surprised that Pixar hadn’t commercialized Bo Peep’s Skunkmobile and hoped his DIY efforts could inspire more inclusive toy options from the Toy Story franchise. He does admit that the Skunkmobile presents a more unique design challenge than your standard, plastic, toy action figure. Combining both the textile element to create the illusion of fur and the RC components to give the toy its mobility requires careful thought. You definitely don’t want the wheels ripping into the fabric as you wheel around the backyard or for the fur to snag every object you pass by in the house.

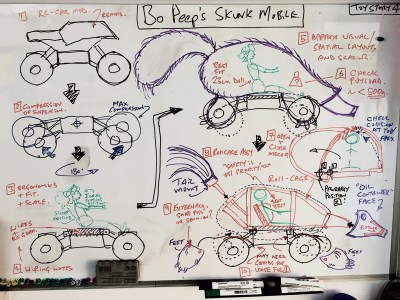
Given the design challenges of making the Skunkmobile from scratch, [Jude] decided the best way forward was to retrofit a custom-designed skunk-shaped body onto a standard RC car chassis. The difficulty here lies in finding a chassis that can support the weight of the retrofitted body as well as one big enough to hold a 9-inch Bo Peep doll inside the driver’s compartment. Before spending endless hours 3D printing (and re-printing) his designs, [Jude] first modeled the Skunkmobile in card (using cardboard), a practice we’ve seen before, and are always in love with. He continually emphasized the form of his device was probably even more important than its function as capturing the essence as well as the “look and feel” of the Skunkmobile were critical design criteria. You can even see the skunk wagging its tail in all his demo videos. Prototyping in card gave [Jude] a good feel for his Skunkmobile and the designs translated pretty well to the 3D printed versions.

What really impressed us about [Jude’s] project is the incredible detail he provides for his entire design process from his backstory, to the initial prototypes, to the user testing, and, finally, to the realization of the final product. Remember, “We want the gory details!”

Continue reading “Documentation Is Hard, Let The SkunkWorks Project Show You How To Do It Well”

At MIT, Clothing Fiber Watches You

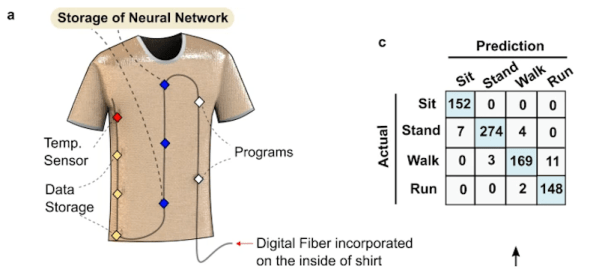
[Yoel Fink] and his team at MIT have announced their creation of a fiber that can sense and store data. In addition, they can use data from a shirt made of the material to infer the wearer’s activity with high accuracy. The fiber contains hundreds of microscale silicon chips into a preform used to create a polymer fiber that connects the chips using four 25 micron tungsten wires. You can read the paper directly in Nature Communications.

The fiber contains temperature sensors and enough memory (24CW1280X chips) to store a short movie for two months without power. It also contains 1,650 neural network elements, which means the fiber can train to infer activity itself without additional help.

Continue reading “At MIT, Clothing Fiber Watches You”

Knitting Machine Rebuild Takes It To The Next Level

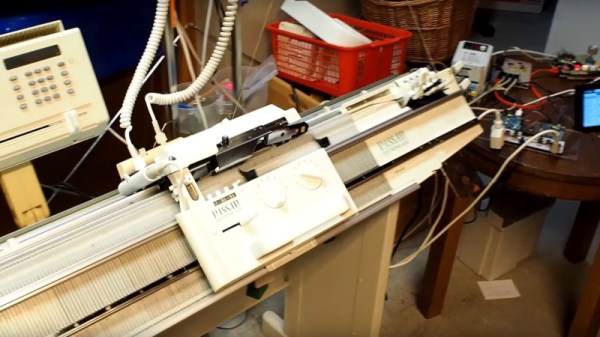
Those of us who to textile work may own a sewing machine and even if we’re really into it and have the funds, an overlocker. But there’s another machine in that field that few of us will have, and that’s a knitting machine. These machines have a sliding carriage over a long array of needles, and even the cheaper ones are way more expensive than for example a pretty decent oscilloscope. [Irene Wolf] has a Passap E6000 computerised knitting machine that is by no means an inexpensive one, and she’s made significant improvement to it by giving it new brains, a new motor controller, and replacing the mechanical rear needle bed with a set of computerised ones from the front of another machine.

In her write-up she goes in depth into the arrangement of sensors and electromagnets that operate the machine. She started with a lot of inspiration from a project at Hackerspace Bamberg, but used all the available Passap sensors as inputs where they had used only one. She has two Arduino M0 boards handling the inputs and a Raspberry Pi with control and user interface, and has posted some videos of the system in action one of which we’ve placed below the break.

We probably wouldn’t have had the courage to fearlessly hack such a high-value machine, and we’re particularly impressed by the result. The write-up is particularly interesting not only for the work itself, but for the detailed insight it gives to the workings of these machines. The best news – she’s not finished and there will be more installments.

While you’re waiting for more, remember this is by no means the first hacked knitting machine we’ve brought you.

Continue reading “Knitting Machine Rebuild Takes It To The Next Level”