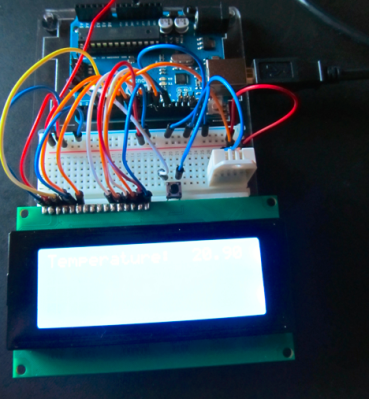
Hacklet 55 – Home Automation Projects

Home automation – the idea of a smart home that monitors and controls the inside environment, takes commands from occupants, and generally makes living easier. Hackers, makers, and engineers have been building their own vision of the smart home for decades. Thanks to cell phones and the revolution of the “internet of things”, home automation is now in the public eye. The hackers haven’t stopped though. They’re still building dreams, one circuit and one line of code at a time. This week’s Hacklet is dedicated to some of the best home automation projects on Hackaday.io!
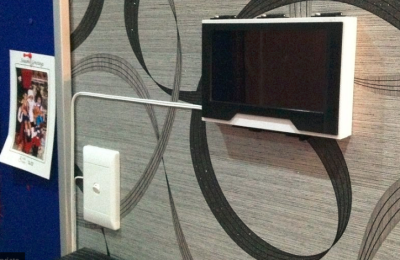
jarvisWe start at the top – [IamTeknik’s] Project Jarvis has been in the top five skulled and viewed projects on Hackaday.io for as long as we’ve been keeping records. Just like the fictional Tony Stark design which inspired its name, Jarvis is based on artificial intelligence. [IamTeknik] has created a system using the BeagleBone Black running his own custom software. He’s also creating Jarvis from the ground up – even the relay modules have been designed and built by [IamTeknik]. So far Jarvis has a great 3D printed door lock unit, and a really nice wall mounted tablet. We’re watching to see what modules [IamTeknik] adds next!
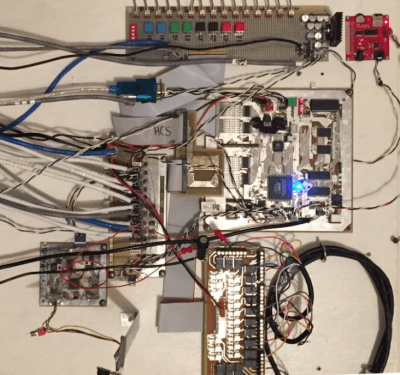
 

hcs[Morrisonpiano] is no home automation noob. He’s been running his own system for two decades. HCS_IV Home Automation System is a project to update his HCS_C home automation system. For the uninitiated, the original HCS was created by [Steve Ciarcia] of Byte and Circuit Cellar fame. There have been several generations of the hardware and software since then, with plenty hackers adding their own custom features. [Morrisonpiano] is updating his system with an NXP Arm Cortex M4 CPU, three big Altera Cyclone FPGAs, and plenty of flash storage. Why use a FPGA on a home automation system? I/O of course! HCS uses a ton of I/O. There are 16 RS485 ports and 10 RS232 serial ports. Going with an FPGA makes things flexible as well. Want to add CAN bus? Just drop in some CAN HDL code and you’re golden!


[Sswitchteven] is giving the smart home more senses with Squirco Smart Home System – Sensor Network. Rather than just have a temperature sensor at the thermostat, or a motion detector in the front foyer, [Steven] wants a network of unobtrusive sensors to blanket the home. He’s doing this by replacing the common light switch with a smart module that has sensors for temperature, humidity, and human presence. [Steven] has spent quite a bit of time researching and experimenting microwave tomography as a means to detect humans. Going with microwaves means no obvious PIR windows.
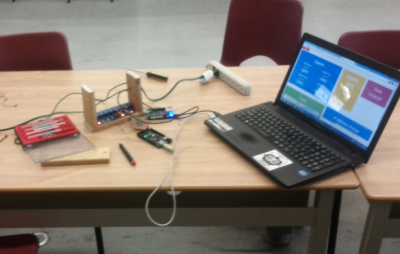
 

bbb-haFinally, we have [Ansaf Ahmad] with BeagleBone Black Home Automation. The idea for this project came from a calculus class on optimization. [Ansaf] is putting mathematical theorems to use in the real world by monitoring usage patterns and current demands of a device. With that data, he can optimize the usage to make things greener. So far, [Ansaf] has been experimenting with a lamp. The system has a web front end which uses PHP. The GPIO pins on the board are controlled using Python and Flask. As an early project, BeagleBone Home Automation is doing great – it’s already earned [Ansaf] high grades in his computer engineering class!

If you want more smart home goodness, check out our updated home automation projects list! Did I miss your project? Don’t be shy, just drop me a message on Hackaday.io. That’s it for this week’s Hacklet, As always, see you next week. Same hack time, same hack channel, bringing you the best of Hackaday.io!

Hacklet 54 – Virtual Reality Projects

Virtual Reality is finally coming of age. Hackers, Makers and Engineers have dreamed of creating immersive interfaces for years. From the first flight simulators to today’s cellphone powered head mounted displays, VR has always been an exciting field. Many of the advances today are being created by hackers who were inspired by systems like Virtuality from the early 1990’s. Now 25 years on, we’re seeing amazing advances – not only in commercial systems, but in open source VR projects. This week’s Hacklet is all about the best VR projects on Hackaday.io!

vr1We start with [j0nno] and D.I.Y Virtual Reality. [J0nno] has become interested in VR, and decided to build his own head mounted display. His goal is to create a setup with full head tracking and an open source software stack. He’s hoping to do this within a budget of just $200 AUD. [J0nno] started with the Ritech3d-V2 VR Goggles, which are a plastic implementation of Google’s project cardboard. For display he’s using a 5.6 inch 1280 x 800 TFT LCD. Tracking is optical, using IR LEDs and a PS3 Eye camera. [J0nno’s] background is in software, so he’s doing great setting up OpenVR and Perception. The hardware side is a bit new to him. This isn’t stopping [J0nno] though! In true hacker spirit, he’s learning all about resistors and driving LEDs as he works on D.I.Y Virtual Reality.

vr2Next up is [Josh Lindsay] with Digitabulum: The last motion-capture glove. Digitabulum is a motion capture glove designed to be able to emulate most other motion capture systems. It is also designed to be relatively low-cost. At $400 per hand, it is less expensive than most other offerings, though we’d still love to see something even cheaper. [Josh] is going with inertial sensors, and a lot of them. Specifically he’s using no less than 17 LSM9DS1 Inertial Measurement Unit (IMU) sensors from ST Microelectronics. IMU sensors like this combine multiple rate gyros, accelerometers, and magnetometers into a single unit. Essentially every segment of every finger has its own sensor suite. As you might imagine, that is quite a bit of data to crunch. An Altera Max II CPLD and an ST Arm processor help boil down the data to something which a VR engine can process. [Josh] has been working on this project for over a year now, and he’s making great progress. The prototype glove looks terrific!

vr3[Thomas] brings augmented reality to the table with Oculus Rift featured Crane control. What started as a hobby experiment became [Thomas’] major project at university. He’s connected an Oculus Rift to a toy crane. A stereo camera on the crane sends a video image to the operator. The camera is mounted on a pan/tilt mechanism driven by the Rift’s head tracking unit. Simple joystick controls allow [Thomas] to move the boom and lower the line. On-screen displays show the current status of the crane. The use of the Rift makes this an immersive demonstration. One could easily see how moving this system into the real world would make crane operations safer for crane operators.

vr4Finally we have [Arcadia Labs] with DIY Augmented Reality Device. This project, which is the [Arcadia Labs] entry in the 2015 Hackaday Prize, uses two 320 x 240 screens to create an augmented reality head mounted display. While the resolution can’t match that of the Oculus Rift or HTC Vive, [Arcadia Labs] is ok with that. They’re going for a lower cost open source alternative for augmented reality. Tracking is achieved with an IMU, while a PS3 Eye camera provides the video. A Raspberry Pi controls the show. [Arcadia Labs] was able to get 50 frames per second on the displays just using the Pi’s SPI interface, however the USB PS3 Eye camera limits things to around 10 FPS. This project is under heavy development right now, so follow along with us to see where [Arcadia Labs] ends up!

If you want VR goodness, check out our new virtual reality projects list! Did I miss your project? Don’t be shy, just drop me a message on Hackaday.io. If you’re on the left coast of the USA, check out SOCAL Virtual Reality Conference and Expo. Hackaday is a sponsor. The event happens on July 12 at the University of California Irvine.

That’s it for this week’s Hacklet, As always, see you next week. Same hack time, same hack channel, bringing you the best of Hackaday.io!

Hacklet 53 – Quick Tool Hacks

They say necessity is the mother of invention. Have you ever been right in the middle of a project, when you realize that you could hack up a simple tool which would make your current task easier? Maybe it’s a coil winder, or a device to hold .100 headers straight in their holes. Faster than you can say “Arabian Nights”, you’re working on a project within a project. It might not be pretty, but it gets the job done. This week’s Hacklet is all about quick tool hacks – little projects that help out around the shop or hackerspace.

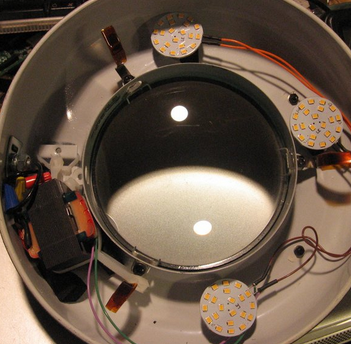
lampieWe start with [theonetruestickman] and Magnificent Magnifier LED Coversion. [theonetruestickman] picked up an articulated magnifier lamp at Goodwill for $4. These lamps are a staple of benches everywhere. The only problem was the switch and fluorescent tube were both failing. [theonetruestickman] didn’t feel bad for the lamp though. He pulled out the tube, ballast, and starter, replacing them with LEDs. He used 12 V 3 watt LED modules to replace the tube. Three modules provided plenty of light. An old wall wart donated its transformer to the effort. Since these LED modules are happy running on AC, no bridge rectifier was necessary. The modernized lamp is now happily serving on [theonetruestickman’s] workbench.

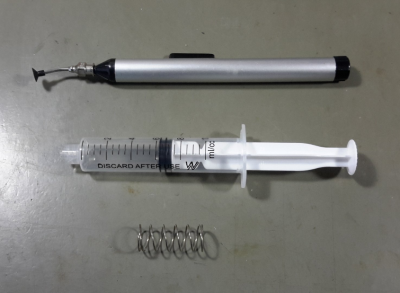
toolNext up is [Kwisatz] with Pick Up tool hack. [Kwisatz] is a person of few words. This whole project consists of just two words. Specifically, “syringe” and “spring”. Thankfully [Kwisatz] has provided several pictures to show us exactly what they’ve created. If you’ve ever used one of those cheap pickup tools from China, you know [Kwisatz’s] pain. The tiny piece of surgical tube inside the tool creates a feeble vacuum. These tools only hold parts for a few seconds before the vacuum decays enough to drop the part. [Kwisatz] kept the tip of the tool, but replaced the body with a syringe. A spring is used to create just the right amount of vacuum to hold parts on while they are being placed.

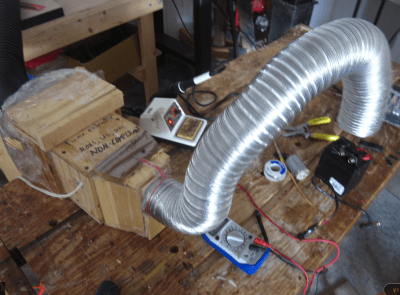
fume[Dylan Bleier] made his shop air a bit safer to breathe with a simple fume extractor for $20. Solder and flux create some nasty smoke when heated. Generally that smoke wafts directly into the face of the hacker peeking at the 0402 resistor they are trying to solder. A bit of smoke once in a while might not be so bad, but over the years, the effects add up. [Dylan] used two 120V AC bathroom fans, some metal ducting, plywood, and a bit of time to make this fume extractor. [Dylan] is the first to say it’s not UL, CE, or ROHS compliant, but it does get the job done. He even added a screen to keep bugs from flying in from the outdoor exhaust port.

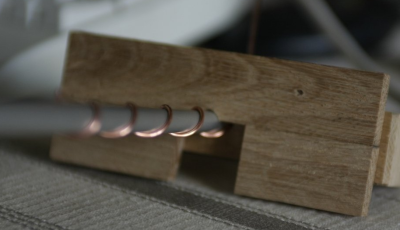
helix[ftregan] needed to wind a helical coil for an antenna, so he built Helix Winder. Helices are essentially springs, so that should be easy, right? Turns out that making a nice uniform helix is not the easiest thing in the world. The helix winder is a jig which makes winding these special coils much easier. Holes are drilled at a specific angle in a wooden block. The wire is fed through that block and rolled onto an aluminum tube. Rotating the block on the tube forces the wire into the helix shape. The only downside is that each winder is only good for once dimension of helix.

I’ve noticed that some of these quick hacks don’t get as much love as they deserve over on hackaday.io. So if you notice a cool hack like this, drop a comment and give the project a skull. If you want to see more of these hacks, check out our new quick tool hacks list! See a project I might have missed? Don’t be shy, just drop me a message on Hackaday.io. That’s it for this week’s Hacklet, As always, see you next week. Same hack time, same hack channel, bringing you the best of Hackaday.io!

Hacklet 52 – Breakout Board Projects

Starting a design with a new part can be hard. What power supply voltage(s) does it need? Are there any support component requirements? What is the footprint? What about the I/O voltage levels? Breakout boards are designed to answer all those questions for you. Breakouts help when you’re designing with a new part – be it a microcontroller, a sensor, a motor driver, or anything else. They also are a huge help when you’re trying to knock out a quick hack, and just need to get something working quick. Fast to integrate, often breadboard friendly, breakouts just make things easier! This week’s Hacklet is about some of the best breakout board projects on Hackaday.io!

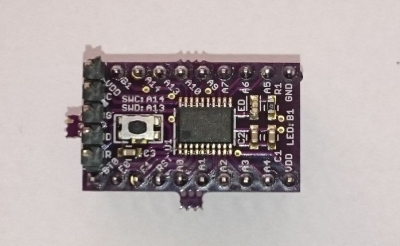
32f4We start with [Christoph] and STM32F030F4P6 breakout board. Inspired by the Teensy 3.0, [Christoph] set out to build a simple, easy to use, and small breakout board for an ARM processor. The STM32F030F4P6 is a great starting point. At only 20 pins, it’s one of the smallest ARM based chips around. He added the basic things needed to bring this chip up: decoupling caps, a reset button, headers for ST’s software debugger, and of course an LED for a blinky hello world program. The resulting board is physically tiny, but this lilliputian ARM board packs Coretex M0 powered punch!

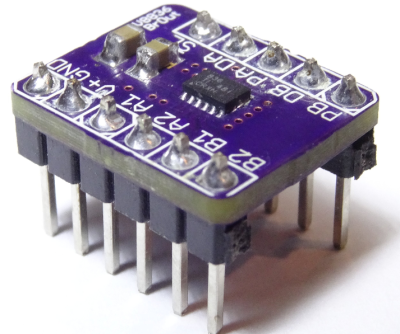
drvNext up is [al1] and DRV8836 Breakout. Sooner or later, everyone wants to drive a motor in one of their projects. It’s a rite of passage, just like blinking an LED. Motors pull a lot of current though, so external transistors or driver chips are almost always necessary. TI’s DRV8836 chip packs two full H-bridges into one package. That’s enough to drive two DC motors or one stepper. Handling 1.5 amps of current per driver in a tiny package means that thermal coupling is important. The DRV8836 has a large thermal pad which has to be soldered to keep the magic smoke in. [al1] dropped the chip, along with the correct thermal footprint and decoupling capacitors onto a simple breakout. The result is easy to use motor drivers for the masses.

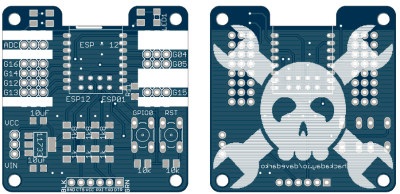
espHackaday.io power user [davedarko] took cues from his favorite designs to create Ignore this ESP8266 board. In [Dave’s] own words, “I stole from every one. The huzza from Adafruit, [Matt’s] breakout board, [Al1s] board, NodeMCUs DevKit.” Hey [Dave] there’s no stealing in open source hardware! There is  only design reuse with attribution, which is exactly what you’re doing. [Dave’s] breakout can use both popular ESP8266 footprints: the ESP-01 and ESP-12. He’s added power, reset/programming buttons, and the all important serial header to talk to the module. Going serial allows dave to keep costs down by not including an expensive serial to USB chip in the BOM. Most of us have FTDI cables (or clones) bouncing hanging around anyway. We definitely like the logo on this one!

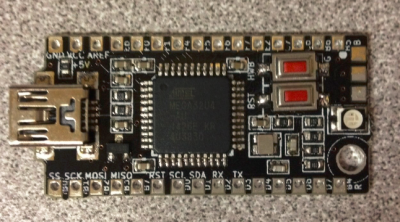
bbbFinally we have [The Big One] with uBBB 32u4. uBBB 32u4 is a bigger brother of µbbb, a Hackaday.io project [Warren] and [The Big One] worked on. µbbb uses an Atmel ATmega32u2 processor. [The Big One] has expanded the faimly to include an ATmega32u4. If you’re wondering, uBBB stands for “Micro Bare Bones Board” At 1.65″ x 0.8″, this is a micro board. It still manages to  include everything you need to get the processor up and running fast. Crystal, buttons, decoupling caps, and LEDs – everything is here. A mini USB connector makes communicating with the ATmega a snap!

If you want to see more breakout boards, check out our new breakout board list! If I’ve forgotten to add you to the list, just drop me a message on Hackaday.io. That’s it for this week’s Hacklet, As always, see you next week. Same hack time, same hack channel, bringing you the best of Hackaday.io!

Hacklet 50 – Hydroponic Projects

Growing plants without soil has been has been amazing people for centuries. First written about in the 1600’s, hydroponics has become an industry with numerous techniques for germinating and sustaining both plant and animal life. It comes as no surprise then that hackers, makers, engineers, and scientists have been working with and improving hydroponic systems for centuries. Hydroponic plant growth is a project you can really sink your teeth into, as there’s nothing sweeter than eating the fruits and vegetables of your labor. This week’s Hacklet is all about the best hydroponic projects on Hackaday.io!

hydropwnWe start with HydroPWNics, [Adam Vadala-Roth’s] entry in The 2015 Hackaday Prize. [Adam] is creating a universal system with will work with both hydroponic and soil based grow systems. The hydroponic setup will consist of plants in a PVC gutter system. Water will be pumped to the top gutter, and flow down via gravity through the plant roots and back to the reservoir. The system will be monitored and controlled by a DyIO controller. Props to [mad.hephaestus] for creating DyIO, a project seeing reuse in the Hackaday.io community!


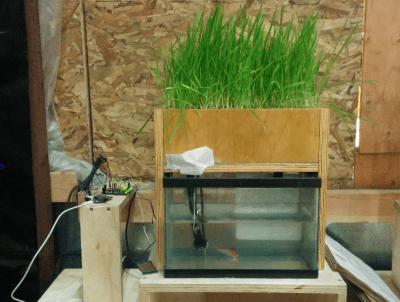
hydro2Next up is [Justin] with AAGriculture, an Automated Aquaponic Garden. AAGriculture is aquaponic system, which means it uses a symbiotic relationship between plants and fish to make more food for humans to eat. The fish in this case are bluegill and bullhead. A Raspberry Pi controls the system, while A Teensy-LC is used to help out with some of the real-time duties, like monitoring a PH probe. [Justin] is even using CO2 tanks to keep dissolved gasses in check. He must be doing something right, as his tomatoes are now over 23″ tall!


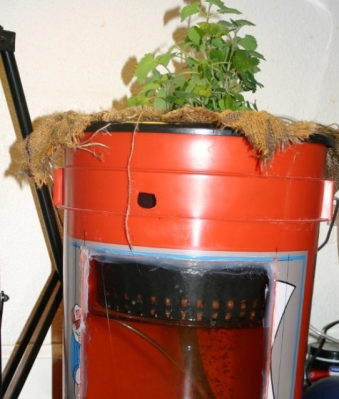
homer[Em] brings us 5g Aquaponics. 5g aquaponics isn’t a next generation cellular system, nor a 5.8 GHz WiFi setup, it’s an aquaponic system in a 5 Gallon bucket. Anyone from the US  will recognize the orange “Homer Bucket” from Home Depot. 5g Aquaponics includes a window, allowing the underwater workings to be monitored. Speaking of monitoring, 5g aquaponics is a manual affair – [Em] hasn’t used any electronics here. The idea is to create a system that is easy to get up and running for those who are new to Hydro/Aquaponic setups. [Em] is using a dual zone root system. The plant grows in dirt within a burlap fabric. The fabric then sits in a water bath which also houses the fish. Air pumped through an airstone keeps everything circulating. [Em’s] initial version of the project worked a bit too well. The tomato plant grew so large that the roots strangled the fish! Hopefully both flora and fauna are happy with this new rev 2.0!


smartAquaFinally we have [Kijani grows] with Smart Aquaponics, which was [Kijani’s] entry in The 2014 Hackaday Prize. One wouldn’t expect fish, plants and Linux to mix, but that is exactly what is going on here. Linux runs on the popular Wr703n router, while a custom ATmega328 Arduino compatible board keeps track of the sensors.  The second version of the system will run on an ATmega2560 and an AR9331 module, all housed on one board. The system does work, and it’s been expanded from a single fish tank to a large flood/drain table complete with grow lights, all kept at [Kijani’s] office. The biggest problems [Kijani] has run into are little things like misplaced resistors masquerading as kernel bugs.

Still haven’t eaten your veggies? Want to see more hydroponic projects? Check out our new hydroponic projects list! That’s it for this week’s Hacklet, As always, see you next week. Same hack time, same hack channel, bringing you the best of Hackaday.io!

Hacklet 49 – Weather Display Projects

Everyone wants to know what the weather is, and what it is going to be. Today’s internet enabled forecasts give us continuous streams of current weather data and predictions from any of several computer models. Couple that with data from an on-site station, and you’ve got a lot of information to display! It makes sense that weather display projects would be popular with hackers, makers and engineers. What do you do after you build the worlds most awesome clock? Build the worlds most awesome weather display (and then incorporate a clock in there as well!).

Last week on The Hacklet I mentioned that there are two basic types  of weather projects on Hackaday.io: Sensing and Display projects. There was a bit of foreshadowing there, as this week’s Hacklet covers some of the best weather display projects on Hackaday.io!

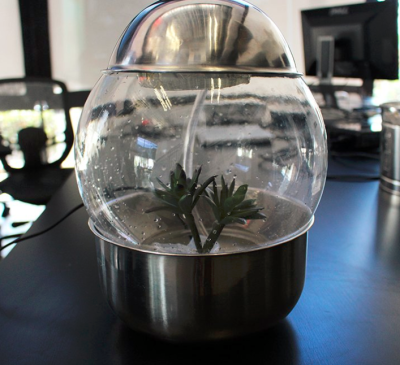
geoWe start with [Ashley Hennefer] and G.E.O, a project which is out of this world – literally. Geological Environment Observer, or G.E.O was created for NASA’s Space Apps Challenge. G.E.O’s mission is to keep astronauts on long-distance space flight missions connected with their home city (and planet). An astronaut programs the device with their home city and G.E.O takes it from there. Inside a glass globe, G.E.O creates weather patterns mirroring the programmed city. It does this with Adafruit NeoPixel LEDs, a water pump, a mist generator, and a wave shield. An Intel Edison controls the system. For now, weather data and programming are completed using a web interface. Once G.E.O launches though, data will be streamed via NASA’s deep space network.

flaps[Sephen DeVos] keeps track of the weather with a glance at his Internet Split Flap Weather Clock. Lots of weather apps use simple icons to display the current conditions. [Sephen] placed those icons on a mechanical split flap display which lets him know the conditions outside. The project’s case came from a donor clock given to [Sephen] by his parents. He then 3D printed an entire split flap mechanism, including the gears! Each 50 mm x 100 mm flap forms half an image.  A small stepper drives the flaps, while an IR detector lets the system know when it has reached a home position. Control is handled by an Arduino Nano and companion Ethernet shield. The Arduino checks the weather every 30 minutes. If conditions have changed, it flips to the right icon. Genius!

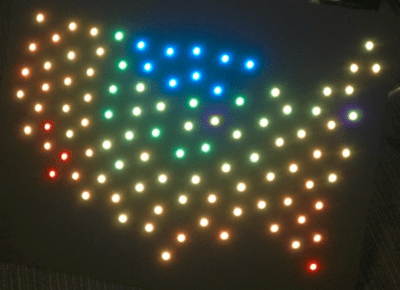
usmap[Dan Fein] is keeping track of the temperature across the entire USA with Weather Map. [Dan] works for Weather Underground, so it’s no surprise that he uses their API (accessed via a node.js script) for weather data. The data is fed into a spark core which then drives a string of 100 WS2812 LEDs. Each LED is mapped to a specific point in the continental USA. Color indicates the current temperature at that location. [Dan] does caution that you’ll have to slow down access to Weather Underground  if you’re using a free API key. Even with slower updates, this is still an awesome project!

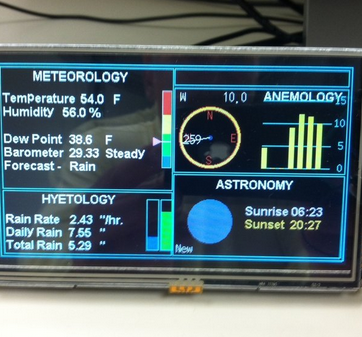
yaws[Jeff Thomas] went the traditional route with YAWS – (Yet Another Weather Station). YAWS uses a 5 inch TFT LCD to display weather data from a number of sensors. [Jeff] got his display and the driver board from buydisplay.com. The driver board uses the venerable RA8875 display driver chip. The RA8875 handles all the hard parts of driving an LCD, like video RAM, refresh, and clocks. This allows a relatively slow Arduino to drive all those pixels. [Jeff] created a very handsome interface to display all his data, but he has a small problem – a memory leak causes the system to freeze up every 18 hours! We’re hoping [Jeff] will share his source code so the Hackaday.io community can help him find that pesky bug!

If you want to see more projects like these, check the Weather Display Projects list on Hackaday.io. That’s it for this week’s Hacklet, As always, see you next week. Same hack time, same hack channel, bringing you the best of Hackaday.io!
Hacklet 48 – Weather Sensing Projects

Throughout history, mankind has been at the mercy of the weather. Planning a major outdoor event like a wedding or a naval battle? Better hope for clear skies! Man doesn’t have the ability to change mother nature at will quite yet, but hackers are working on it! Until then, we can measure  the current conditions and predict the weather in the near future. A bit of help from cloud based computer models and global sensing even allows us to model and predict weather patterns days in advance. It’s no surprise that makers, engineers, and hackers love weather projects. We’ve found there are two basic project groups (with a some overlap between them): Sensing projects and display projects. This week’s hacklet focuses on some of the best weather sensing projects on Hackaday.io!

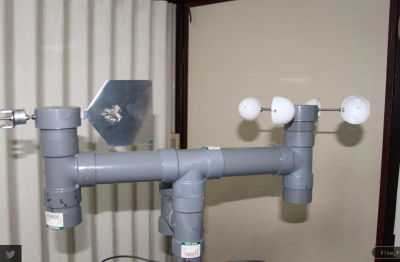
aneWe start with [diysciborg] and Modular Weather Station. This 2014 Hackaday Prize entrant is a DIY outdoor weather station. [diysciborg] went with easily available PVC pipe and sheet metal for most of his mechanical build. His anemometer alone is a work of art. Mounting 8 magnetic reed switches in slots cut in a PCB allows for a thin device which can easily sense the speed of the wind. Other sensors include a TLS230R light to frequency converter for sunlight measurement, CO, wind direction, and more. An Arduino Pro Mini is at the center of it all.

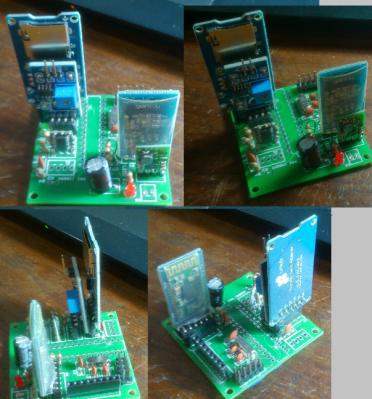
facil[Clovis Fritzen] is saving the planet from global warming with his project FacilTempo. FacilTempo is a weather station, and an entry in the 2015 Hackaday Prize. The idea is to make a simple and low-cost setup which can be built in bulk and placed anywhere on the Earth. [Clovis] plans to measure temperature, humidity, atmospheric pressure, sunlight, and rain. He also hopes to add a Sparkfun sensor to monitor wind speed and direction. All the data will be transmitted via a radio link. [Clovis] is adding the ability for FacilTemp to communicate via 433 MHz, WiFi, or Bluetooth. The entire sensor suite and its on-board ATmega328 will be powered by a LiPo battery. The battery will be charged by solar or wind power, depending upon what is available on site. With 8 project logs already in the can, FacilTempo is well on its way to beating back global warming!

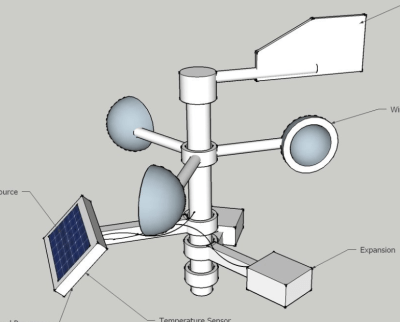
lcw[Ulf Winberg] is building the Low Cost Weather Station, his entry in the 2015 Hackaday Prize. Low Cost Weather Station aims to be a $50 sensor suite for local weather conditions. [Ulf] plans to power the entire device using wind and solar energy. He’s hoping to avoid batteries by storing his power in a supercapacitor. Power calculations have been taking up quite a bit of his design time so far. The $50 bill of materials limit is one that [Ulf] is serious about. He’s keeping careful eye on his component selections to keep that goal attainable. The system will transmit wind speed, wind direction, sun, and other data through a Laird BL600 Bluetooth low energy transceiver.

zetaFinally we have [Greg Miller] taking it back to basics with Weather Station Zeta. Zeta is [Greg’s] first big project. He’s only just recently learned to solder, but he’s already squeezing a lot of performance out of a little Arduino. The idea is to create a two station system. The outdoor station will monitor the weather, including temperature, humidity, and barometric pressure. Data will be transmitted to an indoor station with a similar set of sensors. The indoor station will also include a 20 line x 4 column character LCD to display the data.  [Greg] has the indoor section of the system just about done, and he’s working on learning the ins and outs of XBee data radios. He’s also going to include an Adafriut CC3000 breakout board to Web enable the weather station. We love seeing ambitious early projects like this one!

If you want to see more projects like these, check the Weather Sensing Projects list on Hackaday.io. 

That’s it for this week’s Hacklet, As always, see you next week. Same hack time, same hack channel, bringing you the best of Hackaday.io!