A handheld game console made from bare PCBs

Minimalist Homebrew Hardware Recreates Arcade Classics

Classic video games might look primitive by today’s standards, but the addictive gameplay of Breakout or Pac-Man remains fun no matter what decade you were born in. Keeping the relevant hardware running becomes harder as the years pile up however, so when [Michal Zalewski] decided to introduce his kids to classic video games, he didn’t dig up his old game consoles. Instead, he decided to recreate several games from scratch using the bare minimum amount of hardware needed.

The first project is a copy of Snake, the arcade classic that millennials will recognize from their Nokia phones. [Michal] made an initial version using an ATmega328P with an 8×8 LED matrix as a display, but quickly upgraded the hardware to a 16×16 display powered by an ATmega644, and added an LED seven-segment display to show the score. All parts are simply soldered onto a piece of prototyping board, with no need for any custom PCBs or enclosures.

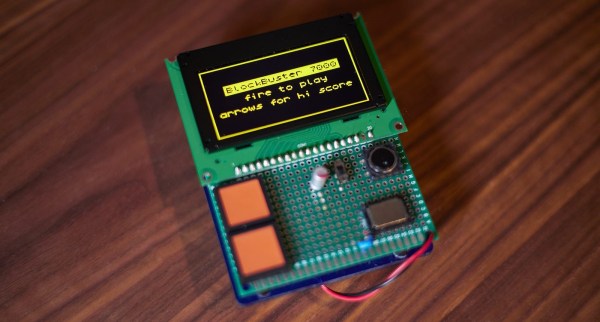
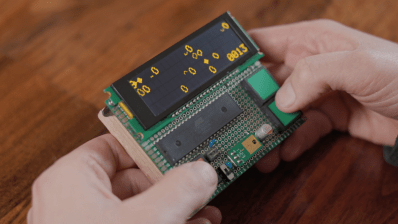
Game #2 is a side-scrolling space shooter called Dino in Space. This game runs on an ATmega1284 and uses a 4×20 character text display, allowing simple graphics as well as an on-screen score counter. Similar hardware, although with a 128×64 graphic OLED screen, powered game #3, a Breakout/Arkanoid clone called Blockbuster 7000.

[Michal]’s blog post is filled with interesting tips for real-life game programming. For example, a true random number generator creates a rather odd-looking bunch of asteroids in space – tweaking the distribution to make it a bit more uniform greatly enhances the game’s playability. Source files for all games are available on [Michal]’s website, and include a description of the exact hardware setup needed for each game.

Recreating Snake on custom hardware is sort of a rite of passage for microcontroller hackers, as you can see in  many impressive projects. Breakout-style games can also be implemented on various hardware platforms, including analog oscilloscopes.

Pocket Computer Reminds Us Of PDAs

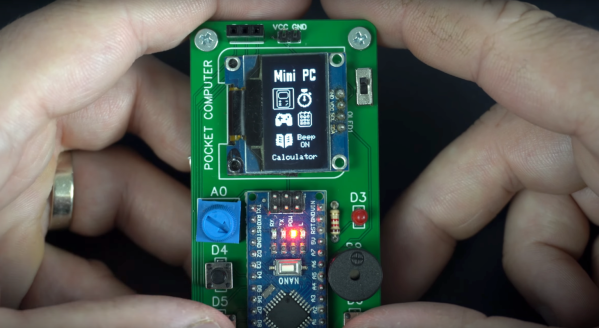
Before smartphones exploded on the scene in the late 00s, there was still a reasonable demand for pocket-sized computers that could do relatively simple computing tasks. Palm Pilots and other PDAs (Personal Digital Assistants) were all the rage in the ’90s and early ’00s, although for cutting-edge tech from that era plenty of these devices had astronomical price tags. This Arduino-based PDA hearkens back to that era, albeit with a much more accessible parts list.

The build is based around an Arudino Nano with an OLED screen and has the five necessary functions for a PDA: calculator, stopwatch, games, phonebook, and a calendar. With all of these components on such a small microcontroller, memory quickly became an issue when using the default libraries. [Danko] uses his own custom libraries in order to make the best use of memory which are all available on the project’s GitHub page. The build also includes a custom PCB to keep the entire pocket computer pocket-sized.

There are some other features packed into this tiny build as well, like the breakout game that can be played with a potentiometer. It’s an impressive build that makes as much use of the microcontroller’s capabilities as is possible, and if you enjoy projects where a microcontroller is used as if it is a PC take a look at this Arduino build with its own command-line interface.

Continue reading “Pocket Computer Reminds Us Of PDAs”

Slice Through Your Problems With A Shukran

We’d wager most hackers are familiar with FTDI as the manufacturer of the gold standard USB-UART interfaces. Before parts like the ultra cheap CH340 and CP2102 became common, if you needed to turn a USB cable into a TTL UART device, “an FTDI” (probably an FT232RL) was the way to make that happen. But some of the parts in the FT232* family are capable of much more. Wanting to get at more than a UART, [linker3000] designed the Shukran to unlock the full potential of the FT232H.

The FT232H is interesting because it’s an exceptionally general purpose interface device. Depending on configuration it can turn USB into UART, JTAG, SPI, I2C, and GPIO. Want to prototype the driver for a new sensor? Why bother flashing your Teensy when you can drive it directly from the development machine with an FT232H and the appropriate libraries?

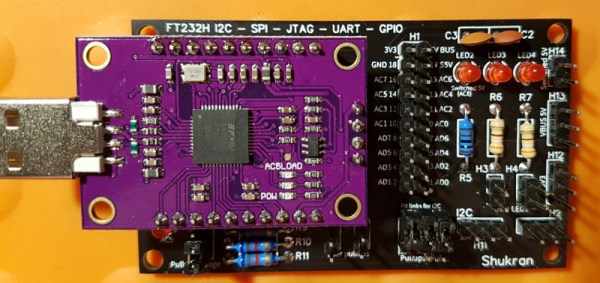
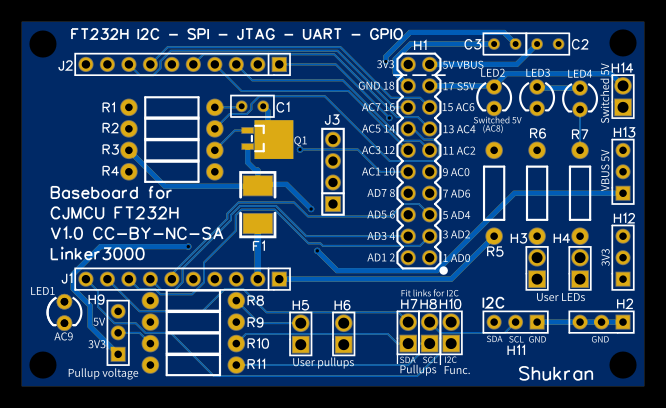
The Shukran is actually a breakout for the “CJMCU FT232H” module available from many fine internet retailers. This board is a breakout that exposes a USB-A connecter on one side and standard 0.1″ headers on the other, with a QFN FT232H and all the passives in the middle. But bare 0.1″ headers (in a square!) require either further breadboarding or a nest of jumper wires to be useful. Enter the Shukran. In this arrangement, the CJMCU board is cheap and handles the SMT components, and the Shukran is easy to assemble and makes it simple to use.

The Shukran gives you LEDs, buttons and switches, and a bunch of pull up resistors (for instance, for I2C) on nicely grouped and labeled headers. But most importantly it provides a fused power supply. Ever killed the USB controller in your computer because you forgot to inline a sacrificial USB hub? This fuse should take care of that risk. If you’re interested in building one of these handy tools, sources and detailed BOM as well as usage instructions are available in the GitHub repo linked at the top.

Uncovering The Echo Dot’s Hidden USB Port

If you upgraded to Amazon’s latest Echo Dot, you might have been surprised to find that the diminutive voice assistant had shed its USB port. Earlier models of the Dot used a garden variety micro USB port for power, which hackers eventually figured out also provided a helpful way to snoop around inside the device’s firmware. The fact that the USB port was deleted on the latest Echo Dot in favor of a simple barrel connector for power was seen by some as a sign that Amazon was trying to keep curious owners out of their hardware.

But as [Brian Dorey] shows, all they did was put a bump in the road. While they removed the external USB connector, the traces for it are still on the board waiting to be accessed. Even better, it turns out the USB data lines are connected to the test points located on the bottom of the Dot. All you need is a simple breakout that will connect through the existing opening in the device’s case, and you’ve got your USB port back.

So what can you do with USB on the Echo Dot? Well, not much right now. [Brian] found that the Dot shows up as a Mediatek device under Linux using lsusb, and fastboot can see it and even confirms the presence of a locked bootloader. It’s going to take some work from the community to see how deep this particular rabbit hole goes.

Even if you’re not interested in restoring its USB port, [Brian] has uncovered a wealth of fascinating hardware information about the Echo Dot during his deep-dive. He’s mapped out many of the test points located throughout the device’s PCBs, and found a few interesting points that might be worth further investigation. For example, he found that driving one of the pins high would trigger the Dot to mute its microphones; which could be useful for anyone looking to cover Alexa’s ears.

[Brian] first cracked open the Echo Dot last month, after scoring one for cheap during Amazon’s Prime Day sale. It looks like he’s making fairly rapid progress on unraveling the mysteries of this popular gadget, and we’re very interested in seeing where this research takes us.

A Retro Handheld Console As They Used To Be Made

Before there were Nintendo Switches, there were Game Boys. And before that there were all the successive generations of Game Boys and other consoles right back to the Game and Watch, and then those handheld Simon and Space Invaders games of the late 1970s. These devices typically packed a 4-bit microcontroller and an array of discrete LEDs, and movements in-game were simply created by alternate LEDs on the game field being flashed.

The TeleBall from [sv2002] is a handheld game in the vein of those early handheld games, in that it features a matrix of LEDs as a screen on which it can display simple games. So far it plays Breakout, and Tennis for Two, which might seem odd were it not for its built-in radio for two-person play with two consoles.

Inside the TeleBall is an Arduino Nano, a Maxim display driver for the LED matrix, and the familiar Nordic Semiconductor RF module. Control is via a potentiometer, and everything sits in a smart 3D-printed case. Everything is open-source, so should you wish to have your own you can head over to the project’s web site and grab all the files. You can watch it in action playing tennis with two consoles in the video below the break.

The original Tennis for Two created in 1958 was an oscilloscope game using an analogue computer, and is credited as the first video game created purely for entertainment purposes. If you’d like to see a recreation of it, we covered one over a decade ago.

Continue reading “A Retro Handheld Console As They Used To Be Made”

A Hacked Solution For Non-Standard Audio Modules

When life hands you lemons, lemonade ends up being your drink of choice. When life hands you non-standard components, however, you’ve got little choice but to create your own standard to use them. Drinking lemonade in such a situation is left to your discretion.

The little audio record and playback modules [Fran Blanche] scored from eBay for a buck a piece are a good example. These widgets are chip-on-board devices that probably came from some toy manufacturer and can record and playback 20 seconds of audio with just a little external circuitry. [Fran] wants to record different clips on a bunch of these, and pictured using the card-edge connector provided to plug them the recording circuit. But the pad spacing didn’t fit any connector she could find, so she came up with her own. The module and a standard 0.1″ (2.54 mm) pitch header are both glued into a 3D-printed case, and the board is connected to the header by bonding wires. It makes a nice module that’s easily plugged in for recording, and as [Fran] points out, it’s pretty adorable to boot. Check it out in the video below.

Sure, the same thing could have been accomplished with a custom PCB breaking out the module’s pins to a standard card-edge connector. But [Fran] knows a thing or two about ordering PCBs, and our guess is she wanted to get this done with what was on hand rather than wait for weeks. There’s something to be said for semi-instant gratification, after all. And lemonade.

Continue reading “A Hacked Solution For Non-Standard Audio Modules”

Save Some Steps With This Arduino Rapid Design Board

We’re all familiar with the wide variety of Arduino development boards available these days, and we see project after project wired up on a Nano or an Uno. Not that there’s anything wrong with that, of course, but there comes a point where some hobbyists want to move beyond plugging wires into header sockets and build the microcontroller right into their project. That’s when one generally learns that development boards do a lot more than break the microcontroller lines out to headers, and that rolling your own design means including all that supporting circuitry.

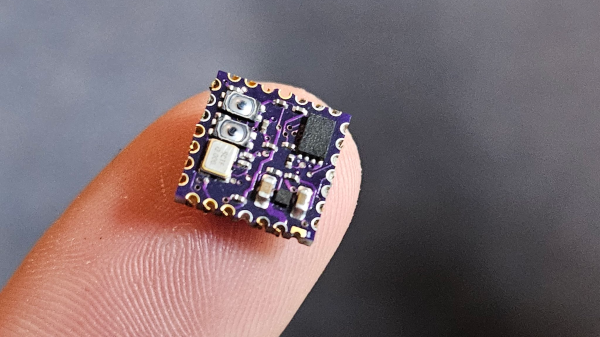
To make that transition easier, [Sean Hodgins] has come up with a simple Arduino-compatible module that can be soldered right to a PCB. Dubbed the “HCC Mod” for the plated half-circle castellations that allows for easy soldering, the module is based on the Atmel SAMD21 microcontroller. With 16 GPIO lines, six ADCs, an onboard 3.3 V regulator, and a reset button, the module has everything needed to get started — just design a PCB with the right pad layout, solder it on, and surround it with your circuitry. Programming is done in the familiar Arduino IDE so you can get up and running quickly. [Sean] has a Kickstarter going for the modules, but he’s also releasing it as open source so you’re free to solder up your own like he does in the video below.

It’s certainly not the first dev module that can be directly soldered to a PCB, but we like the design and can see how it would simplify designs. [Sean] as shown us a lot of builds before, like this army of neural net robots, so he’ll no doubt put these modules to good use.

Continue reading “Save Some Steps With This Arduino Rapid Design Board”