Hackaday Prize Entry: 3D Printed Parametric Motrs

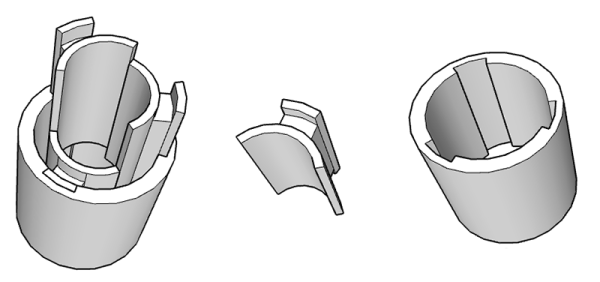
If you’re building something that moves, chances are you’ll be using an electric motor. There are tens of thousands of different motors out there, each with their own properties, speeds, torque, and sizes. How do you pick the right motor? Most of the time it’s a highly educated guess, but [Solenoid] has a better idea: just 3D print a motor designed by a calculator that will give you the properties you need

This entry for The Hackaday Prize is just a web-based calculator for motor designs that takes torque, speed, size, or form factor as an input and spits out a complete motor design. Sure, you’ll need to wind coils on a 3D printed frame, but this calculator removes the need to calculate inductance, coil capacitance, and all the other bits needed to construct an efficient motor.

While actual products made in the millions will still be using off the shelf motors, this project is perfect for one-offs. If you want to motorize a telescope mount, this project will design a motor given the power and resolution per steps required. If you want to build a wind turbine, this calculator will put blades right on the outrunner of a brushless motor. It’s a great project, and something we can’t wait to see the results of.


The 2015 Hackaday Prize is sponsored by:

Crowdfunding Follies: Debunking The Batteriser

It’s not on Kickstarter yet, but this product is already making its media debut, with features in all the tech blogs, an astonishing amount of print outlets, and spouted from the gaping maws of easily impressed rubes the world over. What is it? It’s the Batteriser, a tiny metal contraption that clips over AA, C, and D cells that reclaims the power trapped inside every dead battery. Yes, every dead battery you’ve ever thrown away still has up to 80% of its power remaining. Sounds like complete hogwash, right? That’s because it is.

[Dave Jones] put together a great video on the how comes and why nots of the Batteriser, and while doing so gives a great tutorial for debunking a product, heavily inspired by [Carl Sagan]’s Baloney Detection Kit. The real  debunking starts by verifying any assumptions, and the biggest fault of the Batteriser campaign is claiming 80% of a battery’s power is unused. Lucky for us, [Dave] has tons of tools and graphs to demonstrate this is not the case.

To verify the assumption that battery-powered devices will brown out after using only 20% of a battery’s available power, [Dave] does the most logical thing and looks at the data sheets for a battery. After using 20% of available power, these datasheets claim these batteries should be around 1.3V. Do devices brown out at 1.3V? Hook it up to a programmable power supply and find out.

It turns out every battery-powered device [Dave] could find worked perfectly until around 1.1V. Yes, that’s only 0.3V difference from 1.4V claimed by the patent for the Batteriser, but because of the battery discharge curve, that means 80% of the power in a normal device is already being used up. The premise of the Batteriser is invalid, and [Dave] demonstrates it’s a complete scam.

If a through debunking of the Batteriser’s claims wasn’t enough, [Dave] goes on to explain how it may actually be dangerous. The positive terminal of a battery is also the metal can, while the negative terminal is just a tiny nib of metal seperated from the rest of the battery by a gasket. Since the Batteriser is made of metal and serves as the ground for the boost converter circuit, it’s very, very close to shorting through the branding and logo emblazoned on a mylar wrapping each battery is shrouded with. One tiny nick in this insulator, and you have a direct short across the battery. That’s going to turn to heat, and there’s a lot of energy in a D cell; a failure mode for the Batteriser is a fire. That’s just terrible product design.

Video below.

Continue reading “Crowdfunding Follies: Debunking The Batteriser”

Controlling A Rigol With Linux

The Rigol DS1052E is the de facto oscilloscope for any tinkerer’s bench. It’s cheap, it’s good enough, and it’s been around for a long time; with the new 1054 zed model out now, you might even be able to pick up a 1052E on the cheap.

[wd5gnr1] came up with a really interesting piece of software that allows a Linux system to control most of the functions on this popular scope. With just a USB cable, you can read and log all the measurement of the scope, save waveforms in CSV format, and send data to gnuplot and qtiplot.

Since the 1052E has been around for such a long time, there’s a bunch of software out there that takes advantage of the nifty USB port on the front of this scope. If you need a cheap spectrum analyzer, here ‘ya go, and tools for the .WFM files native to this scope even exist for Windows. [wd5gnr1] even says his tool can probably be ported to Windows, but ‘just use Linux.’

Beach Sign

LED Sign Brightens Up The Beach After Dark

[Warrior_Rocker’s] family bought a fancy new sign for their beach house. The sign has the word “BEACH” spelled vertically. It originally came with blue LEDs to light up each letter. The problem was that the LEDs had a narrow beam that would blind people on the other side of the room. Also, there was no way to change the color of the LEDs, which would increase the fun factor. That’s why [Warrior] decided to upgrade the sign with multi-colored LEDs.

After removing the cardboard backing of the sign, [Warrior] removed the original LEDs by gently tapping on a stick with a hammer. He decided to use WS2811 LED pixels to replace the original LEDs. These pixel modules support multiple colors and are individually addressable. This would allow for a wide variety of colors and animations. The pixels came covered in a weatherproof resin material. [Warrior] baked the resin with a heat gun until it became brittle. He was then able to remove it entirely using some pliers and a utility knife. Finally, the pixels were held in place with some hot glue.

Rather then build a remote control from scratch, [Warrior] found a compatible RF remote under ten dollars. The LED controller was removed from its housing and soldered to the string of LEDs. It was then hot glued to a piece of cardboard and placed into the sign’s original battery compartment. Check out the video below for a demonstration. Continue reading “LED Sign Brightens Up The Beach After Dark”

Automatic Print Ejector For All 3D Printers

Way back in 2010, Makerbot released the Automated Build Platform, a neat heated conveyor belt for the Cupcake or Thing-O-Matic that would spit parts out when a print was done. It’s a great invention if you need to produce 20 of something, and the perfect invention if you want to sit on a patent and not innovate anything ever.

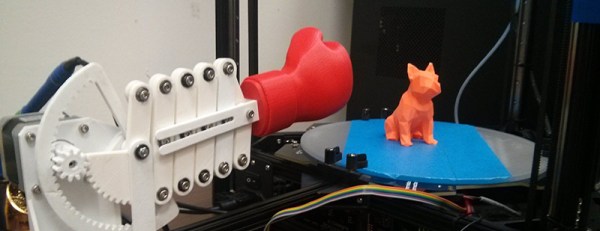
You won’t need to wait until the year 2030 to get a device that automatically removes a print from a print bed. The folks at MatterHackers came up with an Automatic Print Ejector that removes a print in the most [Rube Goldberg]-ish way possible: with a boxing glove.

The Automatic Print Ejector is pretty much taken straight out of a [Buster Keaton] movie. It’s a series of scissor mechanisms with a 3D printed boxing glove on the end, driven by a stepper motor. When the print finishes, the boxing glove simply punches a print off the bed of a printer.

Does it work? It does, brilliantly. Check out the video below.

Continue reading “Automatic Print Ejector For All 3D Printers”

ESP8266 As A Networked MP3 Decoder

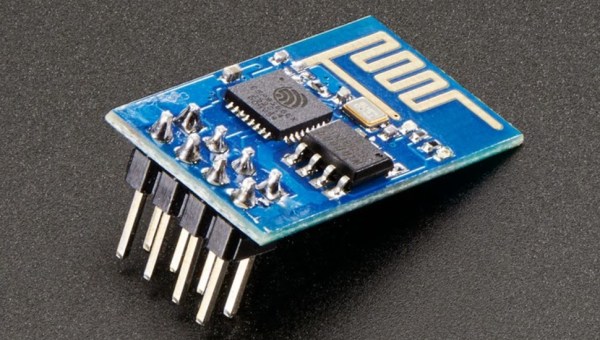
Support libraries, good application notes, and worked examples from a manufacturer can really help speed us on our way in making cool stuff with new parts. Espressif Systems has been doing a good job with their ESP8266 product (of course, it doesn’t hurt that the thing makes a sub-$5 IOT device a reality). Only recently, though, have they started publishing completed, complex application examples. This demo, a networked MP3 webradio player, just popped up in Github, written by the man better known to us as Sprite_tm. We can’t wait to see more.

The MP3 decoder itself is a port of the MAD MP3 library, adapted for smaller amounts of SRAM and ported to the ESP8266. With a couple external parts, you can make an internet-connected device that you can point to any Icecast MP3 stream, for instance, and it’ll decode and play the resulting audio.

What external parts, you ask? First is something to do the digital-to-analog conversion. The application, as written, is build for an ES9023 DAC, but basically anything that speaks I2S should be workable with only a little bit of datasheet-poking and head-scratching. Of course, you could get rid of the nice-sounding DAC chip and output 5-bit PWM directly from the ESP8266, but aside from being a nice quick demo, it’s going to sound like crap.

The other suggested external IC is an SPI RAM chip to allow for buffering of the incoming MP3 file. WiFi — and TCP networks in general — being what they are, you’re going to want to buffer the MP3 files to prevent glitching. As with the dedicated DAC, you could get away without it (and there are defines in the “playerconfig.h” file to do so) but you’ll probably regret it.

In sum, an ESP8266 chip, a cheap I2S DAC, and some external RAM and you’ve got a webradio player. OK, maybe we’d also add an amplifier chip, power supply, and a speaker. Hmmm…. and a display? Or leave it all configurable over WiFi? Point is, it’s a great worked code example, and a neat DIY device to show your friends.

The downsides? So far, only the mono version of the libMAD decoder / synth has been ported over to ESP8266. The github link is begging for a pull request, the unported code is just sitting there, and we think that someone should take up the task.

Other Resources

In our search for other code examples for the ESP8266, we stumbled on three repositories that appear to be official Espressif repositories on Github: espressif, EspressifSystems, and EspressifApp (for mobile apps that connect to the ESP8266). The official “Low Power Voltage Measurement” example looks like a great place to start, and it uses the current version of the SDK and toolchain.

There’s also an active forum, with their own community Github repository, with a few “Hello World” examples and a nice walkthrough of the toolchain.

And of course, we’ve reported on a few in the past. This application keeps track of battery levels, for instance. If you’ve got the time, have a look at all the posts tagged ESP8266 here on Hackaday.

You couldn’t possibly want more resources for getting started with your ESP8266 project. Oh wait, you want Arduino IDE support?

Thanks [Sprite_tm] for the tip.

Creating New Nintendo 3DS Hardware

For the last five years or so, Nintendo has been selling the 3DS, the latest in a long line of handheld consoles. Around two years ago, Nintendo announced the New Nintendo 3DS, with a faster processor and a few other refinements. The new 3DS comes in two sizes: normal and XL. You can buy the XL version anywhere in the world, but Nintendo fans in North America cannot buy the normal version.

[Stephen] didn’t want the jumbo-sized New 3DS XL, both because it’s too large for his pockets, and because there are no fancy cases for the XL. His solution? Creating a US non-XL 3DS with god-like soldering skills.

In manufacturing the XL and non-XL versions of the 3DS, Nintendo didn’t change much on the PCBs. Sure, the enclosure is different, but electronically there are really only two changes: the eMMC storage and the Nintendo processor. 3DS are region-locked, so simply swapping out the boards from a normal 3DS to an XL 3DS wouldn’t work; [Stephen] would also like to play US games on his modded console. That leaves only one option: desoldering two chips from a US XL and placing them on the board from a Japanese 3DS.

With a board preheater and heat gun, [Stephen] was able to desolder the eMMC chip off both boards. Of course this meant the BGA balls were completely destroyed in the process, which means reballing the package with solder bits only 0.3mm in diameter. With the US eMMC transplanted to the Japanese board, [Stephen] ended up with an error message that suggested the processor was reading the memory. Progress, at least.

[Stephen] then moved on to the processor. This was a nightmare of a 512 pin BGA package, with 512 pins that needed a tiny dot of solder placed on them. Here, sanity gave way and [Stephen] called up a local board and assembly house. They agreed to solder the chip onto the board and do an x-ray inspection. With the professional rework done, [Stephen] assembled his new US non-XL 3DS, and everything worked. It’s the only one in the world, and given the effort required to make these mods, we’re expecting it to remain the only one for a very long time.