DIY Injection Mold Design For The Home Shop

3D printing is great for prototyping, and not bad for limited runs of parts. Unfortunately though it really doesn’t scale well beyond a few pieces, so when you’re ready for the mass market you will need to think about injection molding your parts. But something like that has to be farmed out, right? Maybe not, if you know a thing or two about designing your own injection molds.

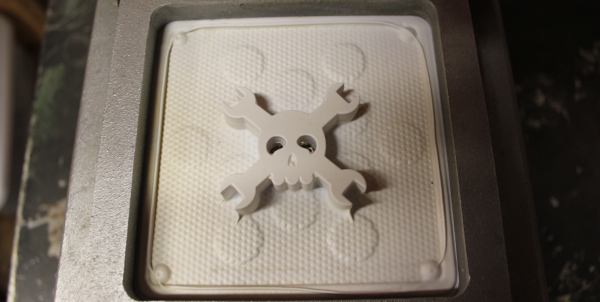
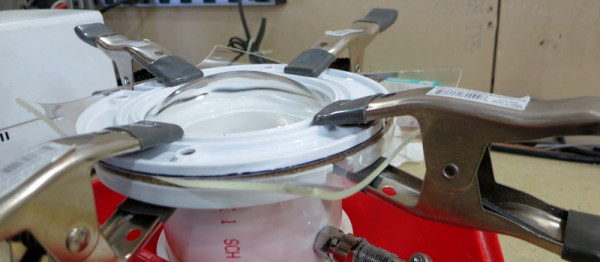
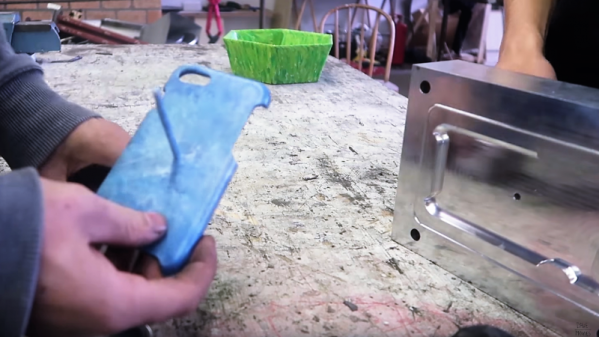
The video below comes from [Dave Hakkens] by way of his Precious Plastic project, whose mission it is to put the means of plastic recycling into the hands of individuals, rather than relying on municipal programs.  We’ve covered their work before, and it looks like they’ve come quite a way to realizing that dream. This tutorial by [Dave]’s colleague [Jerry] covers the basic elements of injection mold design, starting with 3D modeling in Solidworks. [Jerry] points out the limitations of a DIY injection molding effort, including how the thickness of parts relates to injection pressure. Also important are features like gentle curves to reduce machining effort, leaving proper draft angles on sprues, and designing the part to ease release from the mold. [Jerry] and [Dave] farmed out the machining of this mold, but there’s no reason a fairly complex mold couldn’t be produced by the home gamer.

When you’re done learning about mold design, you’ll be itching to build your own injection mold machine. Precious Plastic’s tutorial looks dead simple, but this machine looks a little more capable. And why CNC your molds when you can just 3D print them?

Continue reading “DIY Injection Mold Design For The Home Shop”

Tools Of The Trade – Thermoforming

Chances are good that you’ve already lost some blood to thermoforming, the plastics manufacturing process that turns a flat sheet of material into an unopenable clamshell package, tray inside a box, plastic cup, or leftover food container.  Besides being a source of unboxing danger, it’s actually a useful technique to have in your fabrication toolchest. In this issue of Tools of the Trade, we look at how thermoforming is used in products, and how you can hack it yourself.

The process is simple; take a sheet of plastic material, usually really thin stuff, but it can get as thick as 1/8″, heat it up so that it is soft and pliable, put it over a mold, convince it to take all the contours of the mold, let it cool, remove it from the mold, and then cut it out of the sheet. Needless to say, there will be details.

https://commons.wikimedia.org/wiki/File:Thermoforming_animation.gif

Continue reading “Tools Of The Trade – Thermoforming”

Quick And Easy Pressure Forming Makes Plexiglas Domes

Thermoplastics are amazingly versatile materials. Apply some heat, add a little force, and within seconds you’ve got a part. It’s not always quite that simple, but as [maxelrad] discovered, sometimes thermoforming can be as easy as blowing up a balloon.

In need of a cowling for an exterior light fixture on an experimental aircraft, [maxelrad] turned to pressure forming of Plexiglas for the hemispherical shape he needed. His DIY forming rig was a plumbing-aisle special: PVC pipe and caps, some air hose and fittings, and a toilet flange for the pressure chamber. The Plexiglas was softened in a toaster oven, clamped over the business end of the chamber, and a few puffs of air inflated the plastic to form a dome. [maxelrad] points out that a template could be applied over the plastic sheet to create the streamlined teardrop shape he needs, and he notes that the rig would likely work just as well for vacuum forming. Of course, a mold could be substituted for the template to make this a true blow-molding outfit, but that would take away from the simplicity of this solution.

There have been a fair number of thermoforming projects featured on Hackaday before, from this DIY vacuum former to a scratch-built blow molder. And while we really like the simplicity of [maxelrad]’s technique, what we’d really love to see is some details on that airplane build.

3D Printing With Nylon For A More Useful Objects

[taulman] over on Instructables has been working on his own version of a 3D printer. Unlike the usual PLA or ABS filament all the RepRaps and Makerbots use, this printer uses nylon to make parts with very interesting properties.

Most extrusion printers are designed to print with ABS (a very hard plastic that melts around 220-230° C) or PLA (a somewhat softer plastic that melts at about 180° C). [taulman] is using Nylon 6, a very slippery and bendable plastic that melts around 320° C (about 600 degrees Fahrenheit). He’s doing this with a hot end of his own design and a ‘spiky’ extruder bolt that allows high-temperature thermoplastics to be extruded into any shape imaginable.

For the longest time, the 3D printer community has been using low-temperature thermoplastics such as PLA and ABS. There are obvious benefits to these materials: it’s pretty easy to source a spool of filament, and the low melting point of these plastics makes building a printer easier and safer. Now that [taulman] has the high-temperature plastic nut cracked, he’s moving on to easily-machiniable Delrin and transparent Polycarbonate. Very cool, and hopefully in a year’s time we’ll have a choice of what material to run in our printers.

After the break, there are a few videos [taulman] put up showing his printer at work and the properties of his 3D printed objects. It looks like [taulman] can print objects that are impossible on any other 3D printer we’ve seen; the flexible iPhone case probably couldn’t be made on any other DIY machine.

Continue reading “3D Printing With Nylon For A More Useful Objects”

Twittering Pub Hanging

There’s nothing groundbreaking about this hack, called the TweetWall, but the craftsmanship is gorgeous! [Yergacheffe] had access to the right tools; an epilog laser and a thermoplastic bender (an item we didn’t know we needed until now… thanks a lot). It has the usual bits you’d expect in a Twitter ticker, an LED matrix and an Arduino. There is also an OLED screen that displays the avatar of the current Twitter feed. Because data is transferred over a serial connection the SD slot on that screen is used to cache images which helps to keeps the messages coming without delay. The end product is quite good, we’d expect to see it hanging on the wall of the pub down the street.