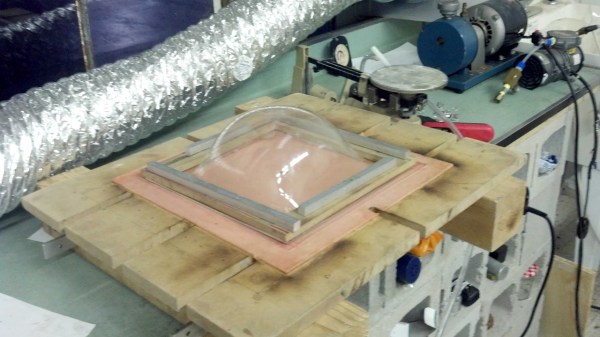
Blown plastic from a plastics blow oven

Blowing Arcylic Canopies Using Stuff From Around The Shop

Blowing an acrylic sheet after heating it is an easy way to make a smooth and transparent canopy or bubble for anything from clams to light fixtures. [Michael Barton-Sweeney] does it using plastic blow ovens he made cheaply, mainly from stuff which most of us already have in our workshops.
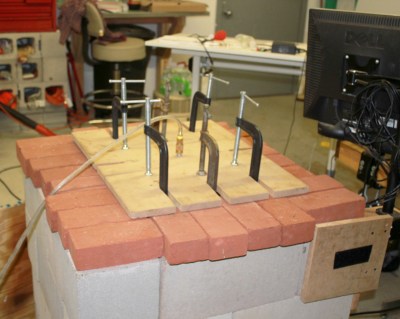
Plastics blow ovenAll you need is a way to heat the plastic, to then clamp it down around the edges, and finally to blow air into it as you would when blowing up a balloon. Of course, there are things to watch out for such as making sure the plastic is heated evenly and letting it cool slowly afterward but he covers all that on his hackaday.io page.

He’s also on his second plastics blow oven. The first one worked very well and is perhaps the easiest to make, building up an enclosure of CMUs (cinder blocks) and brick. He had success heating it with both propane and with electric current run through Kanthal wire. But the CMUs absorbed a lot of heat, slowing down the process. So for his second one he made a cast concrete enclosure with aluminum reflectors inside to focus the heat more to where needed.

We’re not sure of everything he’s blown acrylic bubbles for but we first learned of his ovens from the transparent clams in his underwater distributed sensor network. In fact, he was inspired to do plastics blowing from a childhood memory of the Air Force museum in Dayton, Ohio, where they visited the restoration hanger and watched the restorers blowing bubbles for a B-17 ball turret.

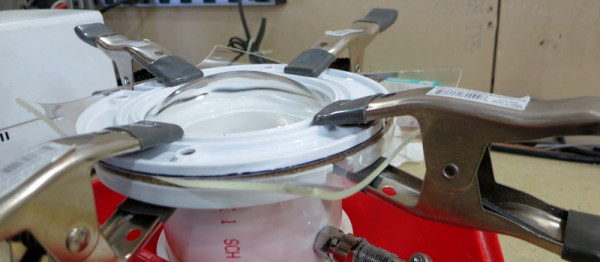
Though if you want to go smaller and simpler for something like a light fixture then you can get away with using a toaster oven, a PVC pipe, and a toilet flange.

Slipcasting Resin Prototypes

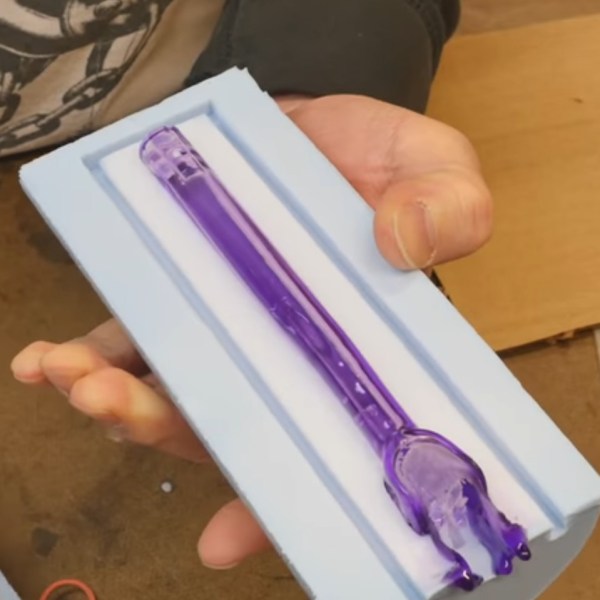
[Eric Strebel] doesn’t need an introduction anymore. If there is a picture of an elegantly designed part with a professional finish on our pages, there is a good chance he has a hand in it. This time he is sharing his method of making a part which looks like it is blow-molded but it is not. Blow-molded parts have a distinctive look, especially made with a transparent material and [Eric’s] method certainly passes for it. This could upgrade your prototyping game if you need a few custom parts that look like solidified soap bubbles.

Mold making is not covered in this video, which can also be seen below the break, but we can help you out with a tip or two. For demonstration’s sake, we see the creation of a medical part which has some irregular surfaces. Resin is mixed and degassed then rolled around inside the mold. Then, the big reveal, resin is allowed to drain from the mold. Repeat to achieve the desired thickness.

This is a technique adapted from ceramics called slipcasting. For the curious, an elegant ceramic slipcasting video demonstration can be seen below as well. For an added finishing touch, watch how a laquer logo is applied to the finished part; a touch that will move the look of your build beyond that of a slapdash prototype.

More education from this prolific maker can be seen in his video on painting with a professional-looking finish and his tips for working with foam-core.

Continue reading “Slipcasting Resin Prototypes”

Quick And Easy Pressure Forming Makes Plexiglas Domes

Thermoplastics are amazingly versatile materials. Apply some heat, add a little force, and within seconds you’ve got a part. It’s not always quite that simple, but as [maxelrad] discovered, sometimes thermoforming can be as easy as blowing up a balloon.

In need of a cowling for an exterior light fixture on an experimental aircraft, [maxelrad] turned to pressure forming of Plexiglas for the hemispherical shape he needed. His DIY forming rig was a plumbing-aisle special: PVC pipe and caps, some air hose and fittings, and a toilet flange for the pressure chamber. The Plexiglas was softened in a toaster oven, clamped over the business end of the chamber, and a few puffs of air inflated the plastic to form a dome. [maxelrad] points out that a template could be applied over the plastic sheet to create the streamlined teardrop shape he needs, and he notes that the rig would likely work just as well for vacuum forming. Of course, a mold could be substituted for the template to make this a true blow-molding outfit, but that would take away from the simplicity of this solution.

There have been a fair number of thermoforming projects featured on Hackaday before, from this DIY vacuum former to a scratch-built blow molder. And while we really like the simplicity of [maxelrad]’s technique, what we’d really love to see is some details on that airplane build.