Installing OpenSSH On The HP TouchPad

hptouchpad_openssh

[Russ] was lucky enough to get his hands on a deeply discounted HP TouchPad, and after hearing about the huge bounty being offered for getting Android up and running on the device, he decided to poke around and see if he could make some headway.

He started off by making a full backup copy of his file system using a tool HP has on their WebOS site, just in case anything unfortunate happened to his device in the process. He grabbed a copy of the ARM cross-compiler and set off to build a copy of OpenSSH for the TouchPad. Once he had the binaries in hand, he started what he thought would be the arduous process of getting SSH onto the TouchPad, but it turned out that it was a simple drag and drop operation.

After remounting the file system to allow write operations, he fired up the SSH daemon and hoped for the best. It worked like a charm, and while it’s a relatively small part of getting Android running on the TouchPad, every bit helps.

Keypad Uses A PIC’s Built In Capacitance Functionality

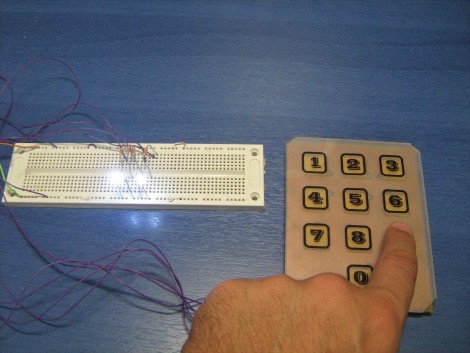
[Giorgos Lazaridis’] most recent project was to build a capacitive touch pad. Since he’s using a PIC 16F1937 it will be relatively easy. That’s because it has a 16 channel capacitance sensing module built right in. But there are still some design considerations that make the development a bit touching.

This isn’t the first time he’s worked with capacitance sensing. Through past experience he has found that it is very important to position the microcontroller as close to the button pads as possible. Because of this, the chip is soldered on the back of the PCB used for the keypad itself. Because he’s hand soldering vias, he also used some foam tape to raise the button pads just a bit. This way they will be flush with the acrylic overlay, which cannot sit flat on the board due the via solder joints.

Check out the video after the break to hear [Giorgos] walk us through the project.

Continue reading “Keypad Uses A PIC’s Built In Capacitance Functionality”

Laptop Touchpad-based LED Lighting Control

touchpad_lighting

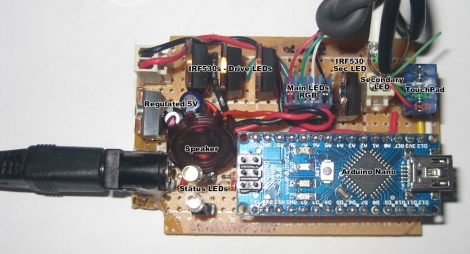
[Dave] needed some extra light above his desk/workbench area and decided to wire up some RGB LED light strips to brighten the place up a bit. He wasn’t content with using a standard switch to toggle them on and off, and after some brainstorming, he decided to build a capacitive touch circuit using a pair of copper tubes mounted in a project box. Just as he was putting the finishing touches on his switch, he saw a project online where a Synaptics touchpad was used in conjunction with an Arduino for lighting control. The copper tube switch was pitched, and he got busy working with his Arduino.

When connected to an Arduino, the touchpads can be used in two modes – relative and absolute. Relative mode is familiar to most people because it is used to guide the mouse cursor around on a laptop’s screen. Absolute mode however, relays coordinate information back to the Arduino, allowing the user to map specific areas of the pad to specific functions. [Dave] enabled his touchpad to use absolute mode, and mapped a handful of different functions on the Arduino. He can now fade his lights on and off or light the room on a timer, as well as use a sliding function to tweak the LEDs’ brightness.

It’s a neat, yet simple hack and a great way to repurpose old laptop touchpads.

Continue reading for a quick demo video he put together, and swing by his site if you want to take a look at the source code he used to get this working.

Continue reading “Laptop Touchpad-based LED Lighting Control”

MIDI Input For The Kaossilator

This isn’t strictly a MIDI input hack; [Furrtek] pulled off an alternate input hack for the Kaossilator that he’s currently using with a MIDI connection. In its unhacked form the Kaossilator is a small touchpad-based sound manipulation tool. [Furrtek] sniffed out how the touchpad data is read and used on the little device. He then purposed an ATtiny2313 as the core of a circuit that spoofs those signals. The microcontroller now listens for incoming MIDI data, looks up the proper signal translations in a table, then outputs them to the Kaossilator.

In the video after the break you can see that it works perfectly, with no lag or noticeable problems. As we alluded to at the top, there could be so much more done with this. Since the ATtiny2313 is merely translating MIDI into touchpad signals, the input could be anything. The first thing that comes to mind is a dance floor that changes the music based on how many people are out there tearing it up. Continue reading “MIDI Input For The Kaossilator”

Paper Touchpad

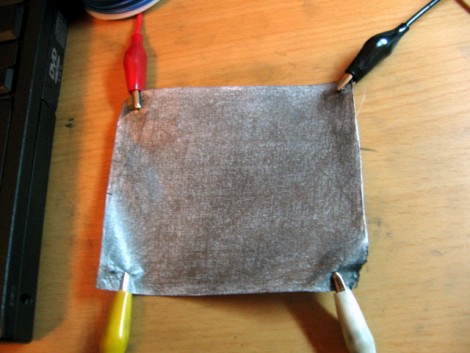
If you don’t mind getting your fingers a little dirty you can replace your mouse with a piece of paper. [Dr. West] made this touchpad himself, which measures signals at the corners of the paper using four voltage dividers. The paper has been completely covered with graphite from a pencil (which we see in hacks from time to time), making it conductive. The user wears an anti-static strap that grounds their hand, allowing an Arduino to calculate contact points on two axes when a finger completes the circuit. See this controlling a cursor in the video after the break.

Continue reading “Paper Touchpad”

Touchpad + Arduino

[youtube=http://www.youtube.com/watch?v=qt_VmJljmKU]

[Jani] directed us to his tutorial on making a laptop touchpad work with an Arduino. After seeing the recent post on touch pad and VFD hacking, he couldn’t resist finding one of these to play with. He shows us how to connect it all up and offers two methods of using the data from it. The first method is to determine the direction of finger travel and the second, shown above, is to use it more like the volume control on an iPod. Source code for both is available on his site.

Touchpad And VFD Hacking

p2 (Custom)

[Agent420] brought up this touchpad and VFD hack in the comments on our capicitive sensor guide post. He had broken dell laptop from which he harvested the touchpad and an HP laserjet that contributed the VFD. Though the touchpad communicates using standard PS2 protocol, he wanted to use it with his Atmel 8535 AVR which required him to write some custom code. In the picture above, you can see the VFD displaying the coordinates of his finger. You can download his code as well as the spec sheets for the different pieces on the project thread.