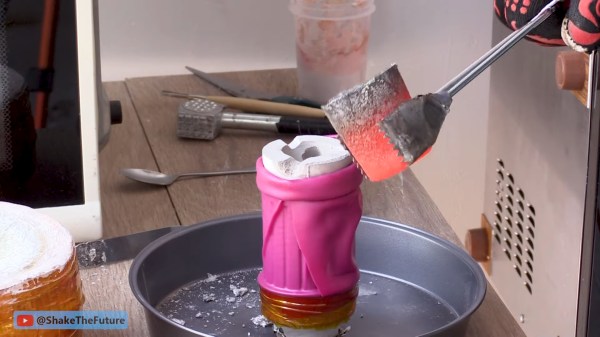
A red hot crucible is held with metal tongs above a white plaster mold. The mold is held in a bright pink silicone sleve atop a metal pan on a wooden workbench. Red cheese wax holds the sleeve to a metal funnel connected to a vacuum cleaner.

Lost Print Vacuum Casting In A Microwave

Hacks are rough around the edges by their nature, so we love it when we get updates from makers about how they’ve improved their process. [Denny] from Shake the Future has just provided an update on his microwave casting process.

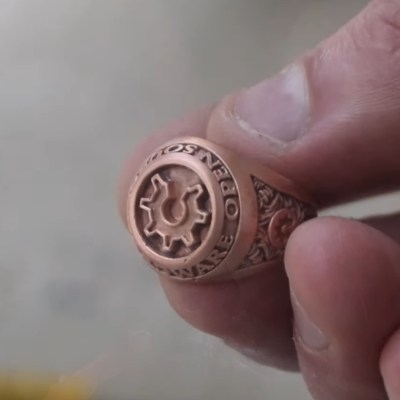
Sticking metal in a microwave certainly seems like it would be a bad idea at first, but with the right equipment it can work quite nicely to develop a compact foundry. [Denny] walks us through the process start to finish in this video, including how to build the kilns, what materials to use, and how he made several different investment castings using the process. The video might be worth watching just for all the 3D printed tools he’s built to aid in the process — it’s a great example of useful 3D prints to accompany your fleet of little plastic boats.A hand holds a very detailed copper ring. It is inscribed with the words "Open Source Hardware" and the open gear logo associated with open source hardware. It looks kinda like a class ring.

A lot of the magic happens with a one minute on and six minutes off cycle set by a simple plug timer. This allows a more gradual ramp to burn out the PLA or resin than running the microwave at full blast which can cause some issues with the kiln, although nothing catastrophic as demonstrated. Vacuum is applied to the mold with a silicone sleeve cut from a swimming cap while pouring the molten metal into the mold to draw the metal into the cavities and reduce imperfections.

We appreciate the shout out to respirators while casting or cutting the ceramic fiber mat. Given boric acid’s effects, [PDF] you might want to use safety equipment when handling it as well or just use water as that seems like a valid option.

If you want to see where he started check out this earlier version of the microwave kiln and how he used it to make an aluminum pencil.

Continue reading “Lost Print Vacuum Casting In A Microwave”

A Classroom-Ready Potentiometer From Pencil And 3D Prints

If you need a potentiometer for a project, chances are pretty good that you’re not going to pick up a pencil and draw one. Then again, if you’re teaching someone how a variable resistor works, that old #2 might be just the thing.

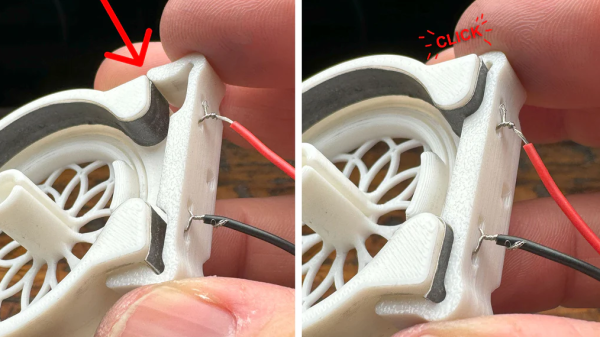
When [HackMakeMod] realized that the graphite in pencil lead is essentially the same thing as the carbon composition material inside most common pots, the idea for a DIY teaching potentiometer was born. The trick was to build something to securely hold the strip while making contact with the ends, as well as providing a way to wipe a third contact across its length. The magic of 3D printing provided the parts for the pot, with a body that holds a thin strip of pencil-smeared paper securely around its inner diameter. A shaft carries the wiper, which is just a small length of stripped hookup wire making contact with the paper strip. A clip holds everything firmly in place. The video below shows the build process and the results of testing, which were actually pretty good.

Of course, the construction used here isn’t meant for anything but demonstration purposes, but in that role, it performs really well. It’s good that [HackMakeMod] left the body open to inspection, so students can see how the position of the wiper correlates to resistance. It also makes it easy to slip new resistance materials in and out, perhaps using different lead grades to get different values.

Hats off to a clever build that should be sure to help STEM teachers engage their students. Next up on the lesson plan: a homebrew variable capacitor.

Continue reading “A Classroom-Ready Potentiometer From Pencil And 3D Prints”

Casting Metal With A Microwave And Vacuum Cleaner

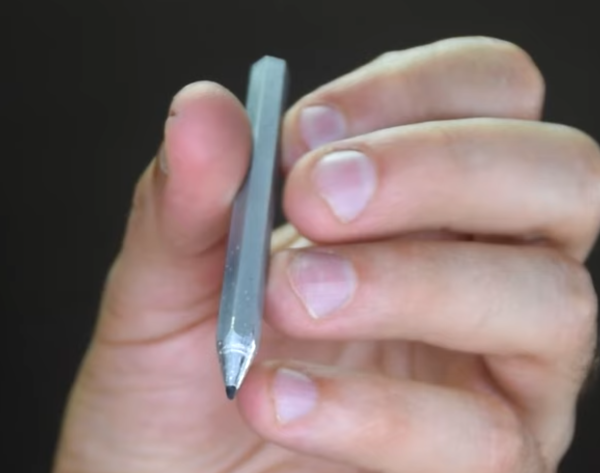
Metalworking might conjure images of large furnaces powered by coal, wood, or electricity, with molten metal sloshing around and visible in its crucible. But metalworking from home doesn’t need to use anything more fancy than a microwave, at least according to [Denny] a.k.a. [Shake the Future]. He has a number of metalworking tools designed to melt metal using a microwave, and in this video he uses them to make a usable aluminum pencil with a graphite core.

Before getting to the microwave kiln, the pencil mold needs to be prepared. A 3D-printed pencil is first created with the graphite core, and then [Denny] uses a plaster of Paris mixture to create the mold for the pencil. The 3D printed plastic is left inside the mold and placed in the first microwave kiln, which is turned on just enough to melt the plastic out of the mold, leaving behind the graphite core. From there a second kiln goes into the microwave to melt the aluminum.

Once the molten aluminum is ready, it is removed from the kiln and poured in the still-warm pencil mold. This is where [Denny] has another trick up his sleeve. He’s using a household vacuum cleaner to suck the metal into place before it cools, creating a rudimentary but effective vacuum forming machine. The result is a working pencil, at least after he wears down a few razor blades attempting to sharpen the metal pencil. For more information about how [Denny] makes these microwave kilns, take a look at some of his earlier projects.

Continue reading “Casting Metal With A Microwave And Vacuum Cleaner”

Junk Build Printer Uses Pencil To Print

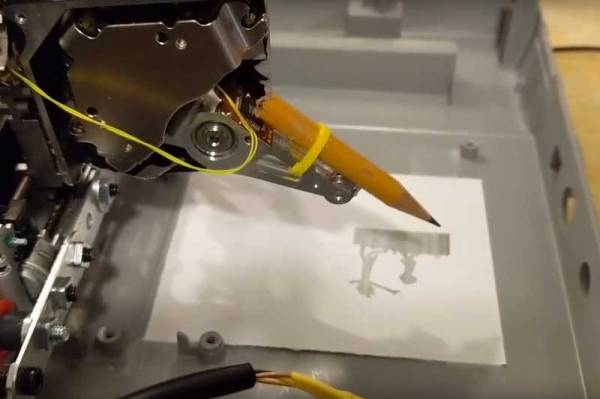
Sometimes, it is interesting to see what you can build from the bits that you have in your junk drawer. [Dr West] decided to build a printer with spare parts including a hard drive, a scanner base and an Arduino. The result is a rather cool printer that prints out the image using a pencil, tapping the image out one dot at a time. The software converts the image into an array, with 0 representing white and 1 representing black. The printer itself works a bit like an old-school CRT TV: the scanner array moves the printer along a horizontal line, then moves it vertically and along another horizontal line. It then triggers the hard drive actuator to create a mark on the paper if there is a 1 in the array at that point.

We’ve seen a few drawing printers before, but most use a plotter or CNC approach, where the motors move the pencil on an X-Y . This type of dot matrix printer (sometimes called a dotter) isn’t as efficient, but it’s a lot of fun and shows what can be achieved with  a few bits of junk and a some ingenuity.

Continue reading “Junk Build Printer Uses Pencil To Print”

Garbage Can RC Car Engine Powers Ridiculous Pencil Sharpener

Christmas has come and gone, and no doubt garbage cans are filling with toys that got but a single use before giving up the ghost. If you scrounge around, you might get lucky and score a busted RC car so you can be like [Mike] and build a completely unnecessary nitro-powered pencil sharpener.

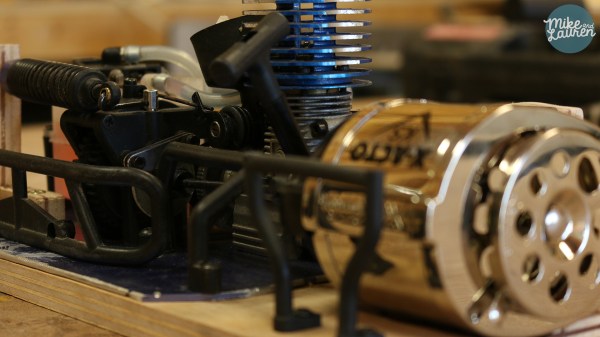
This is one from the [Tim The Tool Man Taylor] “more power” files. To be fair, [Mike] acknowledges as much right up front, and as a learning tool for these super-powerful internal combustion engines, we think it’s a pretty cool project. After dealing with a seized cylinder on what looks to be a VX .18 engine rated at about 1.1 horsepower, [Mike] learns the basics of starting and controlling the engine. Once coupled to a pencil sharpener that clearly isn’t engineered to work at a bazillion RPM and jury-rigging a damper for the clutch, [Mike] fires up the engine and races through a pack of 10 pencils in record time.

As silly as this hack seems, it could come in handy if you decide to go into the colored pencil jewelry market at production levels.

Continue reading “Garbage Can RC Car Engine Powers Ridiculous Pencil Sharpener”

MacGyver, Jedi Knights, Ammo Stockpiles, And Candy Crush

Everyone’s favorite machinist, tinkerer, YouTube celebrity, deadpan comedian, and Canadian is back with a tale of popping a few benzos, stumbling around Mexico, and wondering why everyone else on the planet is so stupid.

The hero of our story considered the feasibility of one hundred and eighty-sixth trimester abortions as he stood outside a Mexican airport watching a stockbroker complain about the battery in his cellphone. Meanwhile, cars drove by.

Here’s how you charge a phone with a car battery and an ‘ol Dixon Ticonderoga.

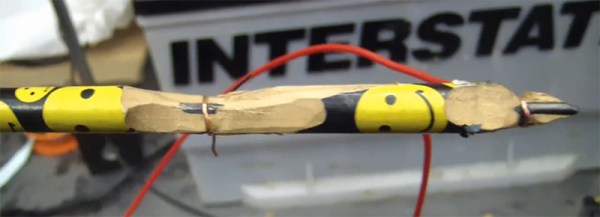
To charge a battery, all you really need to do is connect the terminals to a power source with the right voltage. A cell phone battery needs about three volts, and a car battery has twelve. You need a voltage divider. You can get that with a pencil. Take out a knife, get to the carbon and clay wrapped in wood, and wire the battery up. Make a cut a quarter of the way down this rather long resistor, and there you will find something around three volts.

Does it work? Yeah. It works even better if you have some tape to hold wires onto the cell phone battery when charging. Is it smart? It is if there is no other conceivable way of charging your cell phone. Should you do it? Nah. Video below. Thanks [Morris] for the link.

Continue reading “MacGyver, Jedi Knights, Ammo Stockpiles, And Candy Crush”

A Ring Of Colored Pencils

Colored Pencil Ring

[Peter] proved he has equal parts prowess, patience, and perseverance with this colored pencil ring (imgur link). The ring is made from a cross-section of several colored pencils. The idea seems simple. The build process IS simple. As always though, the devil is in the details.

[Peter] started with a cheap pack of colored pencils. They have to be hexagonal pencils, as round ones won’t work well for this build. [Peter] used two nails to align the  pencils, and medium thickness Cyanoacrylate glue to bond them together. Cyanoacrylate (aka super glue) is a very strong but inflexible bond. We’re curious if a different adhesive might have worked better for this task.

Once the block of glued pencils was dry, [Peter] drilled a hole approximately his ring size. He used a band saw to cut a rough ring blank around the hole, then headed to the wood lathe. He mounted the ring with a jam chuck, which is a piece of wood turned to an interference fit with the workpiece. The problem was that the jam chuck cracked the ring as it was being installed. [Peter] was able to glue the ring back together, and turn it down on his lathe.

Click past the break for more on [Peter’s] ring.

Continue reading “A Ring Of Colored Pencils”