3D Printed String Vase Shows What’s Possible

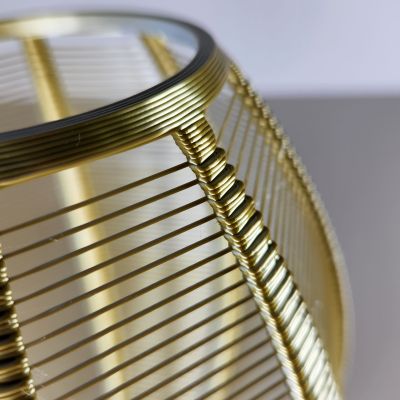
Overhangs are the bane of the melty-plastic 3D printing world. Often, we try to avoid them with creative print alignments, or we compensate with supports. However, [3DPrintBunny] decided to embrace overhangs in the extreme in the design of her creative 3D-printed string vase.

The design is intended to be printed with a larger nozzle, on the order of 0.8 mm or so, at a layer height of 0.6 mm. Under these conditions, the printer nozzle bridges the gap between the vase’s pillars with a single string of molten filament. With the settings just so, the molten filament stays attached during the bridging operation, and creates a fine plastic string between the pillars. Repeat this across the whole design, and you get an attractive string vase.

Amazingly, [3DPrintBunny] didn’t have to do any fancy slicer tricks to achieve this. Stock slicer settings got the job done just fine, and she reports that the model should print on most FDM printers. For her own examples, she printed in a special silver/bronze dual color PLA filament.

It recalls us of efforts to create synthetic hair-like fibers by taking advantage of stringing in 3D printers. Video after the break. Continue reading “3D Printed String Vase Shows What’s Possible”

Using Spiral Mode To Rapidly Print Enclosures

We’ve often said that one of the best applications of desktop 3D printing is the production of custom enclosures. A bespoke case adds a touch of professionalism to any project, and considering the materials needed to print one will cost less than even the cheapest generic project box, it’s a no-brainer. There’s only one problem: it can take hours to print even a simple case.

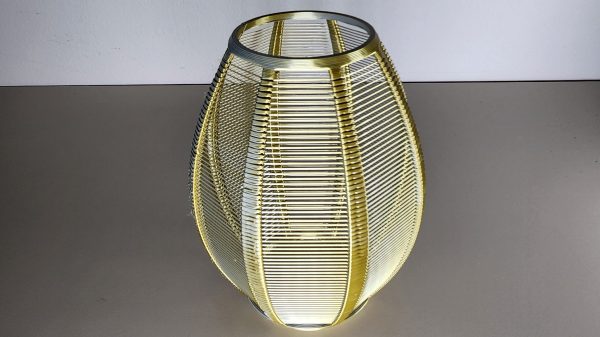
To try and speed things up, [Electrobob] has been experimenting with running off enclosures using spiral or “vase” mode on his 3D printer. Unlike the normal layer-by-layer approach, in this mode, the printer’s hotend continually rises at a steady rate during the entire print. Think of it as akin to printing out a Slinky and you should get the idea.

Spiral printed boxes may need manual retouching

As you might expect, there are some trade-offs here. For one, the walls of the box can’t be very thick since the printer is only making one pass. The nozzle on most printers is 0.4 mm, but in his experiments, [Electrobob] has found he’s able to reliably double that to a wall thickness of 0.8 mm by adjusting the extrusion rate.

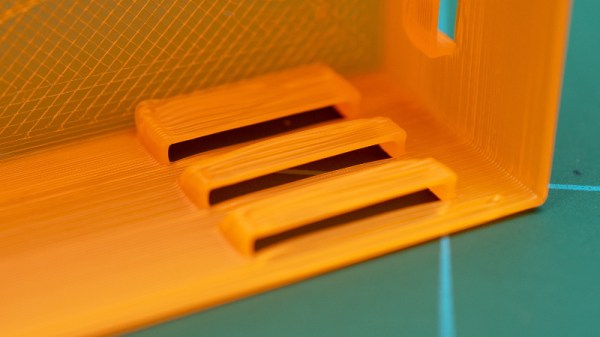
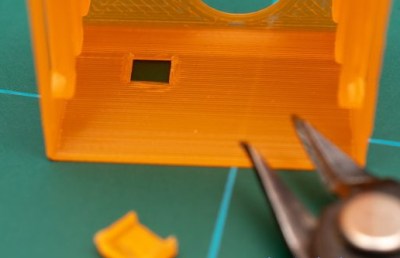
You also need to approach the design a bit differently during the CAD phase. Printing holes in the side of the enclosure, which would be easy enough to do normally, doesn’t really work when running in spiral mode. For those situations, [Electrobob] recommends designing a “pocket” into the side that you can come back and cut out with a knife. It will add a little time to the post-processing stage, but the time saved during the print will more than make up for it.

So how much faster are we talking about? In the example [Electrobob] shows in his write-up, the print time went from nearly two hours to just 18 minutes. The resulting enclosure obviously looks a bit different than the traditionally printed version, and isn’t as strong, but the concept still clearly holds promise for some applications. If you’re building a sensor network that needs a bunch of enclosures, those time savings will really add up.

New Useless Machine Does The Twist

Useless machines might not do any work or produce anything of value on their own, but they can be a great learning tool, and are often beautifully crafted as an expression of the builder’s artistic talents. By and large, they consist of a switch to turn the machine on, and an arm that switches the machine back off in response to this. Vladimir had a different take, and built this twisting vase useless machine instead.

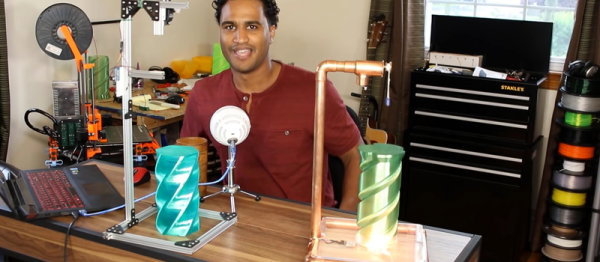
The build references the twisting vases we saw recently – [Vladimir] loved the way they so elegantly opened and closed, and decided to base the build around that. The useless part of the machine is the lifting mechanism – a servo turns a pulley, which uses a magnet on a rope to lift the vase. Upon reaching a certain point, the vase drops, and the magnet is once again lowered to lift it back up again.

The first prototype used a simple delay-based timing loop to determine when to drop the magnet again, however over time this would fall out of sync with the vase’s position and the magnet would fail to attach to the vase. For the second version, [Vladimir] improved things by using a limit switch to determine the position of the vase instead of running on timing alone. The machine’s frame was also rebuilt using copper pipe, which allowed the wires and servo to be hidden from sight. The second revision of the project shows the difference polish can make – differences like these make the machine more suitable for display as a curio in a stylish home setting, rather then a messy project that lives on the workbench only.

Be sure to check out the video of the project below the break. For a simpler useless machine, check out this build. 
Continue reading “New Useless Machine Does The Twist”

Oddly Satisfying – Twist Containers

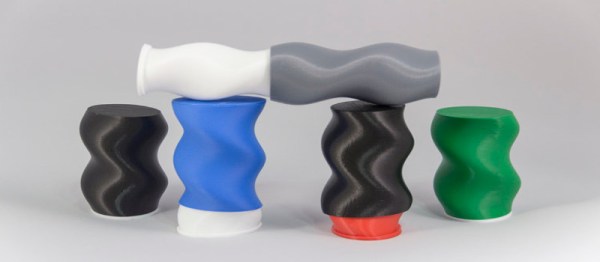
One of the great strengths of 3D printing is that it makes creating objects with certain geometries much easier than it would be with traditional subtractive machining methods. Things like thin-walled perfect spheres or objects with wild undercuts become trivial to make. A great case in point is these amazing 3D-printed twist vases.

The key concept behind the vases is that the shape of the container itself is the thread that binds the two halves together. [Devin] has built plenty over the years, continually experimenting with the design, making everything from a useful compact trash container to heavily-twisted, more artistic pieces. [Devin] says they’re incredibly satisfying to play with, and we’re inclined to agree – it’s particularly great to watch the higher-tolerance printed vases twist themselves closed under gravity.

Such designs aren’t actually all that new – there’s similar models on Thingiverse stretching all the way back to 2009. The great thing about the Internet as an ecosystem is that not only do many people often reinvent the same idea, they each give it their own unique twist (pun unintended). Continue reading “Oddly Satisfying – Twist Containers”

A Vase Of Ice And Fire

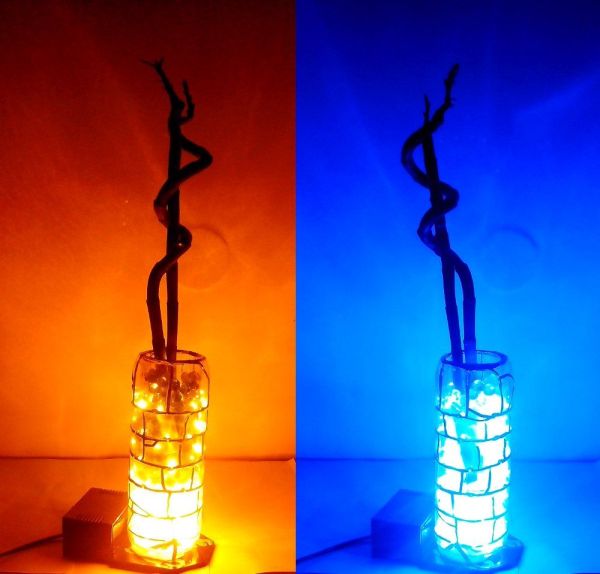
When we first saw [Ginko Balboa]’s vase of ice and fire, we weren’t that impressed. Until we realized that the whole vase was a glass, copper, and solder circuit with LEDs sandwiched in between. The tutorial starts with [Ginko]’s technique for etching a custom board for the base circuit. It gets interesting with the construction of the LED circuit.

First a glass bottle was scored in a pattern and shattered, leaving a jigsaw puzzle. Two differently colored LED light strips were desoldered. Then, from the bottom up, the glass was taped around with an adhesive backed copper tape, and soldered together. Every now and then an LED was soldered between the carefully separated areas of the circuit. Some LEDs were soldered in one way, and some the other. This way the vase could be rotated on its base to select a different color. Once the outside of the vase with the LED circuit inside it was finished, another cut bottle was put in the center and soldered in a final position, making the assembly waterproof.

The final product is really interesting, and we’re scratching our head to figure out if there’s anything else this technique of circuit building could be used for. Ideas?