Upgrading A MIDI Controller With An FPGA

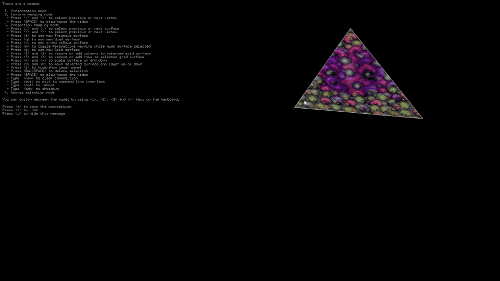
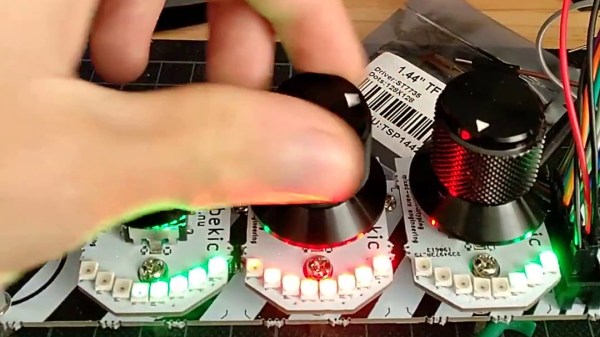
While the “M” in MIDI stands for “musical”, it’s possible to use this standard for other things as well. [s-ol] has been working on a VJ setup (mixing video instead of music) using various potentiometer-based hardware and MIDI to interface everything together. After becoming frustrated with drift in the potentiometers, he set out to outfit the entire rig with custom-built encoders.

[s-ol] designed the rotary-encoder based boards around an FPGA. It monitors the encoder for changes, controls eight RGB LEDs per knob, and even does capacitive touch sensing on the aluminum knob itself. The FPGA communicates via SPI with an Arduino master controller which communicates to a PC using a serial interface. This is [s-ol]’s first time diving into an FPGA project and it looks like he hit it out of the park!.

Even if you’re not mixing video or music, these encoders might be useful to any project where a standard analog potentiometer isn’t accurate or precise enough, or if you just need something that can dial into a specific value quickly. Potentiometers fall short in many different ways, but if you don’t want to replace them you might modify potentiometers to suit your purposes.

Continue reading “Upgrading A MIDI Controller With An FPGA”

Raspberry Pi Projection Mapping Crash Course

Projection mapping might not be a term you’re familiar with, but you’ve certainly seen the effect before. It’s when images are projected onto an object, usually one that has an interesting or unusual shape, to create an augmented reality display. Software is used to map the image or video to the physical shape it’s being projected on, often to surreal effect. Imagine an office building suddenly being “painted” another color for the Holidays, and you’ll get the idea.

This might seem like one of those things that’s difficult to pull off at the hobbyist level, but as it turns out, there’s a number of options to do your own projection mapping with the lowly Raspberry Pi. [Cornelius], an avid VJ with a penchant for projection mapping, has done the legwork and put together a thorough list of different packages available for the Pi in case you want to try your hand at the futuristic art form. Many of them are even open source software, which of course we love around these parts.

[Cornelius] starts by saying he’s had Pis running projection installations for as long as three years, and while he doesn’t promise the reader it’s always the best solution, he says its worth getting started on at least. Why not? If the software’s free and you’ve already got a Raspberry Pi laying around (we know you do), you just need a projector to get into the game.

There’s a lot of detail given in the write-up, including handy pro and con lists for each option, so you should take a close look at the linked page if you’re thinking of trying your hand at it. But the short version is that [Cornelius] found the paid package, miniMAD, to be the easiest to get up and running. The open source options, ofxPiMapper and PocketVJ, have a steeper learning curve but certainly nothing beyond the readers of Hackaday.

To make things easier, [Cornelius] even goes on to give the reader a brief guide on setting up ofxPiMapper, which he says shouldn’t take more than 30 minutes or so using its mouse and keyboard interface. It would be interesting to see somebody combine this with the Raspberry Pi integrated projector we saw a couple years back to make a highly portable mapping setup.