ESP8266 Monitor Keeps An Eye On OctoPrint

At this point, you’ve almost certainly heard of OctoPrint. The web-based control interface for 3D printers is especially popular for those who’s primary computers run on an operating system that has a penchant for occasionally imploding. Even if you aren’t laboring under that common software handicap, OctoPrint offers a wide away of compelling features. Perhaps chief among them the ability to monitor your printer over the network, and if you insist, over the Internet. But while OctoPrint provides the server side for getting your printer on the net, you’re on your own for the client.
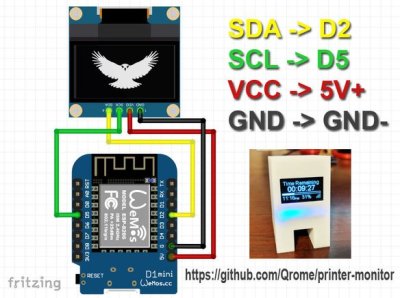
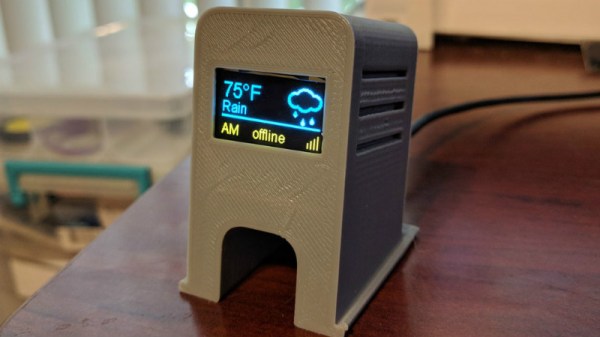
Rather than using a web browser like some kind of peon, [David Payne] has come up with a very slick desktop OctoPrint monitor using the WeMos D1 Mini ESP8266 board. With an exceptionally low part count and housed in a (what else) 3D printed enclosure, this is a cheap and easy OctoPrint accessory that we suspect will be decorating many a hacker’s desk before too long.

The electronics are simple to the extreme, just hook the 4 wires of an 128×64 OLED I2C display to the appropriate pins of the ESP8266 board, and you’re ready to upload the Arduino code [David] has come up with.

His code is very polished, from using WiFiManager for initial network setup to providing its own web-based configuration menus to get the device linked up to your OctoPrint instance, [David] clearly wanted this to be as smooth an experience as possible for the end user. When the 3D printer isn’t working on a job, the monitor will even switch over to showing you the time and weather. We’ve seen commercial products that weren’t this user-friendly.

We also love the case design on this little gadget. While the aesthetics are perhaps debatable (sort of reminds us of the little fellows from Darwinia), we appreciate any functional print that doesn’t require supports. You’ll need to provide a couple of little screws to keep the back panel on, but other than that everything snaps into place.

Of course, you could always just use your smartphone to keep an eye on OctoPrint, and even if the remote management capabilities don’t grab your interest, there’s plenty of interesting plugins to keep you occupied.

Continue reading “ESP8266 Monitor Keeps An Eye On OctoPrint”

Easy Access Point Configuration On ESP8266

One of the biggest advantages of using the ESP8266 in your projects is how easy it is to get WiFi up and running. Just plug in the WiFi library, put the SSID and encryption key in your source code, and away you go. It authenticates with your network in seconds and you can get on with building your project. But things get a little trickier if you want to take your project someplace else, or distribute your source code to others. Quickly we learn the downside of using static variables for authentication.

While there are already a few solutions to this problem out there, [Martin Raynsford] wasn’t too thrilled with them. Usually they put the ESP8266 in Access Point mode, allow the user to connect, and then ask which network they should authenticate with. But he didn’t want his projects to require an existing network, and figured he could do just as well making a field-configurable AP.

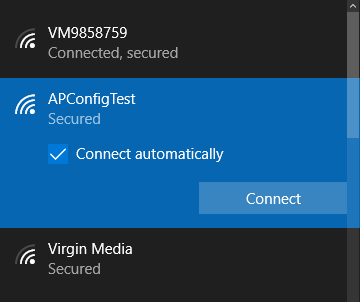
Using it is simple. Once the ESP8266 starts up it will create a new network in the form of “APConfig XXXXXX”, which should be easy enough to find from your client side device. Once connected, you can go to a simple administration page which allows you to configure a new AP name and encryption key. You even have the option to create an open AP by leaving the “Password” field blank. Once rebooted, the ESP8266 will create a new network with the defined parameters.

[Martin] has also included a “backdoor” to let anyone with physical access to the ESP8266 board create a new open AP that can be used to reconfigure the network settings. During boot up there is a brief period, indicated with specific blinks of the LED, wherein you can hit the reset button and trigger the open AP. This keeps you from getting locked out of your own project if you forget what key you gave it.

If you’re not one to go the austere route, take a look at some of the more robust solutions we’ve seen for easier end-user setup of the ESP8266.

Programmable Badge Uses E-Ink And ESP8266

You’ve probably noticed that the hacker world is somewhat enamored with overly complex electronic event badges. Somewhere along the line, we went from using a piece of laminated paper on a lanyard to custom designed gadgets that pack in enough hardware that they could have passed for PDAs not that long ago. But what if there was a way to combine this love for weighing down one’s neck with silicon jewelry and the old school “Hello my name is…” stickers?

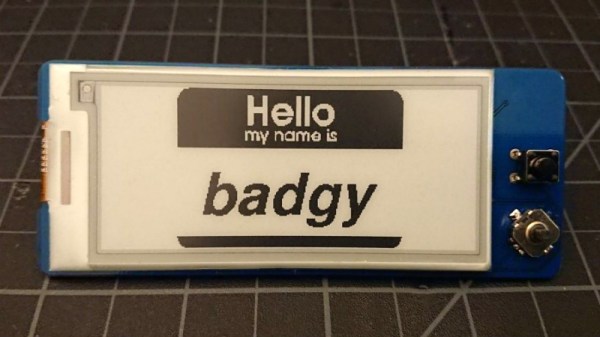
[Squaro Engineering] might have the solution with Badgy, their multi-function e-ink name…well, badge. Compatible with the Arduino SDK, it can serve as anything from a weather display to a remote for your smart home. Oh, and we suppose in an absolute emergency it could be used to avoid having to awkwardly introduce yourself to strangers.

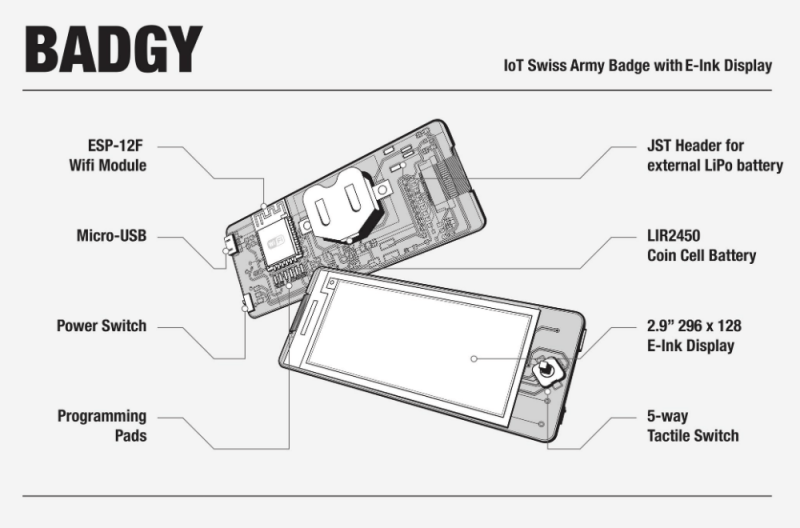
Powered by an ESP-12F, Badgy features a 2.9″ 296×128 E-Ink display and a five-way tactical switch for user input. The default firmware includes support for WiFiManager and OTA updates to make uploading your own binaries as easy as possible, and a number of example Sketches are provided to show you the ropes. Powered by a LIR2450 3.6 V lithium-ion rechargeable coin cell, it can run for up to 35 days in deep sleep or around 5 hours of heavy usage.

Schematics, source code, and a Bill of Materials are all available under the MIT license if you want to try your hand at building your own, and assembled badges are available on Tindie. While it might not be as impressive as a retro computer hanging around your neck, it definitely looks like an interesting platform to hack on.

Easier End-User Setup For ESP32 Projects

As hackers, we occasionally forget that not everyone is enamored with the same nerdy minutia that we are. Configuring hardware by changing some lines in the code and compiling a new firmware doesn’t sound like that big of a deal to those of us who’ve been around the block a few times, but might as well be ancient Sanskrit to the average person. As long as your projects are for personal use this isn’t really a concern, but what if you plan on distributing the code for a project or perhaps even selling finished products? Shipping it out with hard-coded variables simply isn’t an option.

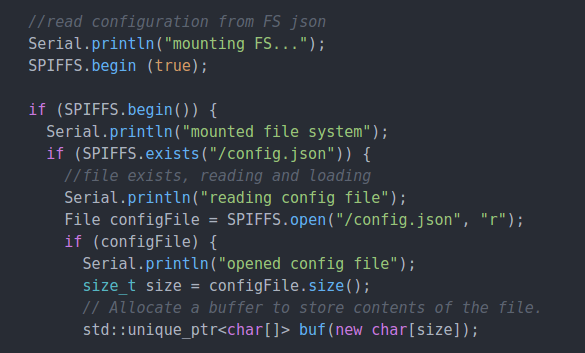
Code for loading configuration file from SPIFFS

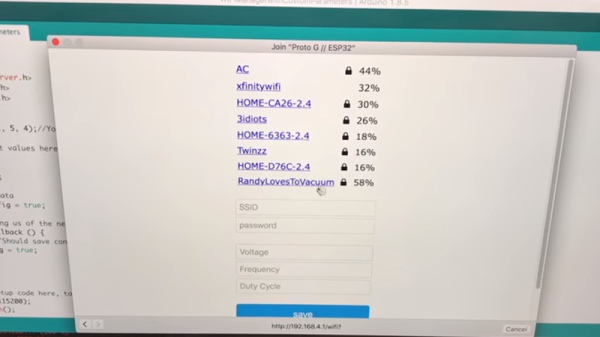
In a recent video, [Proto G] shows a clever way to use WiFiManager to make configuring your ESP32 project easier for end-users. Not only can you use the captive portal system to configure the ESP32’s WiFi against a nearby access point, but it can allow users to enter in configuration data which can be picked up in your code by using SPI Flash File System (SPIFSS).

With the setup demonstrated in the video below by [Proto G], you don’t need anything more exotic than a web browser to configure the device. The end user simply searches for the device’s WiFi network, connects to it, and is presented with an easy to understand dialog which has them select a WiFi network to configure against along with some fields to enter in custom variables. All this information is then stored to a file on the SPI flash. When the ESP32 reboots, it reads the configuration from the saved file and applies the requested settings.

This is very similar to how many consumer devices are now configured, and even the less technically-inclined recipients of such a device should be able to work through the setup with a bit of hand-holding. If you plan on handing one of your ESP32 projects to John Q. Public, this is the kind of configuration you should be aiming for.

We’ve covered using WiFiManager to make ESP32 projects easier to manage, but the addition of arbitrary variables to the captive portal opens up a lot of possibilities. Just the kind of thing you need when you start considering the leap to commercial product.

Continue reading “Easier End-User Setup For ESP32 Projects”

Configure ESP8266 Wifi With WiFiManager

There’s no doubt that the ESP8266 has made creating little WiFi widgets pretty easy. However, a lot of projects hard code the access point details into the device. There’s a better way to do it: use the WiFiManager library. [Witnessmenow] has a good tutorial and a two-minute video (which you can see below).

Hard coding is fine if you are just tinkering around. However, if you are going to send your device away (or even take it with you somewhere) you probably don’t want to reprogram it every time you change access points. This problem is even worse if you plan on a commercial product. WiFiManager does what a lot of commercial devices do. It initially looks like an access point. You can connect to it using a phone or other WiFi device. Then you can configure it to join your network by setting the network ID, password, etc.

Continue reading “Configure ESP8266 Wifi With WiFiManager”