Setup Menu Uses Text Editor Hack

Many embedded devices that require a setup menu will use a USB serial port which you connect to your favorite terminal emulator. But we recently encountered a generic USB knob that did setup using a text editor, like Notepad or even Vim (although that was a bit ugly). A company called iWit makes several kinds of USB knobs which end up in many such products.

These generic USB knobs are normally just plug-and-play, and are used to control your PC’s volume and muting. Some models, like the iWit, the user can configure the mapping within the device. For example, knob rotation can be set to generate up and down arrow keys, and knob press could be ENTER. One could do this kind of mapping on the PC, but many of these USB knobs can do it for you. The crux of the setup is this menu (which you can see in action in the first 30 seconds of the video below).

Continue reading “Setup Menu Uses Text Editor Hack”

Get Your Microcontroller Online At The Speed Of Light

When developing a network-enabled project with the ESP8266 or ESP32, the easiest way to handle WiFi credentials is to just hardcode the access point and encryption key into the program. But that means recompiling the firmware if you ever want to use it on a different network, which isn’t really an option if you’re trying to make something that other people can easily use. If you’re expecting grandma to bust out the UART cable, we’ve got bad news for you.

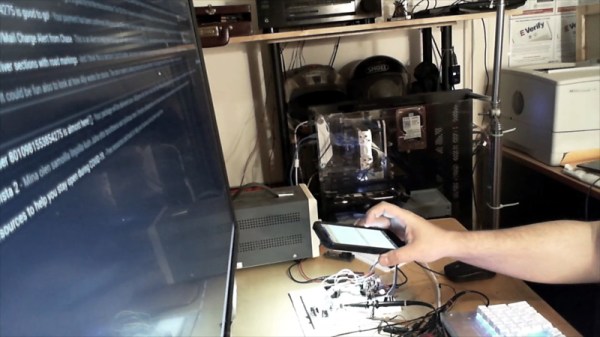
There are various ways around this problem, but we think the one developed by [Pekka Lehtikoski] is particularly clever. With a simple application, network credentials can be literally “flashed” to the waiting microcontroller by rapidly blinking the flash LED on an Android device. This allows the information to be transferred quickly and easily regardless of the user’s technical proficiency. One could even make the argument that it’s more secure than some of the other methods of doing initial setup, since an eavesdropper would literally need to see you do it if they wanted to steal your encryption key.

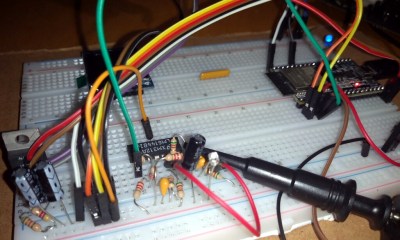
[Pekka] has made the source code for the Android application and the “Gazerbeam” library open for anyone who wants to include the capability in their own projects. To pick up the blinking light you just need to add a phototransistor, an opamp, and a handful of passives to your circuit; making this solution cheap enough that you could even use it in a small-scale production run. The concept isn’t limited to network credentials either. Whenever we can hold conferences again, it could be an interesting way to let attendees customize their badge.

Of course, [Pekka] isn’t the first person to use this trick. Hackers well versed in the history of WiFi MCUs may recall that the Electric Imp used a very similar method of configuration called BlinkUp. If you ever come across a device that asks you to put your phone’s screen down on a little window to perform the initial setup, there’s a good chance it has an Imp inside.

Raspberry Pi Cluster Shows You The Ropes

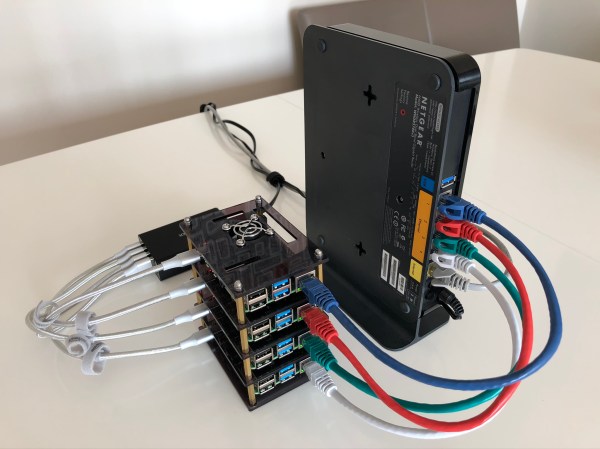
Raspberry Pi clusters are a common enough project, but a lot of the builds we see focus on the hardware side of the cluster. Once it’s up and running, though, what comes next? Raspberry Pis aren’t very powerful devices, but they can still be a great project for learning how to interact with a cluster of computers or for experimental test setups. In this project from [Dino], four Pis are networked together and then loaded with a basic set of software for cluster computing.

The first thing to set up, after the hardware and OS, is the network configuration. Each Pi needs a static IP in order to communicate properly. In this case, [Dino] makes extensive use of SSH. From there, he gets to work installing Prometheus and Grafana to use as monitoring software which can track system resources and operating temperature. After that, the final step is to install Ansible which is monitoring software specifically meant for clusters, which allows all of the computers to be administered more as a unit than as four separate devices.

This was only part 1 of [Dino]’s dive into cluster computing, and we hope there’s more to come. There’s a lot to do with a computer cluster, and once you learn the ropes with a Raspberry Pi setup like this it will be a lot easier to move on to a more powerful (and expensive) setup that can power through some serious work.

Easy Access Point Configuration On ESP8266

One of the biggest advantages of using the ESP8266 in your projects is how easy it is to get WiFi up and running. Just plug in the WiFi library, put the SSID and encryption key in your source code, and away you go. It authenticates with your network in seconds and you can get on with building your project. But things get a little trickier if you want to take your project someplace else, or distribute your source code to others. Quickly we learn the downside of using static variables for authentication.

While there are already a few solutions to this problem out there, [Martin Raynsford] wasn’t too thrilled with them. Usually they put the ESP8266 in Access Point mode, allow the user to connect, and then ask which network they should authenticate with. But he didn’t want his projects to require an existing network, and figured he could do just as well making a field-configurable AP.

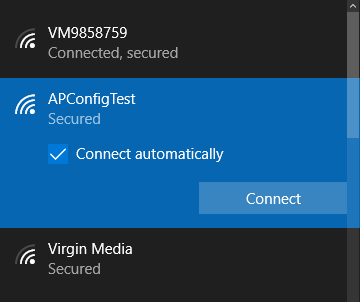
Using it is simple. Once the ESP8266 starts up it will create a new network in the form of “APConfig XXXXXX”, which should be easy enough to find from your client side device. Once connected, you can go to a simple administration page which allows you to configure a new AP name and encryption key. You even have the option to create an open AP by leaving the “Password” field blank. Once rebooted, the ESP8266 will create a new network with the defined parameters.

[Martin] has also included a “backdoor” to let anyone with physical access to the ESP8266 board create a new open AP that can be used to reconfigure the network settings. During boot up there is a brief period, indicated with specific blinks of the LED, wherein you can hit the reset button and trigger the open AP. This keeps you from getting locked out of your own project if you forget what key you gave it.

If you’re not one to go the austere route, take a look at some of the more robust solutions we’ve seen for easier end-user setup of the ESP8266.

Easier End-User Setup For ESP32 Projects

As hackers, we occasionally forget that not everyone is enamored with the same nerdy minutia that we are. Configuring hardware by changing some lines in the code and compiling a new firmware doesn’t sound like that big of a deal to those of us who’ve been around the block a few times, but might as well be ancient Sanskrit to the average person. As long as your projects are for personal use this isn’t really a concern, but what if you plan on distributing the code for a project or perhaps even selling finished products? Shipping it out with hard-coded variables simply isn’t an option.

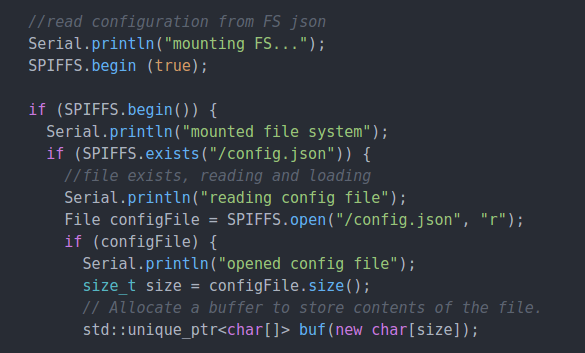
Code for loading configuration file from SPIFFS

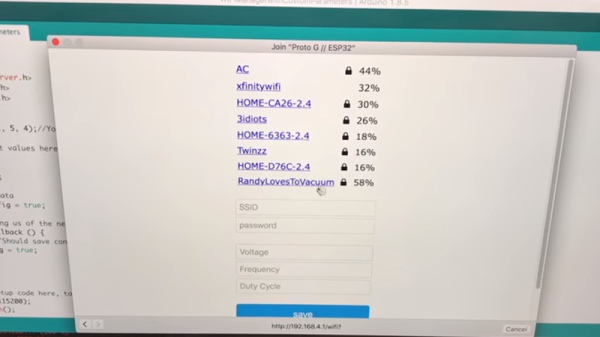
In a recent video, [Proto G] shows a clever way to use WiFiManager to make configuring your ESP32 project easier for end-users. Not only can you use the captive portal system to configure the ESP32’s WiFi against a nearby access point, but it can allow users to enter in configuration data which can be picked up in your code by using SPI Flash File System (SPIFSS).

With the setup demonstrated in the video below by [Proto G], you don’t need anything more exotic than a web browser to configure the device. The end user simply searches for the device’s WiFi network, connects to it, and is presented with an easy to understand dialog which has them select a WiFi network to configure against along with some fields to enter in custom variables. All this information is then stored to a file on the SPI flash. When the ESP32 reboots, it reads the configuration from the saved file and applies the requested settings.

This is very similar to how many consumer devices are now configured, and even the less technically-inclined recipients of such a device should be able to work through the setup with a bit of hand-holding. If you plan on handing one of your ESP32 projects to John Q. Public, this is the kind of configuration you should be aiming for.

We’ve covered using WiFiManager to make ESP32 projects easier to manage, but the addition of arbitrary variables to the captive portal opens up a lot of possibilities. Just the kind of thing you need when you start considering the leap to commercial product.

Continue reading “Easier End-User Setup For ESP32 Projects”

FPGA Metastability Solutions

Gisselquist Technology recently posted a good blog article about metastability and common solutions. If you are trying to learn FPGAs, you’ll want to read it. If you know a lot about FPGAs already, you might still pick up some interesting tidbits in the post.

Don’t let the word metastability scare you. It is just a fancy way of saying that a flip flop can go crazy if the inputs are not stable for a certain amount of time before the clock edge and remain stable for a certain amount of time after the clock edge. These times are the setup and hold times, respectively.

Normally, your design tool will warn you about possible problems if you are using a single clock. However, any time your design generates a signal with one clock and then uses it somewhere with another clock, metastability is a possible problem. Even if you only have one clock, any inputs from the outside world that don’t reference your clock — or, perhaps, any clock at all — introduce the possibility of metastability. Continue reading “FPGA Metastability Solutions”

Setup Day At The Faire Is A Glorious Time!

The Bay Area Maker Faire starts today, but the Hackaday crew rolled in early for something new this year. Friday has traditionally been just for exhibitor setup but this year a few extra groups were on site to see everything come together. Most notably, school field trips. How awesome is it to skip the normal class schedule and hang out at the fair? Also able to get in are media and industry.

I had a great time. Watching everything get setup is often more interesting that seeing the finished display. It’s also much quieter, many fewer bodies (Saturday afternoon is usually a mad press of people) and people haven’t yet lost their voices or the fallen into the monotony of voicing the same explanation over and over again.

Above you can see a few of the friends I ran into. [Windell Oskay] is one of the 2015 Hackaday Prize Judges. He had a freshly minted copy of his new book which I first heard about when visiting Evil Mad Scientist Labs last fall. I also ran into [Kevin] who is the creator of the Arduboy. I first met him at BAMF last year and this year he makes a triumphant return with the new version of Arduboy which overshot it’s Kickstarter by an order of magnitude in just a few days. And who else should I bump into but [Brian Benchoff]. He lives in Pennsylvania and I in Wisconsin so we look forward to hanging out when Hackaday hits the road. I also said a quick hello to [Caleb Kraft] who was slinging veggie paella all evening.

[Brian], [Sophi], [Matt], [Jasmine], [Rich], and I will all be at tonight’s Hackaday Meetup. Anyone in the area won’t want to miss this one. There are a ton of awesome hackers already planning to clink glasses starting at 7pm. All you need to do to join in is RSVP.

Back to the action; I made a quick Friday first pass which still took about three hours. The setup changes just a bit each year… generally things are in the same places but of course returning exhibitors have made a year of upgrades and there’s always a lot of fresh and new on hand. I don’t remember seeing the probability machine last year. It has reservoir of marbles at the top which are being steadily dropped into the “Plinko” style peg-board showing a distribution which has a higher probability toward the center.

Here are just a few more favorites. The Kijani Grows booth has a couple of full aquaponics setups that are worth checking out. I spent some time with the Firepick Delta guys. Sand plotters are always fun and there’s a giant one in one of the booths. I may try my hand at lock picking in The OPen Organization of Lockpickers tent today. And [Louis] of SmartMatrix is launching his Kickstarter to bring fully-assembled versions to people who don’t want to solder the one available in our store.

That’s all for now, I’m off to see as much as is humanly possible. If you’re at the Faire today or tomorrow track us down for some stickers and other swag, and don’t forget tonight’s meetup that I mentioned above!