Multicopters And Their MultiWii Beginnings

With more than five years down the road in this successful hack, [Alexinparis] and his pioneering Nintendo controller hack have been taking eager enthusiasts to the skies with homebrew multicopters armed with MultiWii firmware.

The MultiWii firmware, like most other glorious moments that gloss these pages, was as a hack, and a darn good one. By harvesting the (I²C-based) accel-gyro sensor package in a Nintendo Wii MotionPlus, [Alexinparis] developed control firmware for an Arduino Pro Mini, and, thus: the MultiWii Controller Board was born. With a successful WiiMotion Plus pcb extraction, an Arduino Pro Mini, and some help from the forums, the dedicated hobbyist could build their own flying platform with customizable firmware enabling bi, tri, quad, hex, octo, Y6, and Y4 propeller configurations.

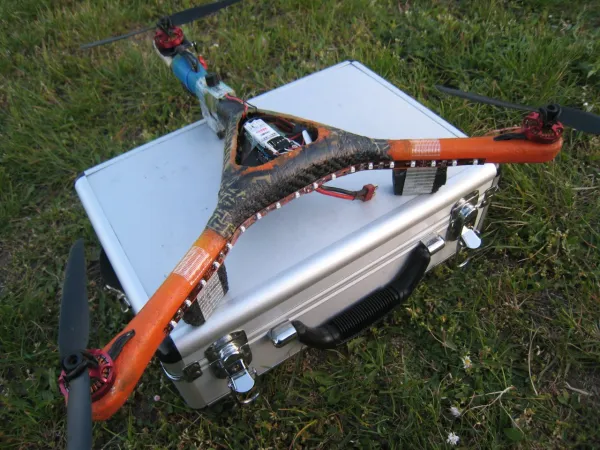
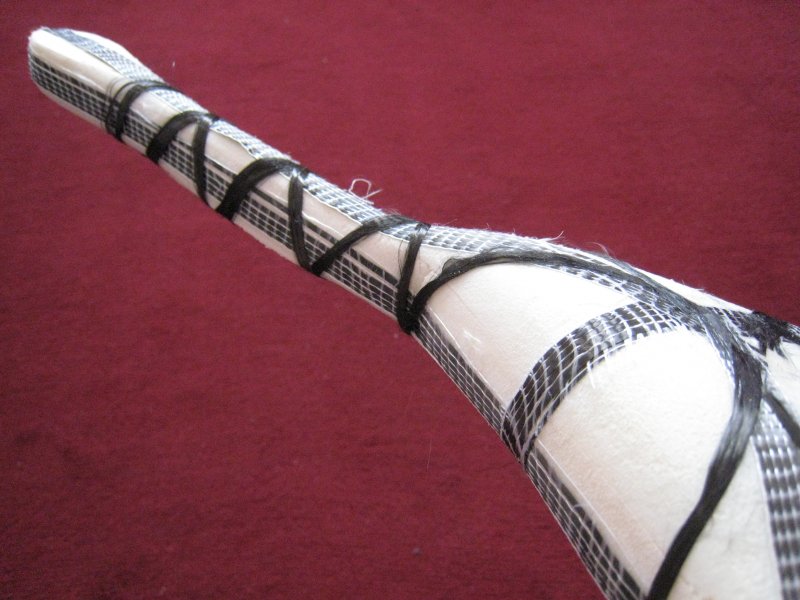
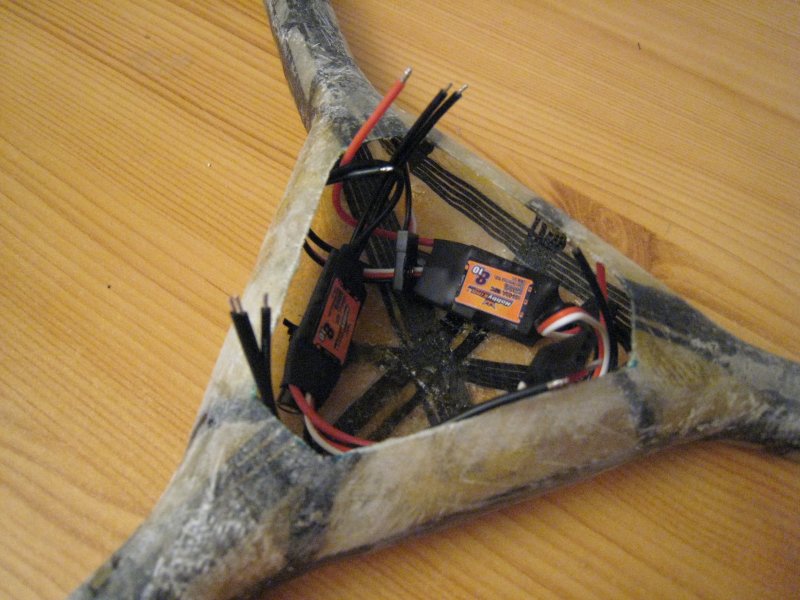
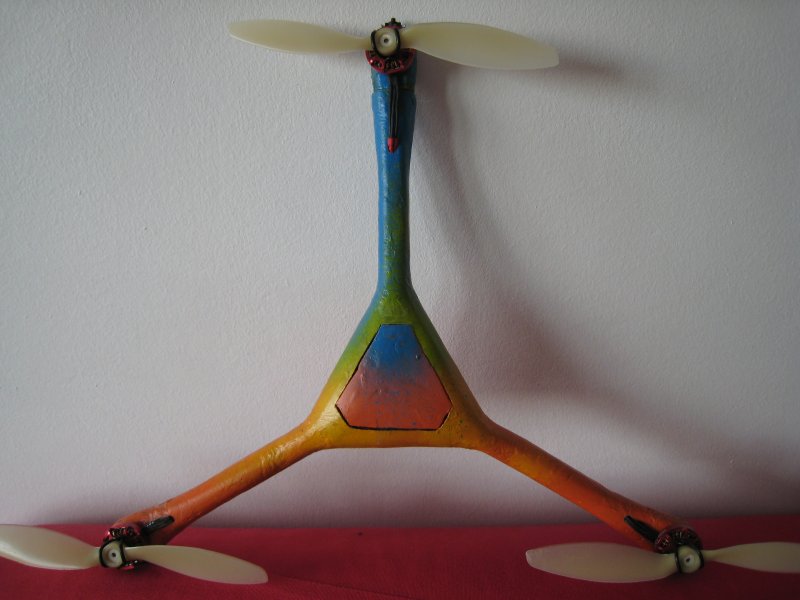
With a working flight controller, [Alexinparis] sent his firmware skyward in a tricopter built from scratch. For a light-but-sturdy shell, he opted for a lost-foam cast hull made from fiberglass and carbon fiber tow. This hull houses most of the electronics safely inside the hollow shell while maintaining the strength to sustain heavy blows from crashes. (The version shown above features additional carbon fiber reinforcement in the center.)

multiwiiLostFoammultiwiiLostFoamHousingmultiwiiDone

More than five years later, MultiWii is a mature open-source project with firmware and wiki under constant update. If you’ve ever considered getting started with multicopters, this project stands as a tested-and-tried road to success. In fact, even RC vendor HobbyKing offers low-cost Multiwii PCBs compatible with the firmware. For more details on the project’s humble beginnings, head on over to the RC Groups thread and followup documentation thread.

We’ve seen MultiWii countless times in the past as the firmware in numerous multicopter builds. It’s about time we give [Alexinparis] some well-deserved credit for paving the way.

Continue reading “Multicopters And Their MultiWii Beginnings”

Another Homebrew Segway Clone Comes In At Under $300

[Matt Turner] tipped us off back in January about his homemade Segway project. Unfortunately that message slipped through the cracks but we’re glad he sent in a reminder after reading Friday’s feature an a different 2-wheeled balancer.

We like it that he refers to this project as being on the budget of a graduate student with a young family. We certainly understand where he’s coming from, and we hope he can ride this to job interviews to show them he truly lives engineering. The control circuitry is a bit higher-end than we’re used to seeing. He chose a Cypress CY8C29466 SoC to control the device. But the sensors are a common choice, using the Wii Motion Plus and Wii Nunchuk for the gyroscope and accelerometer they contain. This is a no-brainer since the sensors are high-quality, cheap and available locally, and communicate of the standard I2C protocol.

When looking for motors [Matt] was happy to find an old electric wheelchair on Craig’s List. This also gave him a gear box, wheels, and tires. He added a pair of motor drivers, with his own alterations to suppress feedback. Sounds like they run a little hot because he plans to add cooling fans to them in the future. But this first iteration is up and running quite well as you can see in the clip after the break.

Continue reading “Another Homebrew Segway Clone Comes In At Under $300”

Quadcopter Build Ready For First Flight

[Abhimanyu Kumar] has been hard at work building and posting about his quadcopter. So far he’s published ten installments for this build, letting us relive the adventure vicariously. But it’s number 11 that we’re really excited about as he plans to share the first free-flight footage in that one.

The bug was planted in his brain after hearing that a quadcopter was used to shoot some of the footage in Spiderman 2. He wanted one to call his very own but the cost of a ready-made unit was out of his league. So he decided to build one instead. The first version uses aluminum bracket for the cross making up the motor mounts. He added LEDs to liven things up and even made a demo video of the thing tied to a table (no IMU yet so free flight would be fatal). After this stepping stone he decided to go with a Wii Motion Plus and Wii Nunchuck as the positioning feedback sensors. There is also a body redesign with helps lighten the load.

It’s a fun project, and we can’t wait to see where he goes from here!

Quadcopter Stabilization System Using Wii Motion Plus

If you’re contemplating a quadcopter build here’s a way to add stabilization hardware without breaking the bank. The BaronPilot project uses an Arduino and a Wii Motion Plus module to ensure an even keel for your flying projects. The hardware inside of the Motion Plus includes two gyroscopes, which the BaronPilot monitors for changes in your flying rig’s orientation. The project serves as a co-pilot by differentiating between movements caused by the remote control, and changes due to wind or other outside factors (like hitting the quadcopter with a stick as seen in the video after the break). It should all translate to less chance of crashing due to operator error.

You can pick up a Motion Plus for less than twenty dollars, a deal when compared to the IMU boards that we usually see in quadcopter builds which usually run more than twice that amount. It’s an I2C device which makes it easy to hook up to just about anything. This project has native support for Teensy, Arduino Nano, and Arduino clones using an ATmega328 chip. But the portability of the Arduino platform should make it easy to tweak the code for use with just about any microprocessor.

Continue reading “Quadcopter Stabilization System Using Wii Motion Plus”

Wii MotionPlus + Arduino

wiimoteplus

[knuckles904] was able to use the new Wii MotionPlus with an Arduino. Nintendo has released the WM+ in order to detect the motion of the controller better. The Wiimote only detects acceleration, whereas the WM+ detects rotation along 3 axes. The Arduino communicates with it over I2C, the same protocol that is used with the Nunchuk. To connect the two devices, he used jumper wires, but breakout boards are also available. He was able to create some example code with help from wiibrew.org. When paired with a Nunchuk, which contains a 3-axis accelerometer, you can have a 6 degrees-of-freedom IMU for under $40, perfect for controlling your robots or logging data.

[via adafruit]