Over the last several years, hackerspaces have cropped up all over the world. These places have become a home base for hackers, tinkerers, makers, designers, and engineers alike. One of the biggest problems associated with these creative environments is the hours that are typically available. A lot of the time you just can’t walk in at odd hours of the night and expect to do anything at all. Granted, the best hackerspaces give out 24 hour access keys to those that pay for it, but sometimes it just feels better to do the work from the comfort of one’s home. Also, if a person doesn’t have the privilege of having a hackerspace in the area, then transforming a garage into a work shop can provide a nice entry point into the continuation of the maker revolution.
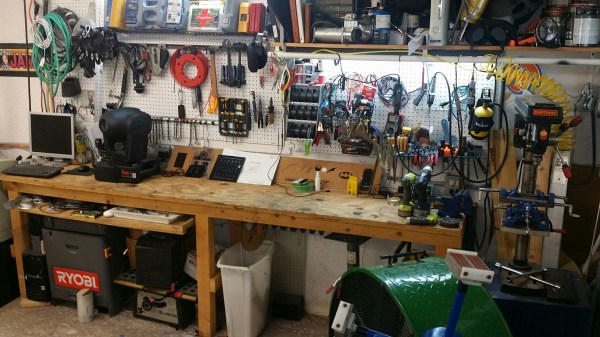
A trend is emerging where garages are being turned into hackerspace-like workshops that are neatly packed away within ordinary neighborhoods. A great example is EdsJunk Home Shop. His two car garage was converted into a maker shop complete with 3D printers, laser cutters, CNC machines, and more tools than one can dream of. The key, as [Ed] states, to creating such a useful home shop is organizing everything strategically.
This project has been a 5 year venture so far and there is still plenty to do. Years of experience have taught [Ed] to coordinate the tools in out-of-the-box ways. His air compressor, for instance, is stored in the attic with a retractable hose descending from the roof down into the garage which helps to save space and reduce noise.