These Twenty Designs Just Won $1000 In The Hackaday Prize

Today we’re excited to announce the winners of the Design Your Concept phase of The Hackaday Prize. These projects just won $1000 USD, and will move on to the final round this fall.

Hackaday is currently hosting the greatest hardware competition on Earth. We’re giving away thousands of dollars to hardware creators to build the next great thing. Last week, we wrapped up the first of five challenges. It was all about showing a design to Build Something That Matters. Hundreds entered and began their quest to build a device to change the world.

There are still four more challenges to explore over the next few months. So far the results have been spectacular. But we’re only a fifth of the way through the Hackaday Prize. So as you celebrate and congratulate the twenty projects below, there’s ample opportunity to get in the game with your own project.

The winners for the Design Your Concept portion of the Hackaday Prize are, in no particular order:

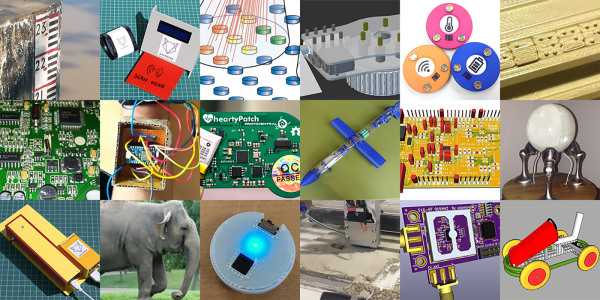
Design Your Concept Hackaday Prize Finalists:

Continue reading “These Twenty Designs Just Won $1000 In The Hackaday Prize”

A Queen Mystery: The Legend Of The Deacy Amp

It sounds like a scene from a movie. A dark night in London, 1972. A young man walks alone, heading home after a long night of practicing with his band. His heavy Fender bass slung over his back, he’s weary but excited about the future. As he passes a skip (dumpster for the Americans out there), a splash of color catches his attention. Wires – not building power wires, but thinner gauge electronics connection wire. A tinkerer studying for his Electrical Engineering degree, the man had to investigate. What he found would become rock and roll history, and the seed of mystery stretching over 40 years.

The man was John Deacon, and he had recently signed on as bassist for a band named Queen. Reaching into the skip, he found the wires attached to a circuit board. The circuit looked to be an amplifier. Probably from a transistor radio or a tape player. Queen hadn’t made it big yet, so all the members were struggling to get by in London.

Deacon took the board back home and examined it closer. It looked like it would make a good practice amplifier for his guitar. He fit the amp inside an old bookshelf speaker, added a ¼ “ jack for input, and closed up the case. A volume control potentiometer dangled out the back of the case. Power came from a 9-volt battery outside the amp case. No, not a tiny transistor battery; this was a rather beefy PP-9 pack, commonly used in radios back then. The amp sounded best cranked all the way up, so eventually, even the volume control was removed. John liked the knobless simplicity – just plug in the guitar and play. No controls to fiddle with.

And just like that, The Deacy amp was born.

Continue reading “A Queen Mystery: The Legend Of The Deacy Amp”

Powerful, Professional Brushless Motor From 3D-Printed Parts

Not satisfied with the specs of off-the-shelf brushless DC motors? Looking to up the difficulty level on your next quadcopter build? Or perhaps you just define “DIY” as rigorously as possible? If any of those are true, you might want to check out this hand-wound, 3D-printed brushless DC motor.

There might be another reason behind [Christoph Laimer]’s build — moar power! The BLDC he created looks more like a ceiling fan motor than something you’d see on a quad, and clocks in at a respectable 600 watts and 80% efficiency. The motor uses 3D-printed parts for the rotor, stator, and stator mount. The rotor is printed from PETG, while the stator uses magnetic PLA to increase the flux and handle the heat better. Neodymium magnets are slipped into slots in the rotor in a Halbach arrangement to increase the magnetic field inside the rotor. Balancing the weights and strengths of the magnets and winding the stator seem like tedious jobs, but [Cristoph] provides detailed instructions that should see you through these processes. The videos below shows an impressive test of the motor. Even limited to 8,000 rpm from its theoretical 15k max, it’s a bit scary.

Looking for a more educational that practical BLDC build? Try one cobbled from PVC pipes, or even this see-through scrap-bin BLDC.

Continue reading “Powerful, Professional Brushless Motor From 3D-Printed Parts”

A Digital Tacho For A Harley

If you are a lover of motorcycling, you’ll probably fit into one or other of the distinct groups of riders. Maybe you’re a sportsbike lover always trying to get your knee down, a supermotard who gets their knee down without trying, a trailie rider for whom tarmac is an annoyance between real rides, or a classic bike enthusiast who spends more time in the workshop than riding.

[Xavier Morales] is none of these, for he cruises the roads of his native Catalonia on a Harley-Davidson Sportster. If you’re familiar with Harleys only from popular culture, or you’re a sportsbike rider who derides them for anachronistic handling and brakes, it’s worth taking a look at a modern Harley from a technical standpoint. Despite styling and brand ethos that evokes another era with the trademark large V-twin engine that looks to the untrained eye the same as it did decades ago, today’s Harley is a very modern machine, and much more capable than the sneering sportsbiker would give it credit for.

There is one area though in which [Xavier]’s Harley was sorely lacking. Its single instrument was a speedometer, it had no rev counter. You might think this would be less of an issue with the lower-revving Harley engine than it would be with a Japanese sportsbike that exists in a hail of revs, but it was annoying enough to him that he built his own tachometer. His write-up of the project is both lengthy and fascinating, and well worth a read.

The Sportster’s data bus follows an established but obsolete standard, SAE J1850 VPW. Since driver chips for this bus are out of production, he had to create his own using a transistor and a couple of resistors. Once he has the data he feeds it to a PIC 18F2553 which in turn runs a display driver chip controlling a brace of 7-segment LEDs. There are also a set of LEDs to indicate gear changes. The whole is installed in a 3D-printed housing alongside the original speedometer, behind the glass from another dial. As a result it looks as though the bike was always meant to be a two-clock design, with a professional appearance.

If you’d like to see it in action, he’s posted a few videos, and we’ve put one below the break. The beautiful Catalan scenery and the mountain twisties look very inviting.

Continue reading “A Digital Tacho For A Harley”