Turning A Microchip MPLAB Snap Into A UDPI AVR Programmer

The Unified Program and Debug Interface (UPDI) is Microchip’s proprietary interface for programming and on-chip debugging, and has become the standard on AVR MCUs after Microchip’s purchase of Atmel. Being a proprietary interface means that even entry-level programmers like the Atmel-ICE are rather expensive at over $100. That’s when for [Scott W Harden] the question arose of whether the much cheaper MPLAB Snap board (~$34) could be used as well for AVR UDPI purposes.

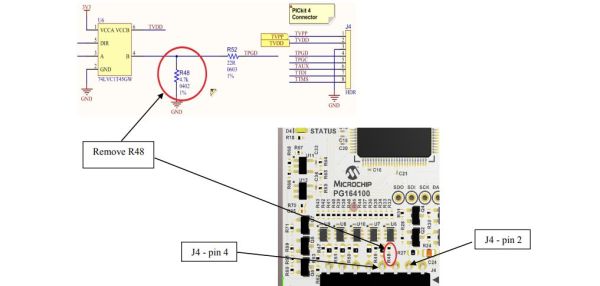
The stages of grief that [Scott] went through before he had it working involved among others the updating of the MPLAB Snap board firmware, getting yelled at by the Microchip Studio IDE when attempting to use the Snap for AVR MCU programming, and ultimately fixing the board following the relevant Microchip Engineering Technical Note (ETN #36) that specifies the removal of a 4.7 kΩ pull-down resistor (R48) on the Snap board. This allows the UDPI line to be pulled high by the MCU.

As the ETN notes, an external pull-up may also be used to override the pull-down, which would leave the ICSP functionality of of the Snap intact. As [Scott] mentions in his conclusion, it feels as if UDPI AVR support with the Snap is really an afterthought for Microchip. Meanwhile there are also more DIY solutions as [Scott] adds, which are useful for just flashing the MCU. An example is with a USB-TTL serial adapter and pymcuprog.

The problem with DIY solutions like jtag2updi, ftdi2updi, and their kin is the effort required to assemble them, and the uncertainty of long-term support as the UPDI ecosystem keeps evolving with new devices and new features. The MPLAB Snap with resistor mod may be just that middle ground between an Atmel-ICE and reverse-engineered OSS projects.

(Featured image: MPLAB Snap resistor mod illustrated, from Microchip ETN #36)

Showing An AVR Programmer Who’s Boss

[Bogdan] makes a good point. When you use a dev board you get programming, debugging, power sourcing, and usually a UART. When you go to the trouble of hooking up a programmer why don’t you get the same thing? Astutely, he points out that all you usually get with programmers is programming. So he set out to add features to the hardware he uses to program XMEGA.

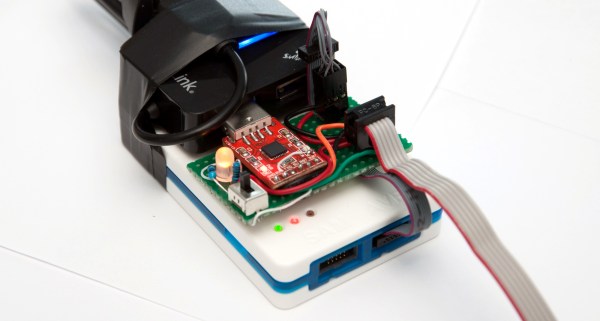
The first part of the trick hinges on his use of PDI programming. This is slightly different from ISP programming. Both use a six-pin connector cable but with PDI two of these pins are unused. He took this opportunity to reroute the chip’s TX and RX pins through the cable, which now gives him an avenue to use a UART-to-USB adapter without adding any cables to his target board. Rather than add a second USB cable he rolled a USB hub into the mix. An LM1117 regulates the 5V USB rail down to 3.3V as a source for the target board.

The programmer being used is an Atmel ICE. As you might imagine he didn’t want to make permanent alterations to it. His modifications are all handled externally, with one IDC cable connecting the programmer to his added circuitry and another headed off to the target board. For now he’s jumpering RX/TX to the programming header but plans to route the signals on future PCBs.

High Voltage AVR Programmer

The most common way of programming AVR microcontrollers is the In System Programming port. That little six-pin header with MOSIs and MISOs coming out of it will program every AVR you’ll ever come across. The ISP does have a downside – fuses. Set your fuses wrong, and without a High Voltage Serial Programmer, your chip is bricked. [Dilshan] designed his own HVSP that’s less expensive than the Atmel STK500 and has a nice GUI app.

Instead of following in the footsteps of the USBtinyISP, [Dilshan] is using a PIC18F as the main microcontroller in the programmer. This chip was chosen because of its built-in USB functionality. Because the High Voltage part of a HVSP operates at 12V, actually providing that voltage needed to be taken into consideration. For this, [Dilshan] is using standard 78xx regulators with an 18V input.

The app to control this programmer does everything you would expect, including all the usual AVRdude commands. A great build, and just what we need to reset the fuses on a few dozen chips we have sitting around.

AVR Programmer

Inexpensive AVR Programmer Made From Five Components

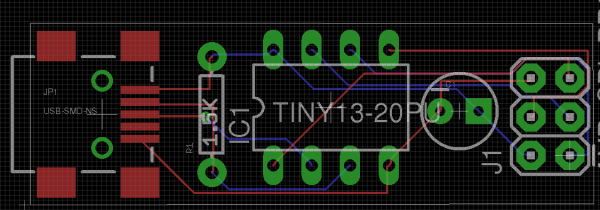
If you want to program an AVR chip as inexpensively as possible, then [Ian’s] solution might just be for you. He built an AVR programmer using only four components. This design is based on the vusbtiny AVR programmer design, with a few components left out.

[Ian’s] design leaves out two of the resistors and two diodes, leaving just four components. These include a 1.5k resistor, a small capacitor, a USB connector, a six pin header, and an ATtiny45. He admits that this may not be exactly up to USB spec, but it does work.

This is one of those projects that is really an exercise in “will it work?” more than anything else. The fact that you need to first program an AVR chip means that this wouldn’t be useful in a pinch, because you would already have to have a working programmer. Nonetheless, it’s always fun to see what can be done with as little as possible.

USB Keyboard Becomes An AVR Programmer

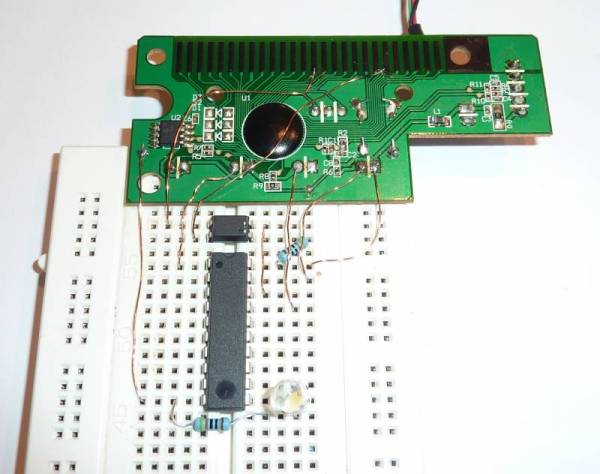
[Steve] created an AVR programmer using an old USB keyboard. We feature a bunch of AVR programmers, but this one is made from parts that many people will have lying around. There are two components: the controller PCB from a USB keyboard, and an optocoupler for emulating key presses.

In order to send data to the AVR, [Steve] used the LED outputs on the keyboard. These LEDs can easily be toggled according to the HID device specification. They provide a 5 volt output with current limiting resistors, which means they can be connected directly to the target AVR.

Reading data is a bit more complex. The optocoupler tricks the keyboard into believing that a single key has been pressed, firing off a data transfer. The MISO pin on the AVR is connected to the row and column of the shift key, which is read by the driver.

On the software side [Steve] created an avrdude interface driver. This allows the programmer to be used with avrdude, just like any other programmer. [Steve] does point out that it isn’t the fastest programmer since the keyboard tries to debounce the MISO input, greatly limiting the speed. However, since it’s made from stuff you might have in your junk bin, it’s a neat hack.

AVR Programmer Made Without A Programmer

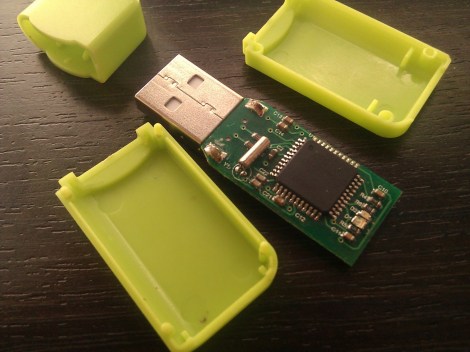
[blueHash] uses this cheap development board as an AVR programmer. What’s interesting to us is that it solves the chicken-or-egg problem that is usually encountered when bootstrapping a programmer. We’ve written about this issue before. Most programmers use microcontrollers, which first need to be flashed using a programmer. But it turns out the chip on this dev board has a DFU mode which gets around that conundrum.

He grabbed a uSD dev board for about $6. It’s got a crystal, an ATmega32u4 chip, and on the other side there’s a MicroSD card slot. We looked around and found an Atmel Datasheet (PDF) which describes the Device Firmware Upgrade mechanism. The AVR devices which support DFU are factory configured to use it. This dev board is designed to use DFU so all [blueHash] needed to do is find and configure a ISP firmware package that worked with this chip.

Raspberry Pi As An AVR Programmer

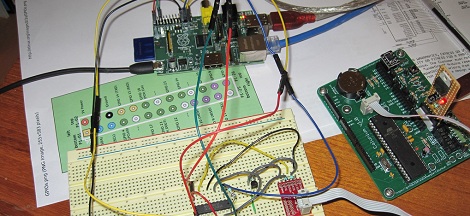
AVR programmers can be bought for just a few dollars on the Internet, but if you’re building an expansion board with an AVR for your Raspi, this is the build for you. It’s a safe way of programming an AVR via the Raspi’s GPIO pins that uses an extremely minimal circuit.

The AVR ISP interface looks a lot like an SPI interface, and the easiest way to program an AVR with a Raspi would be to bitbang all the commands from the GPIO pins. Sometimes, though, the logic of the AVR and Raspi would be at different levels, so while bitbanging may work in a pinch it’s not something anyone should use regularly.

To get the Raspi and AVR talking to each other safely, [Steve] built a small circuit from a 74244 buffer and a FET. With the added support for Linux GPIO avrdude programming, it’s a snap to program an AVR with a Raspi.

A few days ago we ran across a hugely overwrought PIC programmer for the Raspi, so we’re glad to see another round in the PIC/AVR holy war go to the AVR camp.

Thanks [Mateusz] for sending this one in.