Building your own watch or clock is kind of a maker’s rite of passage. Once upon a time, if you went with a wrist watch, you’d typically work on producing your own compact PCB with everything crammed into a typical watch form factor, maybe relying on a simple binary output for compactness and simplicity. Times have changed, however, and [Arnov]’s design is altogether different in its construction.
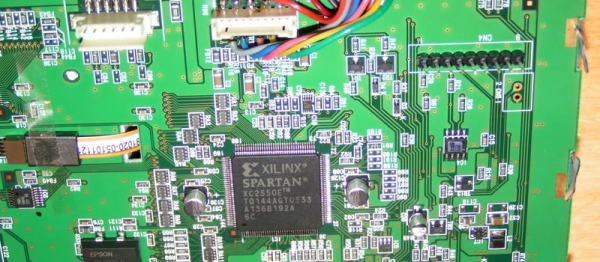
The build relies on a XIAO ESP32-C3 microcontroller board as the brains of the operation. It’s paired with the XIAO expansion board. It’s designed as a carrier for the ESP32-C3, giving it a bunch of IO that’s accessible over readily-accessible connectors. It also features a display, a real-time clock, and a battery — pretty much the three main things you’d need to add to an ESP32 to turn it into a watch.
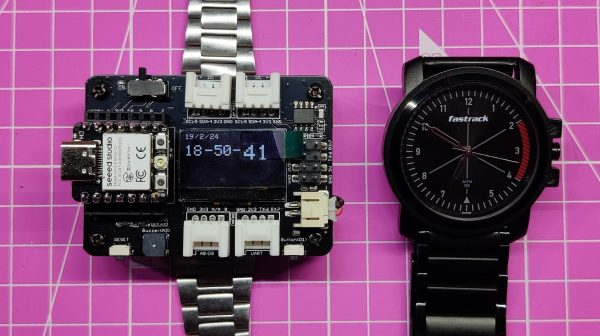
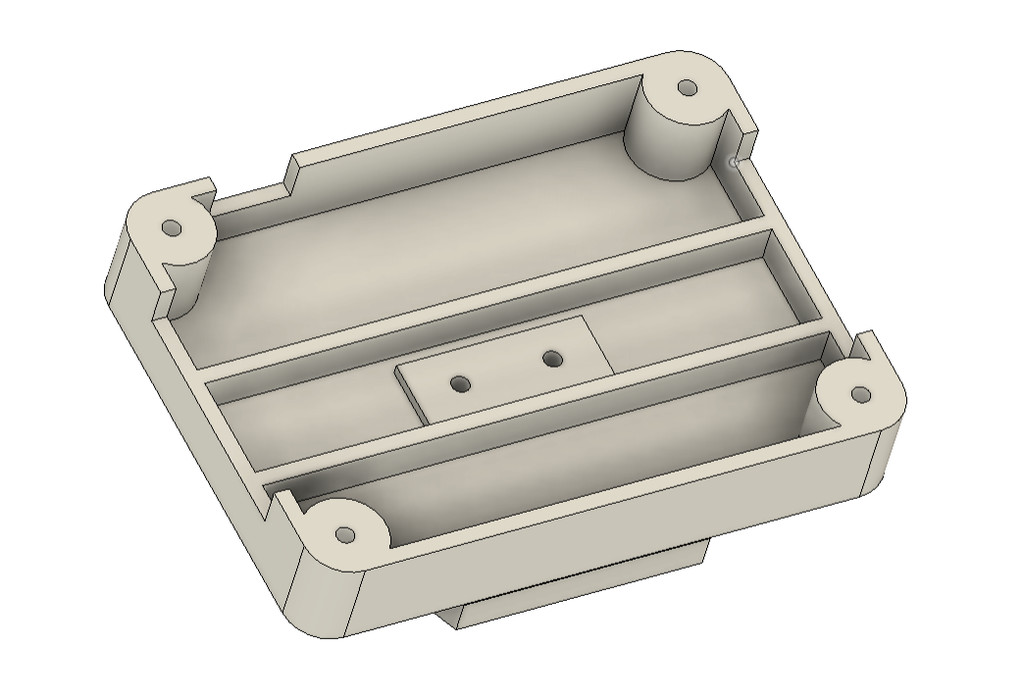 Thus, with the electronics pretty much done, it was simply up to [Arnov] to turn the device into a watch. He achieved this by screwing the frame and strap of an old Casio watch to a 3D printed carrier for the XIAO expansion board. With that done, it was simply a matter of writing the code to show the time from the RTC on the display. There’s no connectivity features, no smart stuff going on — just the time and date for your perusal.
Some might decry the project for simply slapping a watch band on a devboard. Or, you could look at how this indicates just how fast and easy development can be these days. Once upon a time, you could spend weeks trying to find a cheap display and then further weeks trying to get it working with your microcontroller. Now you can spend $20, get the parts in a few days, and get your project blasting along minutes later.
If you’ve done an altogether more ornate watch build of your own, we’d love to see that, too. Show us on the tipsline!