Inside A Rubidium Frequency Standard

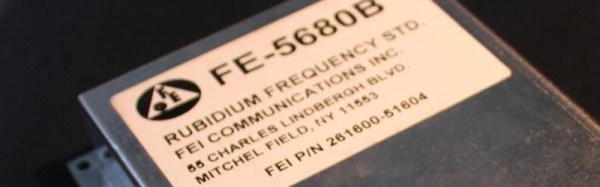
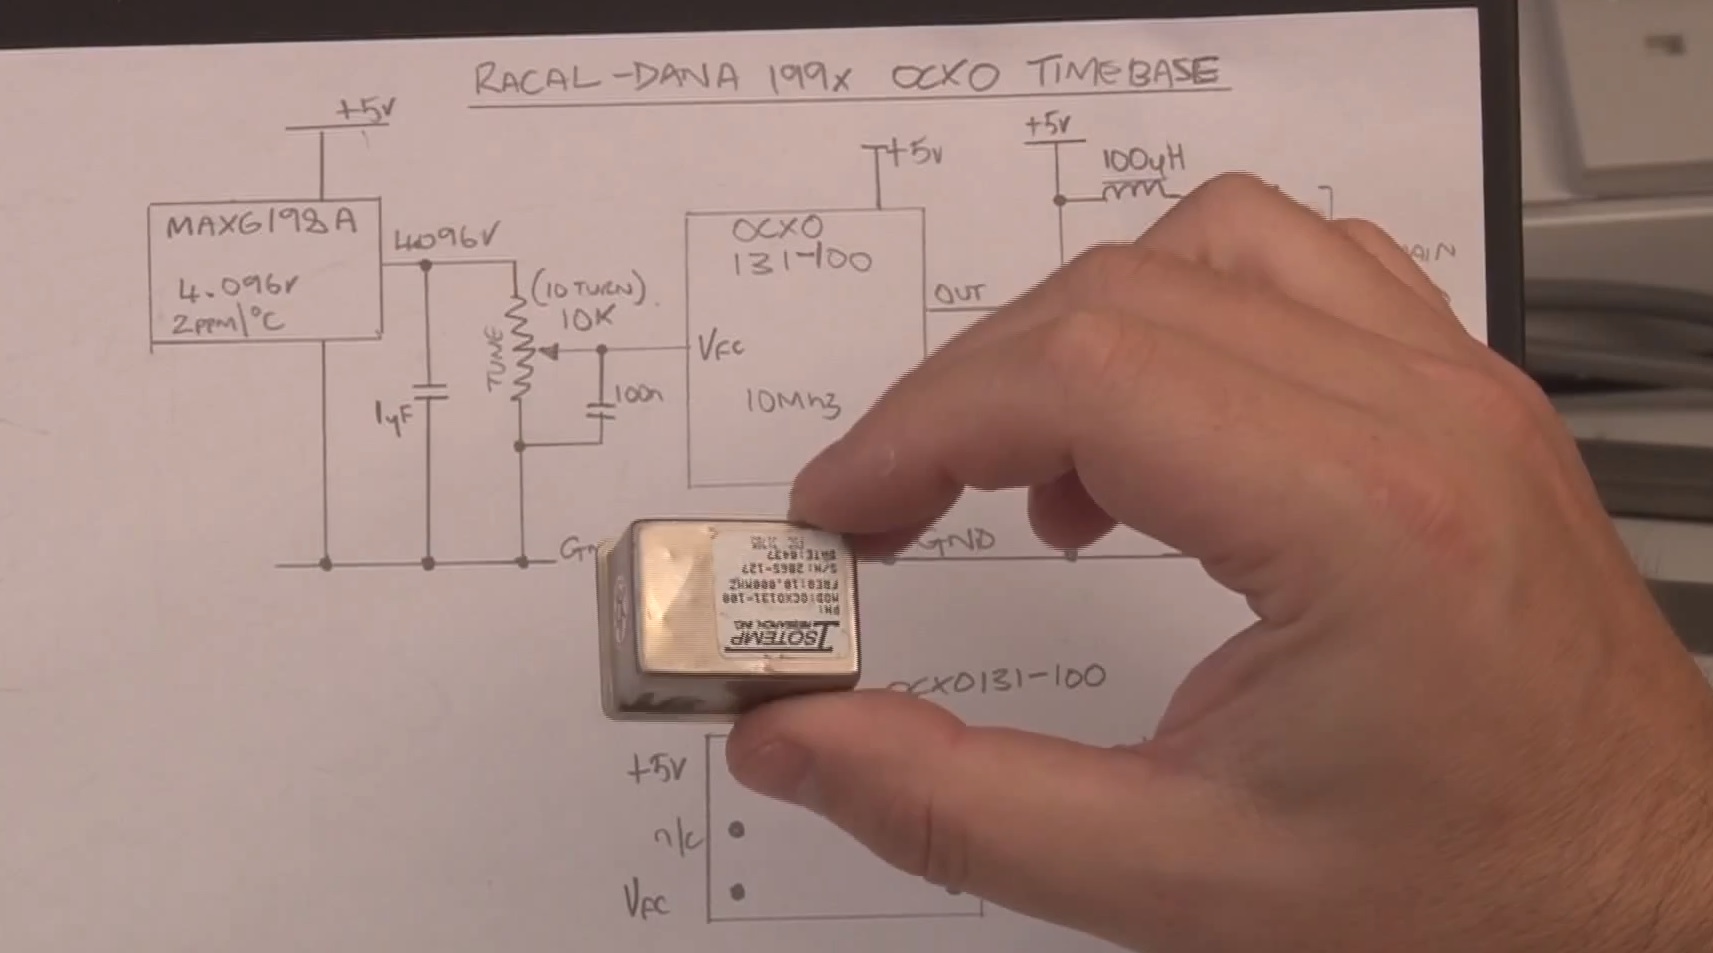
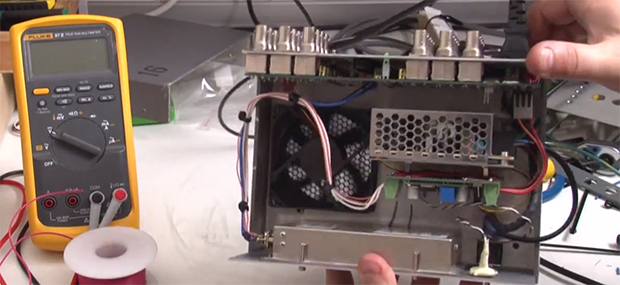
We think of crystals as the gold standard of frequency generation. However, if you want real precision, you need something either better than a crystal or something that will correct for tiny errors — often called disciplining the oscillator. [W3AXL] picked up a rubidium reference oscillator on eBay at a low cost, and he shows us how it works in the video you can see below. He started with a GPS-disciplined oscillator he had built earlier and planned to convert it to discipline from the rubidium clock.

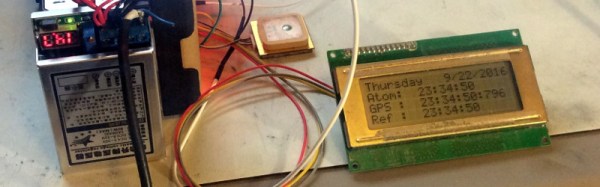
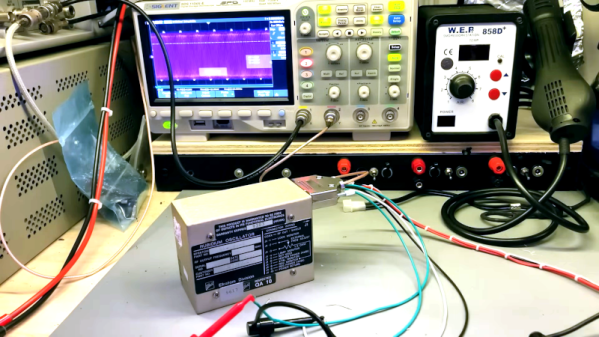
The connector looks like a D-shell connector superficially, but it has a coax connector in addition to the usual pins. The device did work on initial powerup, and using a lissajous pattern to compare the existing oscillator with the new device worked well.

Continue reading “Inside A Rubidium Frequency Standard”

Rubidium Disciplined Real Time Clock

[Cameron Meredith] starts the Hackaday.io page for one of his projects by quoting a Hackaday write-up: “A timepiece is rather a rite of passage in the world of hardware hacking“. We stand by that assertion, but we’d say most of the clocks we feature aren’t as capable as his project. He’s made a real-time-clock module controlled by a rubidium frequency standard, and since it also includes a GPS clock he can track local time dilation effects by comparing the two.

Surplus rubidium standards are readily available, but each description of one seems to feature a lot of old-fashioned hardware hacking simply to get it working. This one is no exception, an unusual connector had to be replaced and an extra power supply module attached. Once those modifications had been made and a suitable heatsink had been attached, he was able to bring the rubidium standard, an RTC module, and GPS module together with an ATMega32U4 miniature Arduino-compatible board and an LCD display. The firmware is functional, but he admits it is not finished.

All the project’s files can be found on the Hackaday.io page linked above. Future plans include also monitoring the NIST WWVB radio time signal from Fort Collins, Colorado, for an extra time dilation comparison.

We’ve featured innumerable clocks over the years here at Hackaday, but among them have been a few based upon atomic standards. More than one has been used as a lab reference standard, but most similar to this build is [Max Carters] experiments to check the accuracy of an atomic standard, also using the WWVB transmissions.

A Rubidium Reference For Discrete Component Clocks

Sometimes you open a freshly created Hackaday.io project and discover more than you expect. A moment of idle curiosity turns into a lengthy read involving several projects you wonder how you managed to miss the first time around. So it was this morning, with [Yann Guidon]’s documentation of his eBay-purchased rubidium frequency standard. In itself an interesting write-up, with details of reverse engineering the various different internal clock signals to derive more than just the standard 1-second pulses, and touching on the thermal issues affecting frequency lock.

Transistors were EXCITING back then!

It is when you look at his intended use for the standard that you’ll see the reason for the lengthy read. He has a couple of discrete component clock projects on the go. His first, a low-powered MOSFET design, promises to break the mold of boring silicon bipolar transistors with hefty power consumption. It is his second, a design based on germanium transistors and associated vintage components, that really stands apart. Not a Nixie tube in sight, but do browse the project logs for a fascinating descent into the world of sourcing vintage semiconductors in 2016.

Neither clock project is finished, but both show significant progress and they’ll certainly keep time now that they’ll be locked to a rubidium standard. Take a look, and keep an eye on progress, we’re sure there will be more to come.

We’ve featured a couple of rubidium standards here in the past. This rather impressive clock has one, and here’s one assembled into a piece of bench equipment. They’re readily available as surplus items for the curious constructor, we’re sure that more will feature here in the future.

Jaw-Dropping Atomic Clock Build

You could cruise the Internet bazaars for a talking clock but you’ll never find one as awesome as this. Just look at it… even if it didn’t work it would be awesome.

[Art] certainly lives up to his username. His Rubidium-standard atomic real-time clock is surely an example of hardware art. The substrate is a collection of point-to-point soldered perfboard modules. Each laid out meticulously. What does such layout call for? A gorgeous enclosure which doesn’t obscure your view of the components. For this he went with a copper tube frame and a custom fabricated aluminum chassis pan.

For the circuit itself [Art] tells us he wanted to build something akin to the old HP nixie frequency counters so he went with logic chips. The pictures and a few video annotations are the only clues we have for how this works. Hopefully your encouragement in the comments will help prompt him to share more about that.

Oh, and the talking clock part that we referred to earlier? Every minute you get a readout of the time thanks to a PIC playing back audio using [Roman Black’s] BTc sound compression algorithm.

Continue reading “Jaw-Dropping Atomic Clock Build”

DIY High Stability Timebase Hack For ~$25. Why? Frequency Stability Matters!

DIY High Stability Timebase OCXO

If you have an old “Racal-Dana 199x” frequency counter or similar 10 MHz internally referenced gear with a poor tolerance “standard quartz crystal oscillator” or bit better “temperature compensated crystal oscillator” (TCXO) you could upgrade to a high stability timebase “oven controlled crystal oscillator” (OCXO) for under $25. [Gerry Sweeney] shares his design and fabrication instructions for a DIY OCXO circuit he made for his Racal-Dana frequency counter. We have seen [Gerry] perform a similar upgrade to his HP 53151A, however, this circuit is more generic and can be lashed up on a small section of solderable perf board.

Oven controlled oscillators keep the crystal at a stable temperature which in turn improves frequency stability. Depending on where you’re starting, adding an OCXO could improve your frequency tolerance by 1 to 3 orders of magnitude. Sure, this isn’t as good as a rubidium frequency standard build like we have seen in the past, but as [Gerry] states it is nice to have a transportable standalone frequency counter that doesn’t have to be plugged into his rubidium frequency standard.

[Gerry’s] instructions, schematics and datasheets can be used to upgrade any lab gear which depends on a simple 10 MHz reference (crystal or TXCO). He purchased the OCXO off eBay for about $20 — it might be very old, yet we are assured they get more stable with age. Many OCXO’s require 5 V, 12 V or 24 V so your gear needs to accommodate the correct voltage and current load. To calibrate the OCXO you need a temperature stable variable voltage reference that can be adjusted from 1 to 4 volts. The MAX6198A he had on hand fit the bill at 5 ppm/°C temperature coefficient. Also of importance was to keep the voltage reference and trim pot just above the oven for added temperature stability as well as removing any heat transfer through the mounting screw.

You can watch the video and get more details after the break.

Continue reading “DIY High Stability Timebase Hack For ~$25. Why? Frequency Stability Matters!”

Turning A Rubidium Standard Into A Proper Tool

Rb

You can find rubidium frequency standards all over eBay and various surplus dealers. They’re actually quite interesting devices, able to generate a 10 MHz sine wave with enough precision to be a serviceable atomic clock. While these standards can find themselves very useful in a lab, they’re only a component, and not a working-out-of-the-box device. [Gerry] decided he would fix that, turning his rubidium standard into a proper piece of bench equipment, all in a single afternoon.

[Gerry]’s first step was finding a proper enclosure for his new piece of equipment. Most of the time, choosing an enclosure is practice in the art of compromise. This time, though, [Gerry] found the perfect enclosure: an old piece of video distribution equipment. On the back of this box, there are a ton of BNC plugs, perfect for attaching to random lab equipment and feeding them a signal from the rubidium standard.

After going through the video circuit and changing the 75 Ohm outputs to 50 Ohms, [Gerry] wired up an eBay power supply, fan, and a small circuit with an 8-pin PIC to complete his new tool. The rubidium standard does get freakishly hot, but hopefully mounting it to a large aluminum box with a bit of cooling will keep all the added electronics in working order.

[Gerry] did all this in just under 5 hours. An impressive feat, given that he probably spent that much time editing the video, available below.

Continue reading “Turning A Rubidium Standard Into A Proper Tool”