Bypassing Seagate ATA Security Lock

Here’s a common story when it comes to password retrieval: guy sets up a PC, and being very security-conscious, puts a password on his Seagate hard drive. Fast forward a few months, and the password is, of course, forgotten. Hard drive gets shuffled around between a few ‘computer experts’ in an attempt to solve the problem, and eventually winds up on [blacklotus89]’s workbench. Here’s how he solved this problem.

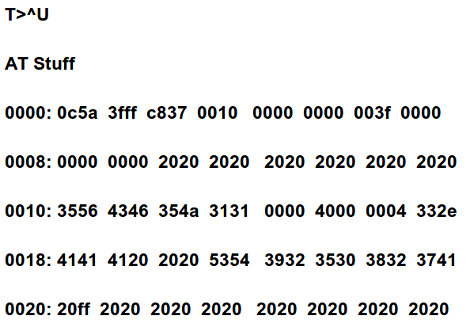
What followed is a walk down Hackaday posts from years ago. [blacklotus] originally found one of our posts regarding the ATA password lock on a hard drive. After downloading the required tool, he found it only worked on WD hard drives, and not the Seagate sitting lifeless on his desk. Another Hackaday post proved to be more promising. By accessing the hard drive controller’s serial port, [blacklotus] was able to see the first few lines of the memory and the buffer.

Two hours and two Python scripts later, [blacklotus] was able to dump the contents of his drive. He then took another Seagate drive, locked it, dumped it, and analyzed the data coming from this new locked drive. He found his old password and used the same method to look for the password on the old, previously impenetrable drive. It turns out the password for the old drive was set to ‘0000’, an apparently highly secure password.

In going through a few forums, [blacklotus] found a lot of people asking for help with the same problem, and a lot of replies saying. ‘we don’t know if this hard drive is yours so we can’t help you.’ It appears those code junkies didn’t know how to unlock a hard drive ether, so [blacklotus] put all his tools up on GitHub. Great work, and something that didn’t end up as a Hackaday Fail of the Week as [blacklotus] originally expected.

Recovering From A Seagate HDD Firmware Bug

Hard drive firmware is about the last place you want to find a bug. But that turned out to be the problem with [BBfoto’s] Seagate HDD which he was using in a RAID array. It stopped working completely, and he later found out the firmware has a bug that makes the drive think it’s permanently in a busy state. There’s a firmware upgrade available, but you have to apply it before the problem shows its face, otherwise you’re out of luck. Some searching led him to a hardware fix for the problem.

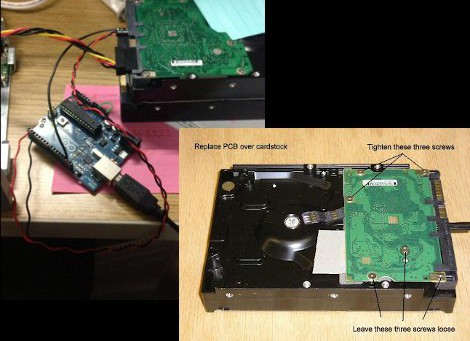
[Brad Garcia] put together the tutorial which illustrates the steps needed to unbrick the 7200.11 hard drive with the busy state bug. The image in the lower right shows the drive with a piece of paper between the PCB and the connectors which control the head. This is necessary to boot the drive without it hanging due to the bug. From there he issues serial commands to put it into Access Level 2, then removes the cardboard for the rest of the fix.

In the tutorial [Brad] uses a serial-TTL converter. [BBfoto] grabbed an Arduino instead, using it as a USB-ttl bridge.

Bricking A Seagate Drive While Trying To Make It Work In An Xbox 360

If you’re looking to replace the hard drive in your Xbox 360 without just buying an official unit, you may be out of luck. There is a tool which will let you do it if you are using aWestern Digital drive as the replacement. But if your new drive is a Seagate this tool will not work. [Darth Circuit] set out to make his Seagate work in the Xbox 360, but his manual changes ended up bricking the drive because of just one little error.

The tool that does this with WD drives is called HddHackr. [Darth] started his quest by finding out what the program actually does. In order to stand in for the original drive the new one must have the same model number, serial number, LBA, and firmware revision. Once these values are changed in a binary file it is written to the drive at a specific location. He changed these values on the drive itself, and got pretty far. That is until he tried a new command which ended up locking him out of the drive. Right now it’s pretty much a brick but we hope someone can pick up where he left off and turn this work into something useful for others. Good luck!

Mac SE Reborn As A Server And Mac Emulator

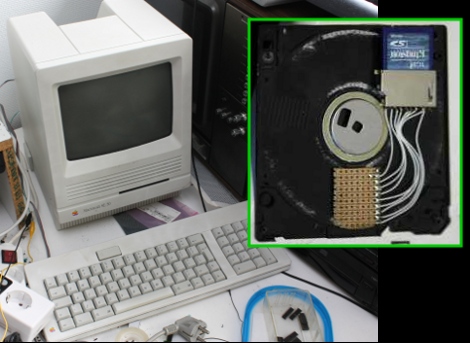
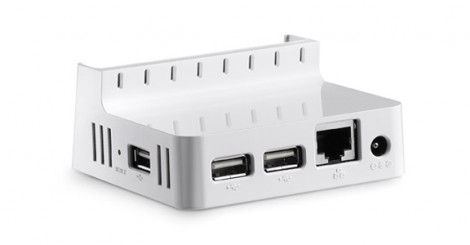
[Sprite_TM] cooked up an amazing hack by resurrecting a Mac SE using a Dockstar and ARM processor. The retro hardware had a bad mainboard thanks to the corrosive properties of a failed backup-battery. He had been wanting to do something with the Seagate Dockstar and decided it would find a nice home in the Mac. But what fun is a dead machine housing a headless server? To add to the fun he included an ARM processor running a Mac emulator, along with all the bits to make the screen, keyboard, and peripherals work. When the Mac is off the Dockstar still runs as a server.

But one of the best parts is the floppy drive. It still takes floppies, but there’s no magnetic media inside of them anymore. Instead, he’s added an SD card slot and some protoboard in the space for the read head. The drive itself has had the read head transplanted for some pogo pins (hey, we saw those earlier today). When you insert the floppy, the pogo-pins raise up and contact the protoboard, connecting the SD card to a Teensy microcontroller.

There’s so much going on with this project we just can’t cover it all here. Things like a chemical cleaning to return the original color of the classic case, and building a converter so that the peripherals are USB compatible are just some of the pleasures awaiting you in [Sprite_TM’s] post. He’s also filmed a demo video that we’ve embedded after the break.

Continue reading “Mac SE Reborn As A Server And Mac Emulator”

More OpenWRT Image Building For The Dockstar

[Der_picknicker] wrote in to let us know about a guide to building OpenWRT images for the dockstar (translated). What they end up with is a nice little network attached storage device that runs SAMBA and subversion under the umbrella of OpenWRT. We looked at flashing and building OpenWRT images for this device back in July. The development branch of OpenWRT hasn’t quite reached a stable release yet, but much has been done in the last few months.

The machine translation is a little rough, but the compilation process is easy enough to follow. If you don’t care to slog through compiling (which apparently takes 1-2 hours) they’ve also made their images available for download. It should be possible to flash via SSH but you might want to add a serial port to the device just to be safe.

Adding A Serial Port To A Dockstar

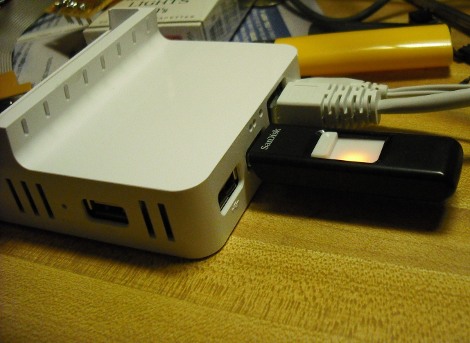
If you don’t look close you might think this Seagate Dockstar is in stock condition. But look at the three holes in the white case just above the thumb drive which act as a serial connection for the Dockstar. [Firestorm_v1] posted the instructions after see our post about installing OpenWRT on the device. He did a nice job of concealing the connection, heating up a pin header to melt the holes he needed. Now he has quick access without sacrificing features or aesthetics. A serial-to-USB cable is modified with a polarized pin header to ensure a quick and accurate connection. This is great for PC connectivity but you also never know when you want to add your own hardware bits to the network device.

OpenWRT On A Seagate FreeAgent Dockstar

The Seagate FreeAgent Dockstar aims to make all of your stuff available online. It serves that purpose but sometimes you just want more options for controlling your hardware and running some scripts. [Eric Cooper] put together a guide for installing OpenWRT on the Dockstar by building your own kernel and loading it onto the internal storage. Once you have a kernel that will play nicely with the hardware, you can install it by tunneling in through SSH; the same method you would use if you wanted to run Linux on this hardware. If you have problems along the way, [Eric’s] also included a guide for cracking the Dockstar open and connecting a serial cable.