Arduino-Controlled Marquee Arrow Points The Way To Whatever You Like

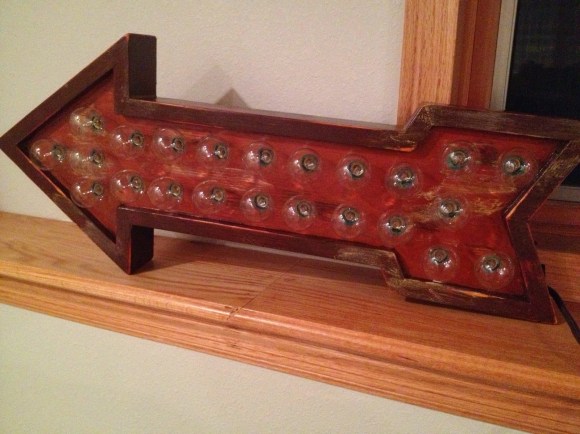
Reader [pscmpf] really digs the scrolling light look of old marquee signs and as soon as he saw some Christmas lights with G40 bulbs, he was on his way to creating his own vintage-look marquee arrow.

We must agree that those bulbs really do look like old marquee lights or small vanity globes. [pscmpf] started by building, varnishing, and distressing the wooden box to display the lights and house the electronics. He controls the lights with an Arduino Pro and an SSR controller board. The 24 lights are divided into ten sections; each of these has its own solid-state relay circuit built around an MC3042 as the opto-coupler, with a power supply he made from a scrap transformer.

[pscmpf] shares some but not all of his code as it is pretty long. There are five patterns that each play at three different speeds in addition to a continuous ‘on’ state. In his demonstration video after the jump, he runs through all the patterns using a momentary switch. This hack proves that Arduino-controlled Christmas lights are awesome year-round.

Continue reading “Arduino-Controlled Marquee Arrow Points The Way To Whatever You Like”

Update: Grow Controller Rebuilt To Last

new-grow-controller

[The Cheap Vegetable Gardener] assembled his first grow controller about three and a half years ago. He’s been very happy with it and knows that he’ll be using it for years, maybe even decades to come. He just finished overhauling the grow controller design to help make sure he doesn’t burn down his garage one day. You have to admit, without knowing anything about the project this rendition does look safer than his original offering.

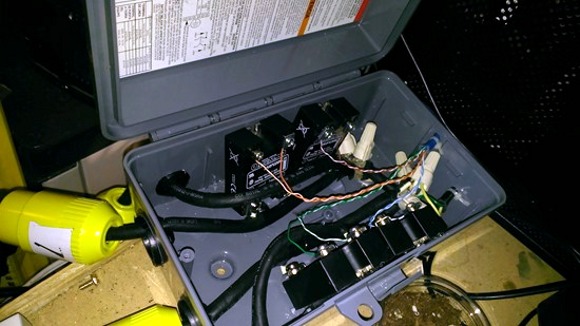
Pictured above is the weather-proof enclosure he used to house four mains-rated solid state relays. This box is isolated from the control hardware, providing heavy-duty utility plugs to interface with the heater, lights, fan, and water pump.  He mounted the Arduino board which controls the relays to the outside of the box, using the Ethernet wire to switch the SSRs. It uses a manufactured shield he designed which will help ease the pain of fixing the system if parts ever go bad.

Later on in the build he shows the grow light and heaters used in his operation. The heaters simply screw into light sockets; something we’ve never come across before.

RF Switching Module Can Learn New Remotes

rf-remote-also-learns-by-itself

This breadboarded circuit is [Sergio’s] solution to controlling appliances wirelessly. Specifically he wanted a way to turn his pool pump on and off from inside the house. Since he had most of the parts on hand he decided to build a solution himself. What he ended up with is an RF base station that can learn to take commands from different remote devices.

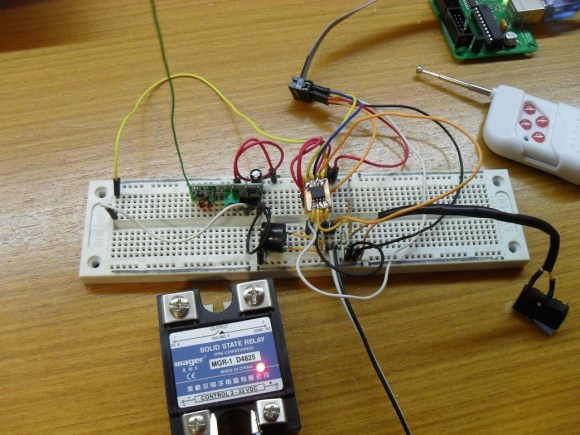
The main components include the solid state relay at the bottom of the image. This lets the ATtiny13 switch mains voltage appliances. The microcontroller (on the copper clad square at the center of the breadboard) interfaces with the green radio frequency board to its left. On the right is a single leaf switch. This acts as the input. A quick click will toggle the relay, but a three-second press puts the device in learning mode. [Sergio] can then press a button on an RF remote and the device will store the received code in EEPROM. As you can see in the clip after the break, he even included a way to forget a remote code.

Continue reading “RF Switching Module Can Learn New Remotes”

FireHero: Raspberry Pi Controlled Pyrotechnics

Fire Hero 3

To put on a live pyrotechnic show at a music festival, [Chris] built the FireHero 3. The result is remotely controlled flames shooting up to 100 feet in the air.

The system is controlled by a Raspberry Pi and an Arduino. A server runs on the Pi and allows a remote computer to control the system. The Pi sends commands over serial to the Arduino, which switches solid state relays that actuate the valves.

There’s also some built in safety features: the system won’t boot unless you have the right key and RFID tag, and there are pressure transducers and temperature sensors to ensure the system is operating safely. A CO2 actuated valve can quickly stop fuel flow in an emergency.

Vaporized propane creates the fireballs. The vapor is created by heating the supply tank in a hot water bath. An accumulation tank stores the vapor and custom built manifolds distribute it to the various flame cannons. At each cannon, a silicon nitride hot surface igniter (HSI) is used to ignite the flames once the valve is opened.

After the break, watch a video the the FireHero making some flames.

Continue reading “FireHero: Raspberry Pi Controlled Pyrotechnics”

Mains Rated Solid State Relay Test Box

building-a-mains-solid-state-relay-test-box

We like our nice, safe, 5V prototyping projects where the only thing that might get fried is a chip. But there are times when you want to switch appliances for one reason or another and then you’re going to want a mains rated relay. [Viktor] got tired of having exposed high voltage on the bench during the prototyping stage of these projects so he recently built a solid state relay test box.

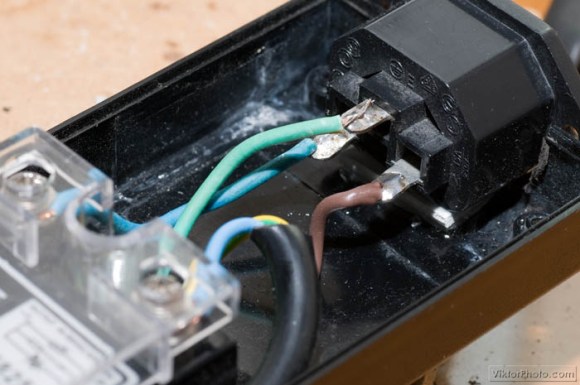
The only thing he bought for the project was the SSR itself. To act as an enclosure he used the brick from an old laptop power supply. This is perfect for a couple of reasons. First off, it’s designed to contain high voltage if there is ever a short or other problem. Second, it’s already setup for incoming and outgoing power. He just needed to remove the guts and mount the relay. Notice that it comes with a clear plastic shield that physically separates the high voltage side from the low voltage control end. This, along with the cable routing, keeps the dangerous stuff on one side to ensure you won’t get an arc to the low voltage portion of the project.

Building A Better PID Smoker Controller

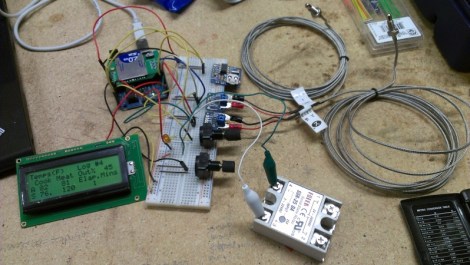
[Matt] wanted to have more control over his meat smoker so he built this advanced PID smoker controller. It uses the solid state relay seen in the bottom-right of this image to switch the smoker’s heating element. But all of the other goodies that are included add several features not usually found in these builds.

This is a replacement for the commercial PID unit he used on the original build. That monitored the temperature in the smoker, using predictive algorithms to maintain just the right heat level. But this time around [Matt] is looking for extra feedback with a second sensor to monitor meat temperature. Using an Arduino with an SD shield he is able to data log the smoking sessions, and his custom code allows him to specify temperature profiles for resting the meat after it has hit the target temperature. It kind of reminds us of a reflow oven controller… but for food.

Spaduino Heats Up A Used Hot-tub

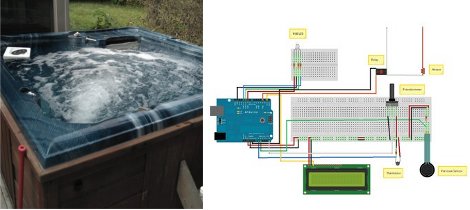
[Ryan] and the roomies decided that a hot tub was just what they needed to spice up the place. They hit Craig’s List and found one for the right price. After acquisition and setup they were pleased to find that the jets and pump worked great. But you’re not going to want to stick as much as your big toe into this ice-cold cryogenics experiment. Some poking around in the control system exposed the dead relays which are responsible for switching the heater. Instead of swapping the parts, [Ryan] began building a control system that will replace the twenty-year-old original.

The heating element still works, but it’s rated at 5.5 kW and here’s no way to automatically switch it on and off. [Ryan] found a 60 Amp solid state relay which can handle the load, and plays nicely with his Arduino. Initial tests got the tub up and running again. Obviously you want the tub to maintain temperature and so a thermistor was added to take readings from the heater core. There’s also a potentiometer to adjust the temperature, and an LCD screen to show the current settings. But [Ryan] hopes to add more features over time, like incorporating jet control, and adding wireless communications via an Xbee module.