Adding Upgrades To A Stock Motorcycle

In today’s world of over-the-air firmware upgrades in everything from cars to phones to refrigerators, it’s common for manufacturers of various things to lock out features in software and force you to pay for the upgrades. Even if the hardware is the same across all the models, you can still be on the hook if you want to unlock anything extra. And, it seems as though Suzuki might be following this trend as well, as [Sebastian] found out when he opened up his 2011 Vstrom motorcycle.

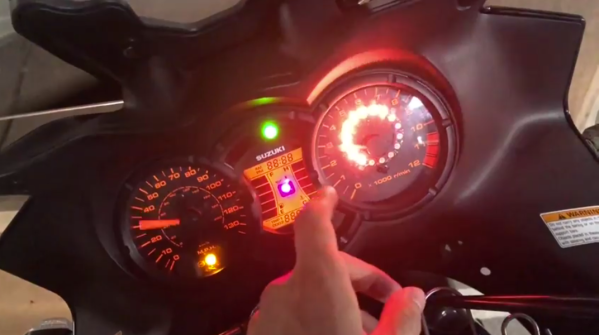
The main feature that was lacking on this bike was a gear indicator. Even though all the hardware was available in the gearbox, and the ECU was able to know the current gear in use, there was no indicator on the gauge cluster. By using an Arduino paired with an OBD reading tool (even motorcycles make use of OBD these days), [Sebastian] was able to wire an LED ring into the gauge cluster to show the current gear while he’s riding.

The build is very professionally done and is so well blended into the gauge cluster that even we had a hard time spotting it at first. While this feature might require some additional lighting on the gauge cluster for Suzuki to be able to offer this feature, we have seen other “missing” features in devices that could be unlocked with a laughably small amount of effort.

Continue reading “Adding Upgrades To A Stock Motorcycle”

Printed Motorcycle Choke Lever Goes The Distance

We all dread the day that our favorite piece of hardware becomes so old that spare parts are no longer available for it, something about facing that mechanical mortality sends a little shiver up the hacker’s spine. But on the other hand, the day you can’t get replacement hardware is also the same day you have a valid excuse to make your own parts.

3D rendering above the 2D scan

That’s the situation [Jonathan] found himself in when the choke lever for his Suzuki motorcycle broke. New parts aren’t made for his bike anymore, which gave him the opportunity to fire up Fusion 360 and see if he couldn’t design a replacement using a 2D scan of what was left of the original part.

[Jonathan] put the original part on his flatbed scanner as well one of his credit cards to use for a reference point to scale the image when he imported it into Fusion 360. Using a 2D scanner to get a jump-start on your 3D model is a neat trick when working on replacement parts, and one we don’t see as much as you might think. A proper 3D scanner is cool and all, but certainly not required when replicating hardware like this.

The choke lever is a rather complex shape, one of those geometries that doesn’t really have a good printing orientation because there are overhangs all over the place. That combined with the fact that [Jonathan] printed at .3mm layer height for speed gives the final part an admittedly rough look, but it works. The part was supposed to be a prototype before he reprinted it at higher resolution and potentially with a stronger material like PETG, but after two years the prototype is still installed and working fine. This isn’t the first time we’ve seen a “temporary” 3D printed part become a long-term solution.


This is an entry in Hackaday’s

Repairs You Can Print contest

The twenty best projects will receive $100 in Tindie credit, and for the best projects by a Student or Organization, we’ve got two brand-new Prusa i3 MK3 printers. With a printer like that, you’ll be breaking stuff around the house just to have an excuse to make replacement parts.


Superbike Gets Bootstrapped Instrument Refit

[Josh] got rid of the standard, factory gauges on his GSXR Super-bike and installed a custom built instrument panel which displays some additional parameters which the regular instrumentation cluster did not. He was working on converting his bike in to a Streetfighter – a stripped down, aggressive, mean machine. The staid looking gauges had to go, besides several other mods to give his bike the right look.

GSXR_03
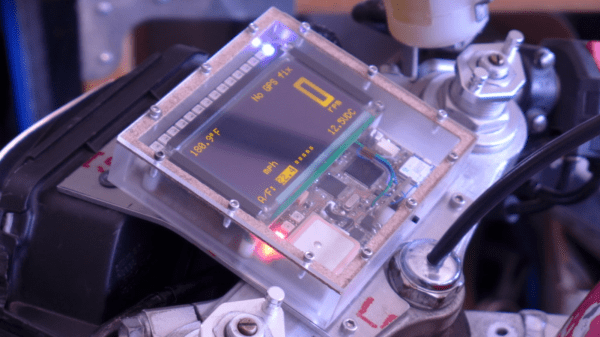
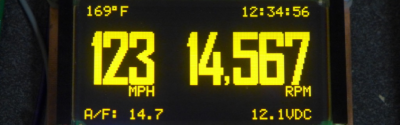
Luckily, he had the right skills and tools available to make sure this DIY hack lives up to the Streetfighter cred of his bike. The important parameter for him was to log the Air / Fuel mixture ratio so he could work on the carburation. Along the way, he seems to have gone a bit overboard with this build, but the end result is quite nice. The build centers around a Planar 160×80 EL graphic display lying in his parts bin. The display didn’t have a controller, so he used the Epson S1D13700 graphic controller to interface it with the microcontroller. An Atmel ATmega128L runs the system, and [Josh] wrote all of his code in “C”.

Continue reading “Superbike Gets Bootstrapped Instrument Refit”