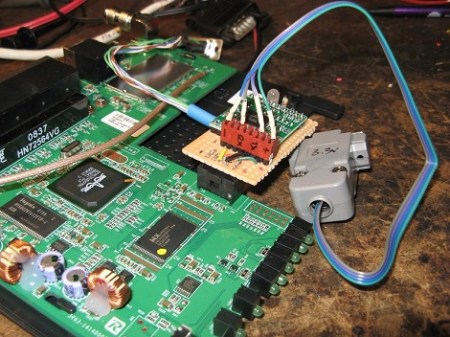
Turning A Router Into An APRS Gateway

[Chris Kantarjiev] is an amateur radio enthusiast (call sign K6DBG) and does a lot with the APRS. We think his build, turning a WRT54gl router into an APRS gateway will be very useful for the APRS tracker builds we’ve been covering.

Setting up an Internet Gateway, or igate, on APRS usually requires a ‘real’ computer. [Chris] didn’t like that idea, so he took aprs4r, igate software for embedded devices, and pruned it down to fit on the 4MB of flash and 16MB of RAM in the WRT.

The actual APRS hardware is connected though headers soldered onto the WRT54gl’s board which go to a small PIC-Based TNC. [Chris] argues that the APRS ‘backbone’ is great, but there aren’t enough nodes on the network for full coverage. We thing this would be a great way to put cheap hardware out in the wild to cover those gaps in the APRS network.

Check out the video for a rundown of the modded WRT54g after the break. If you’re interested amateur radio, Field Day is coming up in just 2 weeks. Find a local club and check out what’s possible with amateur radio.

Continue reading “Turning A Router Into An APRS Gateway”

Repairing A Broken Microwave Keypad

microwave_keypad_fix

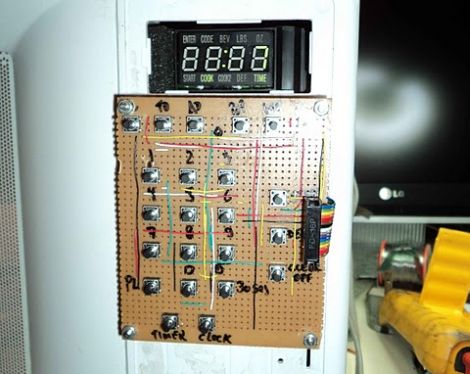
[Alexandre Souza] needed a microwave pretty badly, but he didn’t have a lot of cash on hand. He located one for a great price, but once he got home he found that things weren’t working quite like they should be (Google translation).

After some investigation, he narrowed the problem down to a bad keypad membrane. Unfortunately for him, this model of microwave was never sold in Brazil (who knows how it got there) and the only membrane he could track down had to be shipped in from the US at a cost of $80.

Rather than pay such a high price for a simple membrane, he opted to fix the microwave himself. He dismantled the control panel and thoroughly traced the keypad matrix to get an understanding of which pins toggled which functions. With a piece of protoboard and almost two dozen push buttons in hand, he built his own keypad and wired it directly into the microwave’s control board.

With labels written in marker it might not be the nicest looking thing you have ever seen, but it works a treat and is a great money-saving hack.

Experimental Music IPad Dock

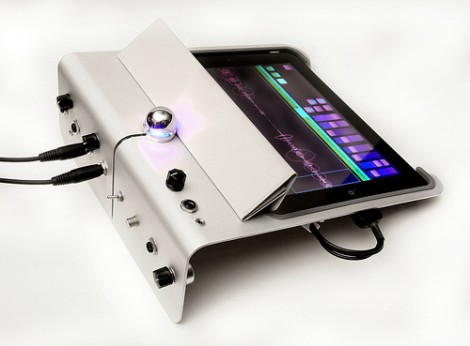
You can buy nice audio breakout equipment for your iPod if you don’t mind breaking the bank. This is partly because the demand is not incredibly high so commercial breakout hardware doesn’t benefit from volume discounts. But it’s also because Apple charges licensing fees for third-party accessories (often referred to as the “Apple Tax”). [Reed Ghazala] decided to side-step the whole situation by building his own accessory which he calls the iPad Audio Desk.

It all starts with a breakout board. The PodBreakout Mini provides an easy to solder interface for the iPad, and ensures that the repetitive act of plugging and unplugging the connection doesn’t break a solder connection. From there [Reed’s] enclosure finishing skills take over. The shape and curve of the aluminum sheet give the look befitting an expensive tablet device. Along the back you can see the jacks for line-in, line-out, video, mic/guitar, and headphones that make the dock useful. It wouldn’t be hard to make one… but it might be hard to make one look this great. See for yourself after the break.

Continue reading “Experimental Music IPad Dock”

DIY CNC Touch Probe

diy_cnc_touchprobe

[Dennis] recently invested some money in the Tormach Tooling System for his CNC’d Sieg SX3 mill in order to make his tool changes easier. While the kit allows him to easily account for height offsets while changing tools, he has no quick, reliable means of locating the spindle in relation to his workpiece. Tired of manually finding the edges of his workpiece for each axis, he built himself a DIY touch probe to automate the process.

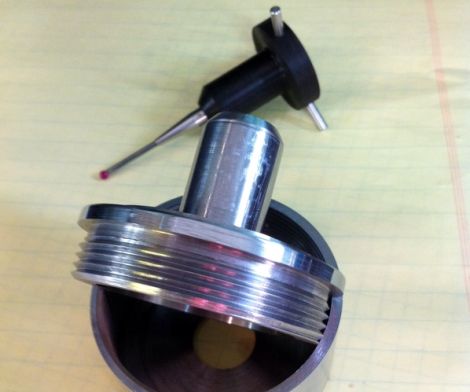
The theory behind the probe’s operation is pretty simple. In the probe’s housing, three conductive rods are mounted perpendicular to the probe tip. Each rod rests between two metal balls forming a complete circuit. When the probe touches the edge of his milling material, the circuit is broken, sending a signal to his CNC control box.

The probe is comprised of several different parts, milled from either aluminum or black delrin. [Dennis] says that after everything was assembled, the runout on the probe was unacceptable, so he made a few tweaks, and now the runout has been reduced to about 0.00025” – well within acceptable tolerance limits for any work he will be doing.

Be sure to check out his site, as there are plenty more pictures of the probe’s construction, as well as additional video.

In the meantime, continue reading to see a quick video of the finished probe in action.

Continue reading “DIY CNC Touch Probe”

IOIO Now Supports Android Open Accessory

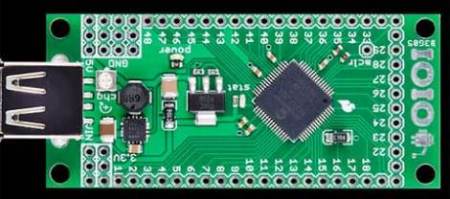
After the announcement of the Android Open Accessory ADK, [Ytai] decided he should get the the ADK running on the IOIO Android breakout board.

The first batch of Android ADK boards sold for about $400. While that price has come down considerably, the IOIO is still cheaper and smaller. [Ytai] put the source and all the technical info on his wiki.

Interestingly, this beta build is a little more capable than the Google offering. The IOIO supports the Android Debug Bridge, so it’s able to work with any Android device made since the beginning of time. The IOIO will try to communicate with the device using the Open Accessory standard because of the much better throughput and latency, but will seamlessly fall back to ADB if the device doesn’t support Open Accessory. Open Accessory boards are only comparable with devices running Android 2.3.4 and higher, so it looks like we’ve got a standard breakout board for the $99 Android tablets that fly off the shelves during Christmas.

[Ytai] has gotten a few of his projects on Hack a Day, like his PICMAN prototyping setup and his awesome 2 foot POV globe, so we’re happy to see this very skilled builder finally get his Hack a Day hat trick and enters the ranks of giants like [Sprite_tm]. If you’ve got a great build, send it in and you might be able to join the pantheon of great builders.

Designing And Building A Bench Supply

[Scott’s] been digging around the back issues of the Internet to find this project. He blew the dust off and sent us a link to an article that traverses the design and build process of a bench power supply.

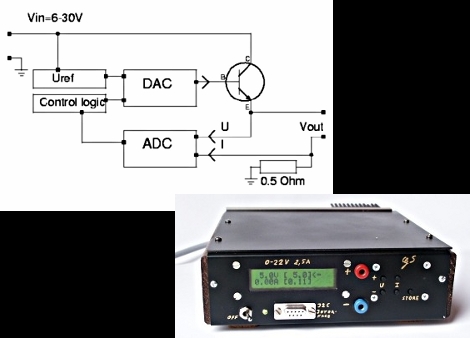
[Guido Socher] does an excellent job of presenting his bench supply project. So many others show of the final product, but he has gone out of his way to make sure we understand the design principles that went into it. He starts off by talking about the simplest possible supply design: a transistor and Zener diode which generates a reference voltage. He goes on to discuss the problems with this simplified circuit and how to address them, covering the gotchas that pop up at each step in the process.

Once he designed the circuit and laid out some boards he began building an enclosure. We love his tip about using a stick pin and an unpopulated through-hole PCB to mark button locations on the front bezel of the case. The final design is shown above, and includes a laptop brick to translate mains power into a 24V 3A DC feed for his custom circuitry.

Create And Conflagrate Giant Modeled Sculptures With Kinect And CNC

Summer has hit, and with it a bunch of crazy people going to crazy festivals and (often) burning crazy sculptures to crazy music! In that vein [Matthew Goodman] recently got involved in the burning flipside community down in Texas for his first big effigy build.  The project called for a gigantic archway flanked by two human shaped figures, since he had been working in Kinect [Matt] decided to try his hand at physically modeling the figures from Kinect mesh data.

After co-registering the depth and image cameras, setting up a capture routine to record, getting  .ply based meshes from the depth camera, and making a keypoint detector [Matt] was ready to start getting real world data from the Kinect. Armed with a ghetto steadycam built from his local Austin Hackerspace‘s spare parts bin, [Matt] proceeded to collect three 1.5 gigabyte scans of the charming [KT], who served as a model for the sculpture.

Once the meshes were imported to sketchup they could be merged and smoothed into a coherent form. The figure was split into CNC-able parts (known as the “lady bits” by [Matt] and his crew) and sent to local makers [Dave Umlas] and [Marrilee Ratcliff]’s ShopBot CNC mill. The 400 some odd bits of wood were then carted to flipside, methodically set up, and promptly set aflame the end of the event.

We have seen a couple of really interesting burning man projects, but this is possibly the shortest lived end result. Stay tuned this summer for more insane Black Rock City bound creations as well. Also don’t forget to check out [Matt]’s site for more details.