Broken Vintage Record Player Reborn As A Portable MP3 Cabinet

old_record_player_pc_jukebox

[Julian] picked up an old record player that was sitting in somebody’s trash pile, and brought it home to see if it could be restored to working order. When he got it home he discovered that it didn’t work at all, so he and his wife decided to modernize it a bit.

In an effort to simultaneously reunite himself with his music collection and piss off audiophiles/antique collectors in the process, he gutted the radio and began rebuilding it to serve as an MP3 jukebox. Once the innards were removed, his wife refinished the cabinet and gave the front grill a new cloth cover.

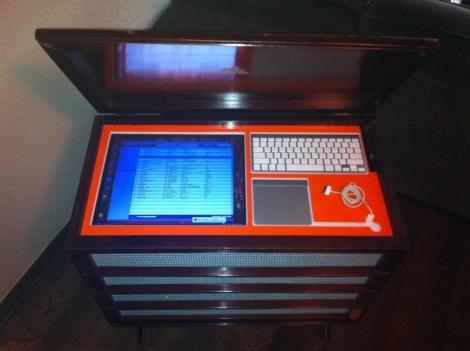
An old PC was installed inside the cabinet, along with a set of relatively cheap (but better than paper cone) speakers. A pair of custom cut plexi panels were used to cover the computer, while providing space for the monitor and Apple wireless keyboard + trackpad [Julian] uses to manage the jukebox.

The refurbed record player came out looking quite nice, and although it likely raises the ire of several different groups of purists, we think it’s pretty cool.

Light Up Your Workshop With This Arcade Button Light Switch

arcade_button_light_switch

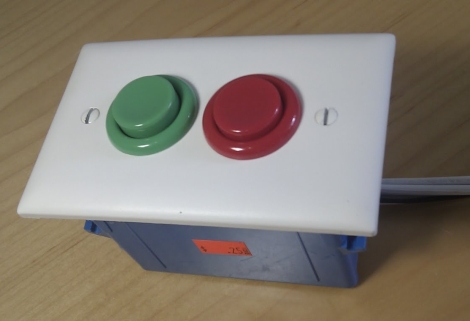
[Pete Mills] was browsing around online when he came across an arcade button light switch and immediately wanted one. He didn’t however want to pay the $35 asking price for the switch, so he decided to build it himself.

He says that his solitary arcade machine doesn’t warrant its own room, so he figured he would wire the switch up to an extension cord in his workshop instead. The switch was made with parts he had on hand, so seeing as he didn’t have any triacs, he opted to use a relay in its place. He thought about how he would construct a simple flip flop circuit for the switch, and settled on using a simple 555-based circuit instead of a pair of transistors.

The end result looks every bit as nice as the version available for sale online, and it works great as you can see in the video below. [Pete] has circuit schematics available on his site should you want to build your own, so if you do, let us know in the comments – we’d love to see different variations on the circuit design.

Continue reading “Light Up Your Workshop With This Arcade Button Light Switch”

Cookie Projector Uses That Dusty Film Camera Of Yours

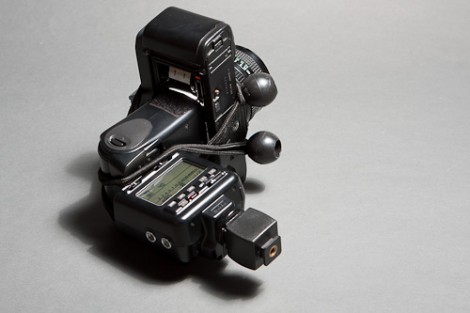
This hack is not for photographers with weak hearts. We’re going to be talking about destroying the body of a Single-Lens Reflex camera. But out of destruction comes something new. A broken camera paired with a flash and functional optics can be used to project light patterns for picture backgrounds.

The hardware is often referred to as a cookie projector, and a commercial unit can cost several hundred dollars. But if you or someone you know has a non-functional film SLR you’re already half way to making your own. Just snap off the back cover, yank out the mirror and shutter, and the bloody part is over. Slap on a lens with a large aperture, create your own slide with the pattern you’d like to see in your images, and affix a flash to the gaping hole on the back of the camera body. The video after the break shows the diy cookie projector hanging out on the flash stand, synchronized with your DSLR flash to add some pizzazz to the photo shoot.

Continue reading “Cookie Projector Uses That Dusty Film Camera Of Yours”

Beginner Concepts: MOSFETs

[Moser’s] introductory guide to MOSFETs serves as a quick introduction for those unfamiliar with the parts. They fill a similar role as a bipolar junction transistor like the 2N2222, making it possible to switch large loads. But fundamentally they are different. Metal Oxide Field Effect Transistors have three pins for Drain, Source, and Gate instead of the Collector, Emitter, and Base that you may be used to. The Gate is the control pin for the device and offers a desirable advantage over bipolar junction transistors in that it is insulated from the channel. This means that much less current flows into the Gate when compared to the Base of a common transistor, saving power and providing protection to the logic circuitry.

Don’t fret if this makes your head spin. [Moser’s] writeup is short and to-the-point but it’s not watered down. You can get a basic overview and if you care to learn more, he’s linked to datasheets and has basic terminology that is easily clarified with a Google search. One of the most powerful tools that he’s included is the simple MOSFET and driver circuit diagram you see above. This makes it possible to switch incredibly large loads very quickly; the true power of the MOSFET.

Defusable Alarm Clock – Wastes Wire But Fun For The Kids

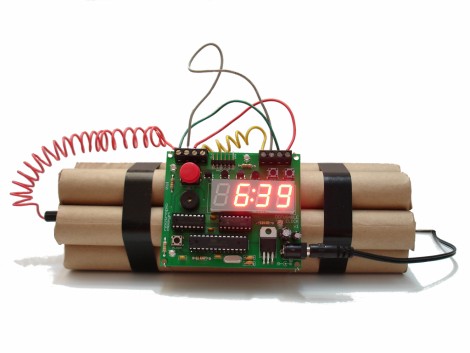
Nothing makes you feel the pressure of getting out of bed in the morning like a ticking-time-bomb on the bedside table. It may look like it came in the mail from ACME, but all that went into this is some wooden dowels covered in craft paper and an Arduino-compatible board. The 7-segment display can act as a clock, or count down to your doom. You can set an alarm that requires you to clip the wires to shut it off. Each time that alarm is set the wires are randomly chosen; one will set of the bomb, one will safely defuse it, and the others do nothing. See for yourself after the break.

The wires are easily replaced because they are connected via terminal blocks. It still seems like an awful waste of wire. We like the Think Geek bomb clock concept that works in much the same way but uses wires that have a male/female RCA plug pair that can be disconnected and reconnected without waste.

This one will apparently be available as a kit, at which point the schematics and code will be released. But it shouldn’t be too hard to build one from scratch yourself, and it’s an obvious winner if you’ve got kids.

Continue reading “Defusable Alarm Clock – Wastes Wire But Fun For The Kids”

Video: Learning Eagle CAD Part 2

This week we are continuing on with our multi-part series where [Jack] shows you how to use Eagle CAD. This video continues where last week’s video left off by showing how to create a custom part and how to use the schematic editor. If you haven’t seen last week’s video, you can find it here. Also, check out our youtube channel where we have uploaded several supplementary videos that go into further detail about many of the tools that are commonly used in the schematic editor. After watching these videos, you should have all of the knowledge that you need to start designing the schematic portion of a circuit board.

This is a fairly long video, clocking in at about 25 minutes, so be prepared to dedicate a chunk of time.

Need Something In A Pinch? SparkFun Products Now At Micro Center

sparkfun_available_in_microcenter

If you happen to live near a Micro Center retail store, you are now lucky enough to have another choice when it comes to purchasing DIY electronics components – SparkFun is selling their products at all Micro Center retail outlets.

While it seems SparkFun announced this change in June, we’re seeing quite a bit of buzz on the topic today. We’re pretty sure their entire catalog won’t be available in store, but they are promising a “wide-range of SparkFun products at all 23 Micro Center locations across the country.”

Known for being very DIY-friendly when it comes to building your own PC, Micro Center was a logical choice for SparkFun. There are definitely times when you need/want a part right away rather than waiting for it to ship, so this seems to be an ideal situation for hackers and makers within range of a Micro Center retail store.

This announcement definitely has us wondering if this will be one of the final nails in the Radio Shack coffin. While Micro Center doesn’t have nearly the market penetration Radio Shack does, a wider selection of components and a friendly, knowledgeable staff makes the SparkFun/Micro Center combination is a compelling one.

What are your thoughts? Let us know in the comments.