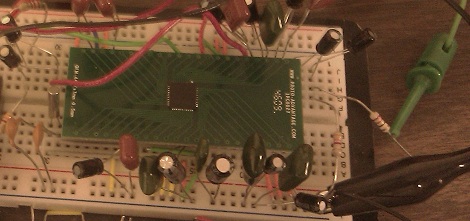
MIDI Synth Arduino Shield

There’s a million and one ways to play around with MIDI and an Arduino. It’s trivial to have a ‘duino spit out a scale to a MIDI keyboard, or even respond to SysEx messages to change a lighting or effects rig. There’s one thing that has eluded MIDI-duino builders, though: implementing a MIDI synthesizer with a DIY shield. It’s a good thing, then, that [Keith] put up a Kickstarter for his AvecSynth project.

[Keith]’s AvecSynth is based around the Dream.fr SAM2195 single chip MIDI synthesizer. It’s a neat little IC that takes in MIDI messages from a sequencer or keyboard and spits out stereo audio. The AvecSynth takes this IC and puts it in a standard Arduino-sized package so building a gigantic light-up, foot-operated piano is now well within the purview of the weekend solder junkie.

While the SAM2195 and AvecSynth doesn’t have fancy subtractive or FM synthesis, it does have the full set of 128 voices in the General MIDI spec. It’s a great project to play around with MIDI, and the price for the DIY kit is right up our alley.

EDIT: [Keith] changed the $20 reward for his Kickstarter to PCB or two SAM2195 chips

A Wooden Engine Powered By Compressed Air

You may have seen an air powered engine at some point, but most are made out of some sort of metal. This engine, however, is made entirely out of wood (and fasteners). One might wonder how a design like this was conceived, but this may be explained by [Woodgears.ca’s] tagline: “An engineer’s approach to woodworking.”  It should also be noted that this is actually [Matthias’] sequel to  “Wooden Air Engine 1.

The engine itself is a neat device in that it uses power from compressed air (or suction from a vacuum cleaner) to make the piston and connecting rod cycle back and forth to spin a flywheel.  The other connecting rod is used to switch which side of the “clyinder” received air pressure (or vacuum).  A really neat mechanical assembly, and one that took a good amount of skill to make out of wood.  Check out the video after the break to see how it all works!

[youtube http://www.youtube.com/watch?v=ngb4SYR74m4&w=470&h=315%5D

If you’d like your woodworking to be more automatic, check out this post about how to set up a CNC router for your personal use.

Hackin’ The Junkyard: Electric Scrap Bike Projects

[Brad Graham] wrote in to let us know about his electric bike data dump over at atomiczombie.com, written just for us! Last we heard from [Brad] he was building some serious robots and freakishly tall tallbikes but since the weather has turned for the chilly its time to focus on indoor projects. Using a combination of robot parts, electrical conduit, and OEM bikes for the frames [Brad] takes us through several of his builds and all the various complications trying to drive the (often very powerful) electric motors. The builds range from scrapping motors and controllers to full blown drop in hub motor systems that can combine human and electric power. There is even an electric pusher cargo cart designed for a cooler, because beers are not going to haul themselves around.

Don’t forget to check out the AtomicZombie website for a ton of useful tips to chopping up bikes for your own mutant transpiration projects, we know we will. Thanks [Brad]!

CheerLights: Synchronizing Christmas Lights Around The Globe

cheerlights-synchronized-christmas-lights

They say that the holidays are a time to gather with others, which usually translates into spending time with friends and family. The folks at ioBridge Labs thought that while friends and family certainly are a big part of the holidays, it would be pretty cool to gather together flocks of strangers by using the Internet to synchronize their Christmas lights.

Participation in CheerLights is pretty easy, requiring little more than an Internet connection, some GE G-35 Color Effects lights, an Arduino, and an ioBridge. While those are the recommended components, an Arduino Ethernet shield will handle networking just as well. There really are no restrictions when it comes to hardware, so if you are so inclined, it should be relatively easy to roll your own display using simple RGB LEDs and a µC of your choosing.

The colors are dictated by the group’s Twitter feed, which can be found at http://twitter.com/#!/@cheerlights. Whenever a message is sent to @cheerlights along with a color, all of the light displays listening in will change simultaneously.

We really like the idea, and think it would be pretty cool to see this sort of program rolled out on a neighborhood or street-wide level, so you could see dozens of strings changing colors all at once.

If you’re interested in checking out CheerLights’ current color, be sure to take a gander at their live stream here.

[via BuildLounge]

Magnetotron Is An Armonica Mellotron Mashup

[Michael] is a huge fan of old media formats. There’s something special about quarter-inch thick 78s, fragile blue cylinders holding music, and thin strips of mylar that preserve the human voice. He’s had an idea for a tape-based instrument for a while, and now that the Magnetotron is complete, we’re in awe of this glass harmonica and Mellotron mashup.

The Magnetotron is a large rotating cylinder that has dozens of strips of audio tape attached to it. The cylinder rotates with the help of a small motor. As the strips of tape rotate in front of him, [Michael] presses two tape heads up to the instrument, making some sort of sound.

Each strip of tape contains a recording of one note, like the venerable Mellotron. Instead of physical keys, the Magnetotron is played in a much more tactile fashion like the glass harmonica. The output of the Magnetotron is interesting with a whole bunch of wow and flutter. Check out the demo of [Michael] playing his instrument at NIME in Brooklyn after the break.

Continue reading “Magnetotron Is An Armonica Mellotron Mashup”

Data Logging With A Cheap Lux Meter

[Minisystem] has a thing for dynamo powered bike lights. He wanted to measure how well his latest is working, but just logging the current flow through the LEDs wasn’t enough for him. He picked up a cheap Lux meter and hacked into the circuit to log measurements while he rides.

He started by cracking open the case to see what the meter held inside. There’s a Texas Instruments Op-Amp that connects to the light sensor. The datasheet for the part didn’t help much, but [Minisystem] did find that the current output on one of the pins changes with light intensity. Further testing led him to discover that the signal is a multiple of 10 for what is shown on the Lux meter’s readout. All he needs to do is take regular measurement of this current and save that data.

To do this, he grabbed his trusty Arduino and made a connection between one of its analog inputs and the op-amp pin. It should be easy enough to dump measurements into the Arduino’s own EEPROM, or use an external storage chip or SD card.

[Thanks Jason]

Hackaday Links: December 16, 2011

Free-form Christmas ornament

Here’s [Rob]’s free form circuit that’s a Christmas ornament for geeks. It looks great, but sadly isn’t powered through a Christmas light strand. It’s just as cool as the skeletal Arduino we saw.

Prototyping with flowers

Well this is interesting: protoboard that’s specifically made to make SMD soldering easier. The guys at elecfreaks went through a lot of design iterations to make sure it works.

We’ll call it Buzz Beer

The days are getting longer and cabin fever will soon set in. Why not brew beer in your coffee maker? It’s an oldie but a goodie.

Christmas oscilloscope

With just an ATtiny and a little bit of  futzing around changing the coefficients of a partial differential equation, you too can have your very own oscilloscope Christmas tree. Don’t worry though, there are instructions on how to implement it with an Arduino as well. HaD’s own [Kevin] might be the one to beat, though.

So what exactly does a grip do?

You know what your home movies need? A camera crane, of course. You’ll be able to get some neat panning action going on, and maybe some shots you couldn’t do otherwise. Want a demo? Ok, here’s a guy on a unicycle.