Basic Animatronics Continued: Servo Actuated Mouth

[Chris] is at it again and this time he has put together a tutorial rounding off his animatronic face by actuating the mouth. His tutorial covers two different styles of robot mouth: an LCD mouth which dims to imply actuation and a servo articulated flap.

[Chris] covers all the aspects of each mouth type, from the basics of human mouth actuation to servo motor control. In this case the LCD mouth is not quite as impressive so it gets installed on a face mock up while the servo mouth goes on the face previously featured in his other tutorials. The entire setup is still controlled using a single PIC 18F452. The circuit diagrams and code for both types of mouth are all available on the site including videos of the actuated mouth and a gif of the LCD mouth in action.

Check out a video of the articulated mouth below throwing down some classic season 6 Jean-Luc. If you are interested in the other parts of the face we have covered [Chris]’s other tutorials on the eyebrows and the eyeballs. These are a great jumping point for your own animatronic face project and do a great  job of setting up all the know how you’d need to build your own emotional puppet.

Continue reading “Basic Animatronics Continued: Servo Actuated Mouth”

A Quick And Dirty VU Meter For Your Next Party

If you want an easy project to spice up your next party, chances are you already have parts on hand to throw together [Mikerbot’s] quick and dirty VU-meter lights. The circuit he designed uses the audio input to trigger the base of a PNP transistor, toggling power through a string of LEDs. He’s using four lights for each of the stereo output signals, making them pulse with the music as seen in the video after the break. The circuit is built on a breadboard, and housed in a picture frame with a less-than-impressive diffuser (we think that’s always the hardest part… check out the Heavy Frost used in this project if you want something that works really well).

There are some VU meter chips out there that will really augment this concept. But one improvement might be to throw in an amplifier chip like the LM386 and a couple of potentiometers so that you can dial-in the sensitivity.

Continue reading “A Quick And Dirty VU Meter For Your Next Party”

[Bunnie] Mods Chumby To Capture Epic Time-lapse Video

When [Bunny] moved into his apartment in Singapore he was surprised to find that a huge building project was just getting started on the other side of the block. Being the curious sort, he was always interested in what was going on, but just looking in on the project occasionally wasn’t enough. Instead, he set up a camera and made a time-lapse video.

This isn’t hard, you can find a slew of intervalometer projects which we’ve covered over the years. But being that [Bunnie] is one of the designers of the Chumby One, and frequently performs hacks on the hardware, it’s no surprise that he chose to use that hardware for the project.

Luckily, he’s sharing the steps he used to get Chumby capturing images. He mentions the hardest part is finding a compatible USB camera. If you have one that works with a 2008 Linux kernel you should be fine. The rest is done with shell scripts. Mplayer captures the images when the script is called from a cron job. Once all the frames are captured, he used mencoder to stitch the JPEGs into a movie. See the result after the break.

Continue reading “[Bunnie] Mods Chumby To Capture Epic Time-lapse Video”

High Voltage: Controlling A Flyback Transformer With An Arduino

If you’d like to build a Jacob’s ladder, an ignition system for a flamethrower, or for some ungodly reason you need 15 kilovolts for a prop replica or cosplay build, this one is for you. It’s an easy to build high voltage power supply that interfaces with an Arduino.

After harvesting a flyback from the power board of a CRT, [Andrew Moser] added a new primary coil to the transformer. This boosts 12 volts that can be easily controlled by an Arduino to something that will arc an inch and a half. The next step building the flyback driver. [Andrew] used a MOSFET and MOSFET driver for this circuit (although he says this guy works without the driver). After that, all that’s left to do is write some software and test it out.

Of course this comes with the boilerplate warning, “If you don’t know what you’re doing, you might die.” That being said, if you ever wanted to test out an Arduino’s resistance to EMP, this is the project for you. Check out the flyback powering a Jacob’s ladder after the break.

Continue reading “High Voltage: Controlling A Flyback Transformer With An Arduino”

What Would You Put In A Shipping Container Makerspace?

rechar_what_to_include_in_a_mobile_workshop

Imagine that you have been asked to construct a portable shipping container workshop that will be sent to the other side of the globe, where the power grid is sketchy and the resources tight. If you had $20,000 to outfit this 20’ container, what components and tools would you include?

This was the question recently posed to us by [Luke Iseman], CTO at re:char. He and his partners are in the midst of putting together a mobile makerspace that will eventually be shipped over to Western Kenya in order to help the locals fertilize their land using biochar. The primary function of this workshop will be to build biochar chambers, so plenty of durable tools and machines are a must. They already have a pretty solid list of items put together, but they wanted input the from makers and hackers out there, who may have worked under similar conditions.

Have any suggestions? Share them in the forum, we’re sure [Luke] and co. will appreciate it!

LEGO Mill Produces Sculpted Models With Fantastic Resolution

[Arthur Sacek] has really got something with the 3D Mill he built entirely from LEGO pieces. As you can see, it uses NXT parts to control the cutter head along three axes. The drill bit that acts as the mill’s cutting head is not a LEGO part, but that’s [Arthur’s] only transgression.

The demo sculpture seen above was cut into a block of floral foam. The model was processed by Autodesk Softimage before being fed into the mill, where it took about two and half hours to complete the job. The foam comes out still in block form looking like a piece of outdoor carpeting. That’s because there’s no debris removal during the milling process. But hit it with the shopvac and you’ll reveal a physical model with surprising detail. We don’t think it comes close to the light-cured resin printing we’ve seen, but it would be a great asset if you’re doing some mold making.

Don’t miss [Arthur’s] video of the milling process after the break.

Continue reading “LEGO Mill Produces Sculpted Models With Fantastic Resolution”

Glowing Eyes Project Keeps It Simple This Halloween

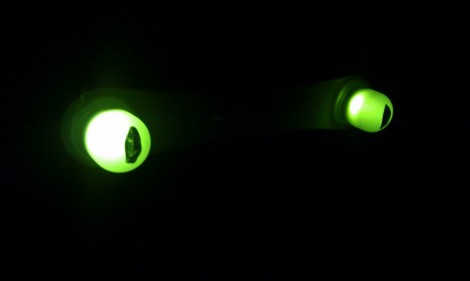
Halloween’s on its way and we want to remind you to get started early so you can show us what you’ve got in store for the little ones this year. [Pete] already finished a simple project to spice up the bushes in front of his house. His trio of glowing and blinking eyes will make a nice addition to the bushes in front of his house. Each is made from a pair of over-sized LEDs mounted on popsicle sticks. After passing the leads through holes in the wood, they are soldered to some resistors and cat-5 cable. The conductors are covered in hot glue to help protect from moisture, and then they’re ready to be driven by the ATtiny2313 which uses random numbers to help ensure the blinking doesn’t look timed. Check out the video after the break to see how he did.

This is a great example that you don’t have to take on the most complicated project in the world to be appreciated. But if you’re looking to be remembered for years to come you might want to aim high by building something like the trash-can jack-in-the-box, or a puking pirate.

Continue reading “Glowing Eyes Project Keeps It Simple This Halloween”