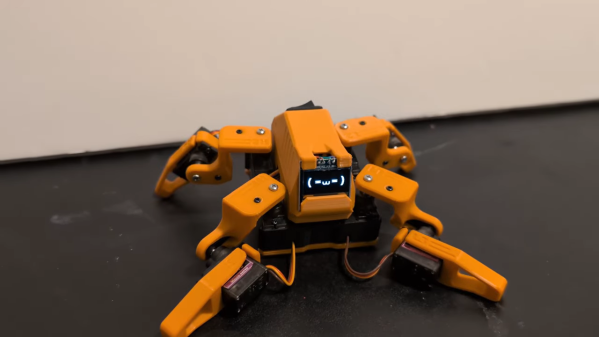
Robots don’t have to be large and imposing to be impressive. As this tiny quadruped from [Dorian Todd] demonstrates, some simple electronics and a few servos can create something altogether charming on their own.
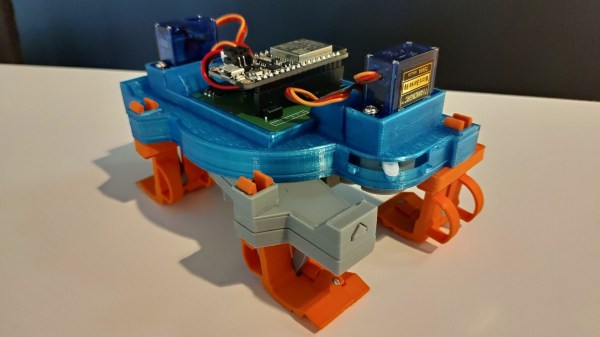
This little fellow is named Sesame. A quadruped robot, it’s built out of 3D-printed components. Each leg features a pair of MG90S hobby servos, one of which rotates the leg around the vertical axis, while the other moves the foot. The ESP32 microcontroller controls all eight servos, enabling remote control of Sesame via its built-in wireless connectivity. Sesame also gets a 128×64 OLED display, which it uses to display a range of emotions.
Mechanically, the Sesame design isn’t particularly sophisticated. Where it shines is that even with such a limited range of motion, between its four legs and its little screen, this robot can display a great deal of emotion. [Dorian] shows this off in the project video, in which Sesame scampers around a desktop with all the joy and verve of a new puppy. It’s also very cheap; [Dorian] estimates you can build your own Sesame for about $60. Files are on GitHub for the curious.
If you prefer your quadrupeds built for performance over charm, you might consider an alternative build. Video after the break.