Colorful Clock

A Colorful Clock For Toddlers

[Don] and his wife were looking for a way to teach their two-year old daughter how to tell time. She understood the difference between day and night, but she wasn’t old enough to really comprehend telling the actual time. [Don’s] solution was to simplify the problem by breaking time down into colored chunks representing different tasks or activities. For example, if the clock is yellow that might indicate that it’s time to play. If it’s purple, then it’s time to clean up your room.

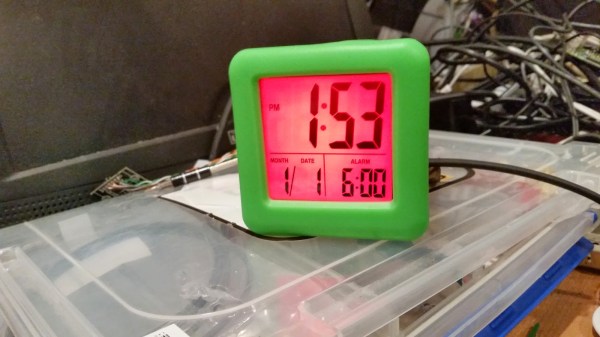
[Don] started with a small, battery operated $10 clock from a local retailer. The simple clock had a digital readout with some spare room inside the case for extra components. It was also heavy enough to stay put on the counter or on a shelf. Don opened up the clock and got to work with his Dremel to free up some extra space. He then added a ShiftBrite module as a back light. The ShiftBrite is a high-brightness LED module that is controllable via Serial. This allows [Don] to set the back light to any color he wants.

[Don] already had a Raspberry Pi running his DIY baby monitor, so he opted to just hijack the same device to control the ShiftBrite. [Don] started out using a Hive13 GitHub repo to control the LED, but he found that it wasn’t suitable for this project. He ended up forking the project and altering it. His alterations allow him to set specific colors and then exit the program by typing a single command into the command line.

The color of the ShiftBrite is changed according to a schedule defined in the system’s crontab. [Don] installed Minicron, which provides a nice web interface to make it more pleasant to alter the cron job’s on the system. Now [Don] can easily adjust his daughter’s schedule via web page as needed.


Blinkenwall Controlled By A C64

Looking for a dual monitor setup for your Commodore 64? Look no further than the C64 controlled Blinkenwall put together over at Metalab.

The Blinkenwall is 45 glass blocks serving as a partition between the main room and the library over at Metalab in Vienna. Previously, the Blinkenwall was illuminated by 45 ShiftBrite RGB LED boards controlled by an Arduino connected to a Fonera router over a serial port. The Metalab guys have an awesome web interface that allows them (and you) to compose 45-pixel animations and play them on the Blinkenwall.

The new hardware update includes a Commodore 64, a Final Cartridge III, and the ever popular Commodore tape drive. now, instead of sending animation patterns over the Internet to an Arduino, the folks at Metalab can write their animations as 6510 assembly and save it on a cassette.

Yes, this may be a bit of an anachronism, but think of the possibilities: Prince of Persia on a 9×5 display, or just a light show to go along with some SID tunes. You can check out the video after the break.

Continue reading “Blinkenwall Controlled By A C64”

Ambilight Clone Built From Arduino And ShiftBrite Modules

[Don] put together a guide that will help you build your own Ambilight Clone for about $40 plus the cost of an Arduino. He’s using it with the HTPC seen above, and utilized modular concepts in building it so that you can easily disconnect your Arduino board when you want to use it for prototyping.

For RGB light sources [Don] grabbed six ShiftBrite modules. These are fully addressable cascading modules which make for very easy hardware setup. Instead of buying a driver shield he built his own using an LM317, heat sink, and wall wart to source enough current to drive all of the modules.

We really enjoy the mounting scheme used. Each module is attached to a piece of acrylic which is then mounted using the standard threaded VESA mounting holes on the back of the monitor. As with other Ambilight clones this one uses the Boblight package to get color information from the video as it plays.

Hacking Cakes With LEDs, The Sequel!

A few weeks back we ran a piece about the convergence of making and baking in an attempt to create a cake festooned with working LEDs. The moral was that not every creative idea ends in victory, but we applauded the spirit it takes to post one’s goofs for the whole internet to see and to learn from.

[Craig]’s LED matrix proved unreliable…and the underlying cake didn’t fare much better, resembling that charred lump in the toaster oven in Time Bandits. The cakes-with-lights meme might have died right there if not for a fluke of association…

Continue reading “Hacking Cakes With LEDs, The Sequel!”

It’s Like… I Can Tell The Time Just By The Color, Man

[Alex] has reduced the resolution of his timepiece as a trade-off for speedy-readability. At least that’s what he claims when describing his color-changing clock. It uses a ShiftBrite to slowly alter the hue of the clock based on the current time. The concept is interesting: 12:00 starts off at white and slowly fades to green at 3:00, blue at 6:00, red at 9:00, and back to white by 12:00 to start the process over again. He has gotten to the point where he can get the time within about 15 minutes just with a quick look. But he did need to spend a few days acquiring the skill by having the color clock sit next to a traditional digital clock.

The build is pretty simple and we’d bet you already have what you need to make your own. [Alex] is really just proving a concept by using the ShiftBrite and an mBed, there’s no precision RTC involved here. So grab your microcontroller of choice, and an RGB LED of your own and see if you can’t recreate his build.

Of course you could always choose to build a color-based timepiece that’s even harder to read.

Google ADK Project Shows Just How Easy It Is To Use

first_adk_project

[yergacheffe] was able to get his hands on a shiny new Google ADK board about a week before it was announced at I/O, and got busy putting together a neat project to show off some of the ADK’s features. His idea was to meld together the ADK and Google’s new music service, two items he says complement each other very well.

He had a handful of LED matrices left over from last year’s Maker Faire, which he decided to use as a Google music metadata display. The base of the display is made from laser-cut acrylic, with a few spare ShiftBrites lighting up the Google music beta logo.

He says it took literally just a couple lines of code to get his Android handset to talk with the display – a testament to just how easy it is to use the ADK.

Pretty much anyone can walk up, attach their phone, and see their current music track on the display with zero fuss, which you can see in the video demo below.

Continue reading “Google ADK Project Shows Just How Easy It Is To Use”

The Start To Finish Of An Interactive Exhibit

[Andrew & Deborah O’Malley] were tapped to created an interactive exhibit. The mission was to show that social problems take continual support from a lot of people before they can be solved. The piece needed to be architectural in nature, and they ended up building this touch-sensitive model building with individually lighted windows.

The project log that the [O’Malleys] posted shows a well executed battle plan. They used tools we’re all familiar with to achieve a highly polished and pleasing result. The planning stages involved a virtual mock-up using Google SketchUp. The details needed to order the shell from a fabricator were pulled from this early work, while the team set their sights on the electronics that shed light and that make the piece interactive. The former is provided by a Shiftbrite module for each window, the latter comes from the Capacitive Sensing Library for Arduino. Despite some difficulty in tuning the capacitive grid, and getting all of those Shiftbrites to talk to each other, the exhibit went swimmingly. It’s not hard to imagine how easy it is to start a conversation once attendees are attracted by the seductive powers of touch sensitive blinky lights.