Original Gameboy Gets Stuffed Full Of Cool Parts

Raspberry Pi Gameboy

One day at Good Will, [microbyter] came across an original Gameboy for $5. Who reading this post wouldn’t jump on a deal like that? [microbyter] was a little disappointed when he got home and found out that this retro portable did not work. He tried to revive it but it was a lost cause. To turn lemons into lemonade, the Gameboy was gutted and rebuilt into a pretty amazing project.

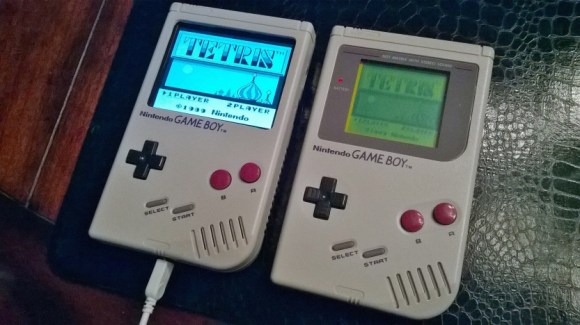
Looking at the modified and unmodified units, it is extremely obvious that there is a new LCD screen. It measures 3.5″ on the diagonal and is way larger than the 2.6″ of the original screen. Plus, it can display colors unlike the monochrome original. Flipping the unit over will show a couple of buttons have been added to the battery compartment door to act as shoulder buttons.

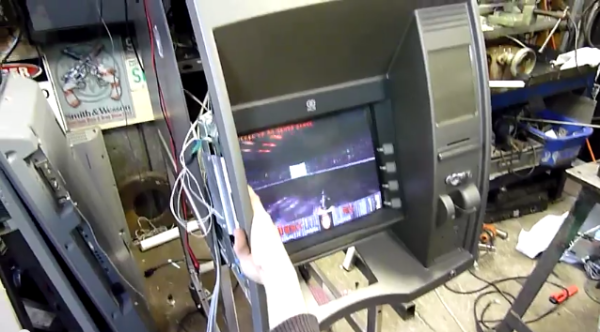
The brains of the project is a Raspberry Pi running Retropie video game system emulation software which will emulate a bunch of consoles, including the original Gameboy. The video is sent to the LCD screen via the composite video output. The Pi’s headphone jack is connected to a small audio amplifier that powers the original speaker that still resides in the stock location. Connecting the controller buttons got a little more complicated since the original board was removed. Luckily there is a replacement board available for just this type of project that bolts into the stock location, allows the use of the original iconic buttons and has easily accessible solder points. This board is wired up to the Pi’s GPIO pins.

Continue reading “Original Gameboy Gets Stuffed Full Of Cool Parts”

An Automated Flappy Bird Player

game Flappy Bird has been ported to just about every system imaginable, including but not limited to the Apple II, Commodores, pretty much every version of the Atari, and serves as a really great demonstration of the TI-99’s graphics capabilities. Porting is one thing, but having a computer automate Flappy Bird is another thing entirely. [Ankur], [Sai], and [Ackerly] in [Dr. Bruce Land]’s advanced microcontroller design class at Cornell have done just that. They’re playing Flappy Bird with a camera, FPGA, and a penny wired up to a GPIO pin to guide the little 8-bit-bird through Mario pipes.

The setup the team is using consists of a webcam that records the screen of a smartphone, an FPGA, and a little bit of circuitry to emulate screen taps. Inside the FPGA, the team is looking at the video stream from the phone to detect the bird, pipes, and gaps. The ‘tapper’ unit is a US penny, placed right above the ‘tap’ button, wired to a GPIO port. This was found to be the ideal contact for a capacitive touch screen – taps that were too small weren’t registered, and taps that were too big registered as two taps.

For spending an entire semester on automating Flappy Bird, the team has a lot of knowledge to show for it, but not the high score: the bird only makes it through the first pipe 10% of the time, and the second pipe 1% of the time. The high score is three. That’s alright – getting the algorithm right to play the game correctly was very, very difficult, and to nail that problem down, they estimate it would take at least another semester.

ASTROGUN Is Like Asteroids On Steroids

Astrogun

As the Jerusalem mini Makerfaire approached, [Avishay] had to come up with something to build. His final project is something he calls ASTROGUN. The ASTROGUN is a sort of augmented reality game that has the player attempting to blast quickly approaching asteroids before being hit.

It’s definitely reminiscent of the arcade classic, Asteroids. The primary difference is that the player has no space ship and does not move through space. Instead, the player has a first person view and can rotate 360 degrees and look up and down. The radar screen in the corner will give you a rough idea of where the asteroids are coming from. Then it’s up to you to actually locate them and blast them into oblivion before they destroy you.

The game is built around a Raspberry Pi computer. This acts as the brains of the operation. The Pi interfaces with an MPU-9150 inertial measurement unit (IMU). You commonly see IMU’s used in drones to help them keep their orientation. In this case, [Avishay] is using it to track the motion and orientation of the blaster. He claims nine degrees of freedom with this setup.

The Pi generates the graphics and sends the output to a small, high-brightness LCD screen. The screen is mounted perpendicular to the player’s view so the screen is facing “up”. There is a small piece of beam splitting glass mounted above the display at approximately a 45 degree angle. This is a special kind of glass that is partially reflective and partially translucent. The result is that the player sees the real-world background coming through the glass, with the digital graphics overlaid on top of that. It’s similar to some heads-up display technologies.

All of the electronics fit either inside or mounted around a toy gun. The display system was attached with a custom-made fiberglass mount. The code appears to be available via Github. Be sure to watch the video of the system in action below. Continue reading “ASTROGUN Is Like Asteroids On Steroids”

Enjoying The Sunrise Every Single Day

Exif_JPEG_PICTURE

[Andy] wanted to take a few at sunrise, but waking up before sunrise has obvious problems associated with it. Instead, he built a device that calculates the local sunrise time, snaps a picture, and goes to sleep until the next morning.

The camera used for the project was an old Canon point and shoot, chosen for the ability to load CHDK firmware. Other electronics included an Arduino pro mini, a LiPo battery and charger board, real time clock, and an old Nokia LCD for the user interface.

There’s quite a bit of code that goes into figuring out when the sun will rise each day, but once that’s figured out, all [Andy] has to do is take the camera somewhere pretty, point it East, and record a few days worth of sunrises. When put into a ‘game camera’ enclosure, its rugged enough to stand up to everything except a thief, and has enough battery power for a few weeks worth of sunrises.

Video demonstrating the local sunrise time below.

Continue reading “Enjoying The Sunrise Every Single Day”

A Router-Based Dev Board That Isn’t A Router

Here’s somethirouterng that be of interest to anyone looking to hack up a router for their own connected project or IoT implementation: hardware based on a fairly standard router, loaded up with OpenWRT, with a ton of I/O to connect to anything.

It’s called the DPT Board, and it’s basically an hugely improved version of the off-the-shelf routers you can pick up through the usual channels. On board are 20 GPIOs, USB host, 16MB Flash, 64MB RAM, two Ethernet ports, on-board 802.11n and a USB host port. This small system on board is pre-installed with OpenWRT, making it relatively easy to connect this small router-like device to LED strips, sensors, or whatever other project you have in mind.

The board was designed by [Daan Pape], and he’s also working on something he calls breakoutserver There’s a uHTTP server written specifically for the board that allows any Internet connected device to control everything on the board. There’s also an HTML5 app they’re developing which could be pretty interesting.

All in all, it’s a pretty cool little device that fits nicely in between the relatively simplistic ‘Arduino with an Ethernet shield’ and a Raspi or BeagleBone.

DOOM ATM

Playing DOOM On An ATM

There aren’t too many details available about this hack, but we still thought it was interesting enough to share. YouTube user [Aussie50] seems to have figured out a way to install DOOM on an automated teller machine (ATM). Not only is the system running the software, it also appears that they are using the ATM’s built-in buttons to control the action in-game.

Many ATM’s today are simply computers that run a version of Windows, so one would assume it shouldn’t be too difficult to get an older game like DOOM running on the hardware. Towards the beginning of the video, you can quickly get a glimpse of what appears to be a default Windows XP background screen. You can see later in the video that [Aussie50] drops to what appears to be an MS-DOS command line. It stands to reason then that this particular model of ATM does run on Windows XP, but that [Aussie50] may have had to install MS-DOS emulation software such as DOSBOX as well.

At one point in the video, the camera man mentions they are using an I-PAC2. Some research will show you that this little PCB is designed to do USB keyboard emulation for arcade games. It looks like you can just hook up some simple momentary switches and the I-PAC2 will translate that into USB keyboard commands. It is therefore likely that [Aussie50] has hooked up the ATM’s buttons directly to this I-PAC2 board and bypassed the original button controller circuit altogether.

It is also mentioned in the video that [Aussie50] was able to get the receipt printer working. It would be interesting to somehow incorporate this into the DOOM game. Imagine receiving a receipt with your high score printed on it. This also gets us thinking about other possibilities of gaming on ATM hardware. Can you configure the game to require a deposit before being able to play? Can you configure it to dispense cash if you beat the high score? What if you modified the multiplayer deathmatch mode so all players must pay an entry fee and the winner takes all? What creative ideas can you come up with for gaming on ATM hardware? Continue reading “Playing DOOM On An ATM”

LED Cube In An Elongated Cube Be Jammin’

LED cube and drive electronics inside an acrylic case

We get a lot of tips about LED cubes. They’re a great build to explore a lot of different things, from the circuit design, to current source and sink, and of course there’s the firmware. Why don’t we see a million of them on the front page? Well, we have seen a lot, but most of what is sent our way doesn’t exhibit such a clean build. It’s obvious that [Justin] took a lot of pride in his work on this 4x4x4 single-color cube.

Hidden away under one of the protoboards is an Arduino that drives it. A lot of the components were salvaged from the e-waste bin at his University. This includes the 12V AC wall wart he uses to power the device. A bridge rectifier converts to DC, and in addition to powering the LEDs there are a couple of USB charging ports. After the break you can see and hear it in action. The cube pulses to the music but the flip of a switch will disconnect the speaker if you want some peace and quiet to go with the light show.

If you’re looking for a challenge, this 8x8x8 RGB offering is several orders of magnitude harder to pull off… block out a lot of extra time if you do decide to take the plunge. We also heard that [Benchoff] might try to make a cube with some of those through-hole ws2812 pixels.

Continue reading “LED Cube In An Elongated Cube Be Jammin’”