Breadboarding A Game Boy From Scratch

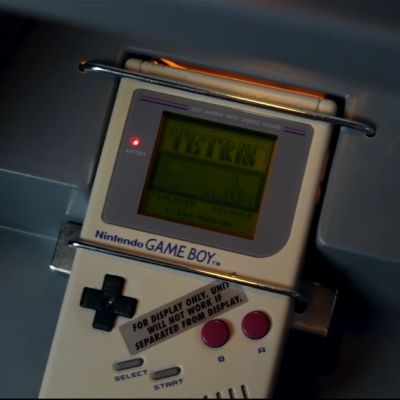
The original Nintendo Game Boy is a stout piece of hardware in a solid plastic enclosure. [Raphael Stäbler] recreated the popular handheld on a breadboard instead, in a fully-functional way, to boot.

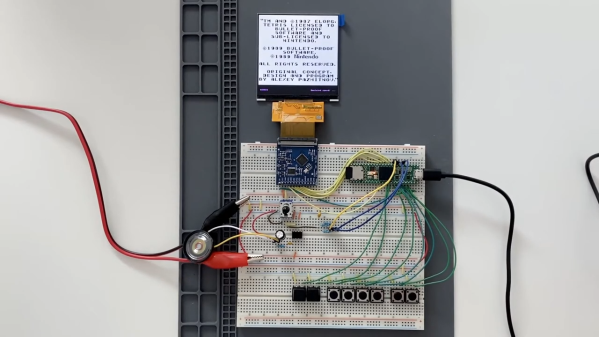
[Raphael]’s build doesn’t rely on a real Game Boy CPU or components. Instead it’s emulated with the aid of a Teensy 4.1 microcontroller. [Raphael] coded up an emulator from scratch, instruction by instruction, something he’s documented on his own blog. The Teensy is placed on a breadboard, and hooked up with a series of 8 buttons to serve as the controls. Audio output is via a LM386 acting as a simple audio amp, hooked up with an original Game Boy speaker for more authentic sound. Display is thanks to a FT81x display driver running a small LCD. Games are loaded via an SD card formatted in the FAT32 file system.

While it’s not as ergonomic as the original Nintendo console, it works, and works well! It’s an impressive project to see the Game Boy recreated from scratch inside a powerful microcontroller. We’ve seen other projects go to similar lengths before. Video after the break.

Continue reading “Breadboarding A Game Boy From Scratch”

The Game Boy Color Accessory You’ve Been Waiting For

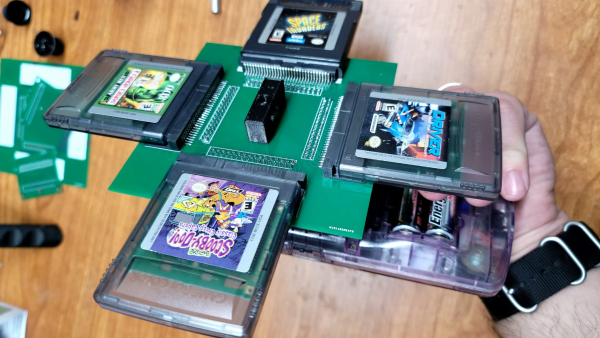
Sometimes silly projects catch our eye, and we just can’t resist covering them. Over on Hackaday.io, [solderking] realized that there was a glaring omission in the multi-game management hardware for the Game Boy Color. Obviously, it’s too mundane to carry the handheld around with a bunch of games in one’s pocket, and a hardware multi-changer would definitely improve the usability. This convenient, pocket-friendly solution allows you to dock up four cartridges at a time, and with only a little mild inconvenience, spin the whole assembly, lock in a game and load it up. What could be easier?

Constructed from a ridiculous three-tier PCB stack, with a rotating center joint, the assembly is completely passive, with the connections from the selected game cartridge passed down a series of connectors before finally entering the Game Boy via the usual edge connector. The mere fact that this works at all just shows how tolerant (and we guess, slow) older gaming platforms used to be, and just what you can get away with! Still, it’s a fun build, and it does work, which just goes to show that just because you can, then you should.

We’re no strangers to Game Boy hacks. Here’s a useful cartridge to help with developing your first program. If the old platform is just a bit too limited for you, then we’ve got you covered with a hack that wedges an iCE40 FPGA and a Pi Zero inside the case, to give a bit more oomph.

Continue reading “The Game Boy Color Accessory You’ve Been Waiting For”

SquareBoi Is The DIY Game Boy Cart You’ve Always Wanted

Running unofficial code on a Nintendo Game Boy has long been a solved problem. However, you still need a way to get that code onto the handheld console. The Squareboi cartridge promises to do just that, as created by [ALXCO-Hardware].

It’s a well-featured cartridge, with up to 4 MB of ROM storage onboard. It also features a ferromagnetic RAM part for savegame storage, which doesn’t need a battery to hang on to your precious data. It’s designed to be compatible with the vast majority of Game Boy and Game Boy Color games, with efforts made to support the most common mapping schemes. It can be built using entirely through-hole components, and is readily programmable via an Arduino.

For those eager to tinker with code on the Game Boy, diving into the Squareboi is a great way to get closer to the bare metal and understand what’s really going on at the low level. Those interested in building their own can get all the relevant details over on Github.

We’ve seen similar hacks before, too, like the cartridge that brought Wikipedia to the humble Nintendo handheld. If you’ve been whipping up your own Nintendo hacks, be sure to drop us a line!

Game Boy Repurposed Solely As A Camera

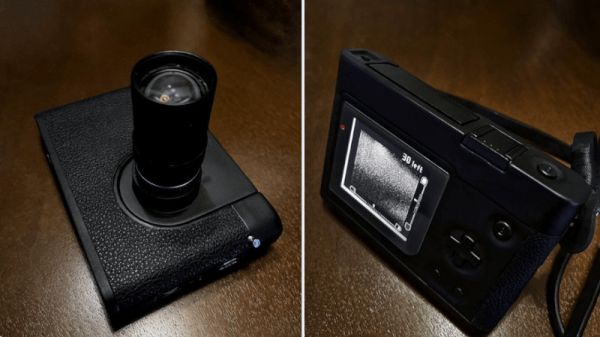
As much as we all love the Game Boy Camera, it’s really just an add-on to the popular handheld console. Twitter user [@thegameboycam] decided to build a dedicated camera platform using the hardware, and the result was the Game Boy DSLR.

Camera pedants will note that it’s not really a DSLR, but that’s not really the point. It’s a Game Boy with the camera accessory built into a proper camera-like housing. There’s a CS/C mount for the lens, and it’s got a custom shell with leatherette, just like the cameras of last century. It’s also got a cold shoe, and a 1/4″ screw thread for tripod mounting. Oh, and strap lugs! So you can really rock that old-school aesthetic with your tweed suit on.

More practical modern features include a 1800 mAh battery that charges over USB Type C and a backlit IPS display. The screen has been turned through 90 degrees, and the cartridge port and buttons are relocated to create a more traditional camera-like form factor. If you really want, though, you can still play it like a regular Game Boy. Just swap out the modified camera cart with the lens mount for a regular Game Boy Camera or another game cartridge.

It’s a fun hack that scores big on style points. No longer can you be the cool kid just by rocking a Game Boy with a big ol’ lens hanging off the back. Now you gotta compete with this!

Our tipsline is waiting for when you’ve got the next big thing in Game Boy Camera hacks. Video after the break.

Continue reading “Game Boy Repurposed Solely As A Camera”

GBA Remote Play Upgrade Lets You Play PlayStation On The Bus

The Nintendo Game Boy Advance was basically the handheld gaming situation of its era, by virtue of the fact that it had no serious competitors in the market. The system was largely known for 2D games due to hardware limitations.

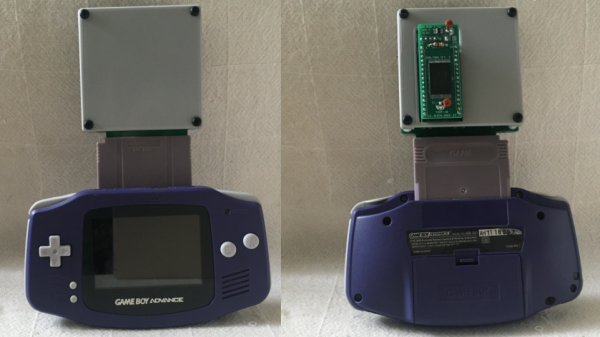
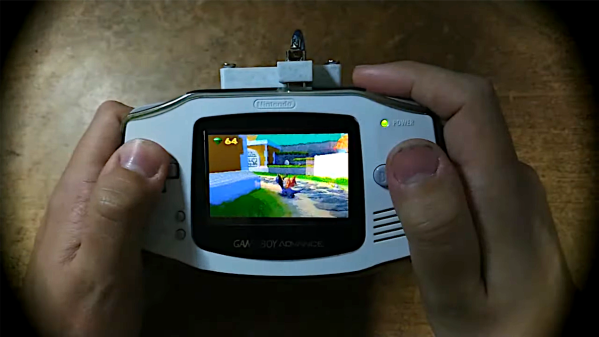
However, [Rodrigo Alfonso] has recently upgraded his GBA Remote Play system that lets him play PlayStation games and others on his classic Game Boy Advance. We first featured this project back in July, which uses a Raspberry Pi 3 to emulate games and pipe video data to the handheld for display, receiving button presses in return.

Since then, [Rodrigo] has given the project some upgrades, in the form of a 3D-printed case that mounts a battery-powered Pi directly to the back of the console for portable play. Additionally, overclocking the GBA allows for faster transfer rates over the handheld’s Link Port, which means more pixels of video data can be clocked in. This allows for more playable frame rates when running at 240×160, the maximum resolution of the GBA screen.

The result is a Game Boy Advance which you can use to play Crash Bandicoot on the bus just to confuse the normies. Of course, one could simply build a Raspberry Pi handheld from scratch to play emulated games. However, this route takes advantage of the GBA form factor and is pretty amusing to boot. Video after the break.

Continue reading “GBA Remote Play Upgrade Lets You Play PlayStation On The Bus”

GateBoy Is A Game Boy Emulated At Gate Level

Old game systems are typically the most popular targets for emulation. With huge communities of fans wanting to recreate the good times of yesteryear, most old systems have all been brought back to life in this manner. However, some simply dive into emulation for the technical challenge, and [Austin Appleby] has done just that with GateBoy.

GateBoy is a project to emulate the Game Boy logic gate by logic gate. It’s a lower level approach that builds upon earlier work [Austin] did on a project called MetroBoy, which we featured previously.

The emulator was created by painstakingly reverse-engineering the logic of the Game Boy. This was done by poring over die shots of the actual DMG-01 CPU silicon. GateBoy emulates most of the chip, though avoids the audio hardware at this stage.

Presently, GateBoy runs at roughly 6-8 frames per second on a modern 4GHz CPU. As it turns out, emulating all those gates and the various clock phases at play in the DMG-01 takes plenty of processing power. However, compilation optimizations do a lot of heavy lifting, so in some regards, GateBoy runs impressively quickly for what it is.

[Austin] still has plenty of work to do before GateBoy is completely operational, and there are some strange quirks of the Game Boy hardware that still need to be figured out. Regardless, it’s a fantastic academic exercise and a noble effort indeed. Meanwhile, you might like to check out the Game Boy emulator that runs just one single game.

Mining Bitcoin On The Nintendo Game Boy

Mining cryptocurrency is a power intensive business, with big operations hoarding ASIC rigs and high-end GPUs in an endless quest for world domination money. The Bitcoin-mining Game Boy from [stacksmashing] is one of them. (Video, embedded below.)

The hack is relatively straightforward. The Game Boy is hooked up to a PC via a Raspberry Pi Pico and a level shifter to handle the different voltage levels. The Game Boy runs custom software off a flash cart, which runs the SHA hash algorithm on incoming data from the PC and reports results back to the PC which communicates with the Bitcoin network.

[stacksmashing] does a great job of explaining the project, covering everything from the Game Boy’s link port protocol to the finer points of the Bitcoin algorithm in explicit detail. For the technically experienced, everything you need to know to recreate the project is there. While the Game Boy manages just 0.8 hashes per second, trillions of times slower than cutting edge hardware, the project nonetheless is amusing and educational, so take that into consideration before firing off hot takes in the comments below. If you’re really interested in the underlying maths, you can try crunching Bitcoin hashes with pen and paper.

Continue reading “Mining Bitcoin On The Nintendo Game Boy”