Despite what you may have read in the comments, we here at Hackaday are not unaware that there’s something of a “Pi Fatigue” brewing. Similar to how “Arduino” was once a dirty word around these parts, projects that are built around the world’s most popular Linux SBC are occasionally getting dismissed as lazy. Hacker crams Raspberry Pi into an old electronic device, applies hot glue liberally, posts a gallery on Imgur, and boom! Lather, rinse, repeat.
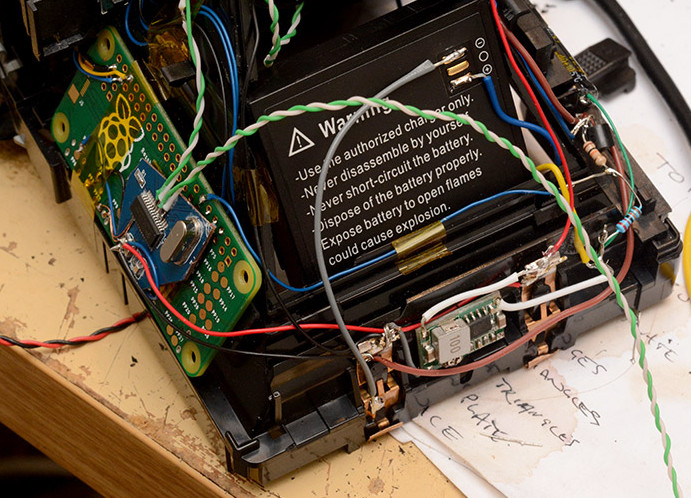
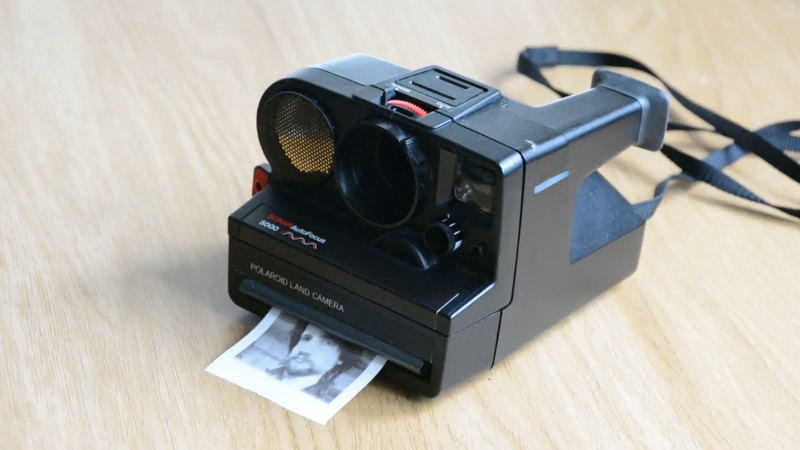
 We only mention this because the following project, despite featuring the Raspberry Pi Zero grafted into a vintage Polaroid camera, is anything but lazy. In the impeccably detailed and photographed write-up, [mitxela] explains how the Pi Zero and a thermal camera recreated the classic Polaroid experience of going from shutter button to physical picture in seconds. The workmanship and attention to detail on this build is simply phenomenal, and should quell any doubts our Dear Readers may have about Raspberry Pi projects. For now, anyway.
The video after the break will show you the modded camera in operation and goes over a few highlights of the build, but for this one you really should take the time to read the entire process start to finish. [mitxela] starts off by disassembling the Polaroid camera, complete with plenty of fantastic pictures that show how this legendary piece of consumer electronics was put together. If you’ve never seen the inside of one of these cameras, you might be surprised to see what kind of interesting hardware is lurking underneath that rather unassuming exterior. From the screw-less construction to the circuits with paper substrate, a lot of fascinating engineering went into getting this camera to a mass-market price. Frankly, the teardown alone is worth checking out.
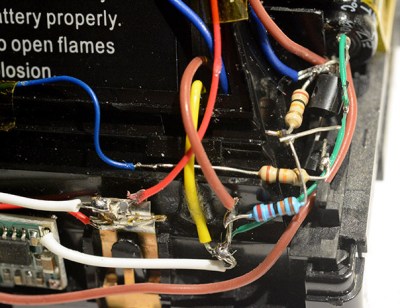
 But once the camera has been stripped down to the bare frame, the real fun begins. At the conceptual level, [mitxela] replaces the camera optics with a cheap webcam, the “brains” with a Raspberry Pi Zero, and the film mechanism with the type of thermal printer used for receipts. But how he got it all connected is why this project is so impressive. Nearly every decision made during the design and construction of this camera was for the purposes of reducing boot-time. Nobody wants a camera that takes 30, 15, or even 10 seconds to boot. It has to be available as soon as you need it.
Getting this Linux-powered camera boot up in as little as 2 seconds took a lot of clever software hacks that you’ll absolutely want to check out if you’ve ever considered building an embedded Linux device. You can’t just throw a stock Raspbian image on an SD card and hope for the best. [mitxela] used buildroot to craft a custom Linux image containing only what was needed for the camera to operate, plus a bunch of esoteric tweaks that the Junior Penguin Wrangler would likely never consider. Like shaving a full second off of the boot time by disabling dumping kernel messages to the serial port during startup.
[mitxela] brought his camera to show off at the recent Hackaday London meetup, but it was far from the first time we’ve come across his handiwork. From his servo-powered music box earlier this year to his penchant for tiny MIDI devices, he’s consistently impressed our cold robot hearts.


I think I am too easily amazed and entertained by these types of projects… It is pretty cool though
me too, the article mentions a kind of fatigue about hacks based on platform, arduino, pi etc.
So far as I’m concerned if the hack is good, who cares what it’s running on. there’s no room in the hacker mindset for this kind of snobbery. I recently watched Tom Scott describing how he made an emoji keyboard using several keyboard macro tools running on the same windows PC. as much as I appreciate elegant hacks, I admire the idea of having an idea and implementing it sucessfully using whatever is to hand.
risk of snobbery is that it leads some people to let a good idea go rather than implement it in a less than perfect or fashonable way.
There needs to be a club named the Junior Penguin Wranglers,
but I digress.
This is a great use for a Pi 0, and slick build too! I think the Pi saturation is only present because of convenience. I like Pis, but also wish for more open source competition, like what happened with Arduino. TI should step up their game.
Doesn’t Polaroid make one of these? A few years when the students moved out I pulled a digital Polaroid camera out of the flotsam. It was somewhat smashed but I thought there was a printer built in, a digital equivalent of original Polaroid cameras.
Michael
The technology is called Zink. It uses 3 pigments, CMY (I think there’s no K), and a clever method to print them. The pigments are in crystal form, embedded in the paper. Using short pulses of high temperature, long pulses of lower temperature, and something in between, it manages to activate all 3 pigments using just a thermal printhead, the width of the paper.
It’s ingenious, all the brains are in the pigments of course. I have a Bluetooth printer somewhere that uses it. Only problem being it needs a lot of current. It comes with a lithium battery, even though it only lasts a few prints, I think because of the high current supply it needs.
As well as the printer, Polaroid make digital cameras just like the old film ones, with the printer built in. So do one or two other companies.
That’s a really well done hack. Inspired by the Fisher-Price digital paper printing camera of some years ago (http://1.bp.blogspot.com/__ggOloCz7QI/TIFBIuEvjhI/AAAAAAAAAA8/rZlRwVdds8I/s400/2790653618_f4cc1a24af_o.jpg) some students of mine made one like this using an Arduino, a camera and a printer. Getting it all to fit in an original Polaroid though? Massively cool.
What would be even cooler? A digital imaging module that’s the shape and size of a Polaroid film pack. Have a small CCD or CMOS sensor that pops up behind the lens inside, positioned just right to intercept the light before it hits the mirror. Would most likely need a lens in front of the sensor to focus the image.
Without a way to retract the sensor it would essentially be a permanent conversion. The front of the ersatz film pack would have a battery hatch, SD card slot and a USB port for charging and data transfer. Could have a cord to pull to retract the pop up sensor for removing the unit.
With the film door closed, there would be no way to tell it’s not a normal Polaroid camera.
Dunno what’d happen with the film counter. Is it simply operated by a lever or something that senses the reducing thickness of the film stack or is it something more complex that requires removal of the film pack after 10 shots?
With some Polaroids, you could swap partially used film packs by reinserting the overcard. I used to break open the empty packs to get the 6V flat battery, which had tons of power left, even in the later versions where the battery area was much reduced in size instead of covering its entire card base.
That would have to be one big sensor though, unless you want the lens to be a pretty powerful telelens. I wonder if they make such large sensors but with ‘hobbyist’ specs, that is to say not costing 8 grand.You can get sensor strips that large, but then you’d have to stand still for the picture for it to do a scan. Or maybe there is a way to ‘hold’ a picture long enough for a scan these days, perhaps some chemical temporary imager would be possible now, although not developed yet (pardon the pun), AFAIK, it could still be that some combination of techniques would make it possible.
Excuse the ramble.
Very nice! The RPi boot optimizations are amazing, very useful in other projects.
Oh the horror!
Another antique butchered with a pi/arduino/esp!
B^)
this is great! I built something similar for burning man, except mine was about 2ft x 1 ft and sat in a photobooth.
Raspberry Pi, a Pi Camera, and an adafruit thermal printer. Impressive that he managed to shrink it down into a camera body.
I’m impressed you found a 2ft x 1 ft Polaroid!
Frankly. HaD shouldn’t be the twitch equivalent of the Positive community. Instead, go watch forsen.
A nice build, which I was lucky enough to see in person.
For me the Pi/Arduino fatigue stems from the likes of buying a CO2 sensor (or whatever) shield, downloading somebody else’s CO2 sensor library, and then thinking you built this amazing CO2 sensor. That doesn’t apply to this build at all. A bonus for using a Pi Zero for a project that actually benefited from a Zero. Not just because your bought one in the rush when they were announced.
The real essence of this hack was the painstaking care of the teardown, the ingenuity of the Linux slimdown, and the panic of realising he had 4 days left to cram in a USB hub and thermal printer, then assemble the whole thing.