Motion-Controlled KVM Switch

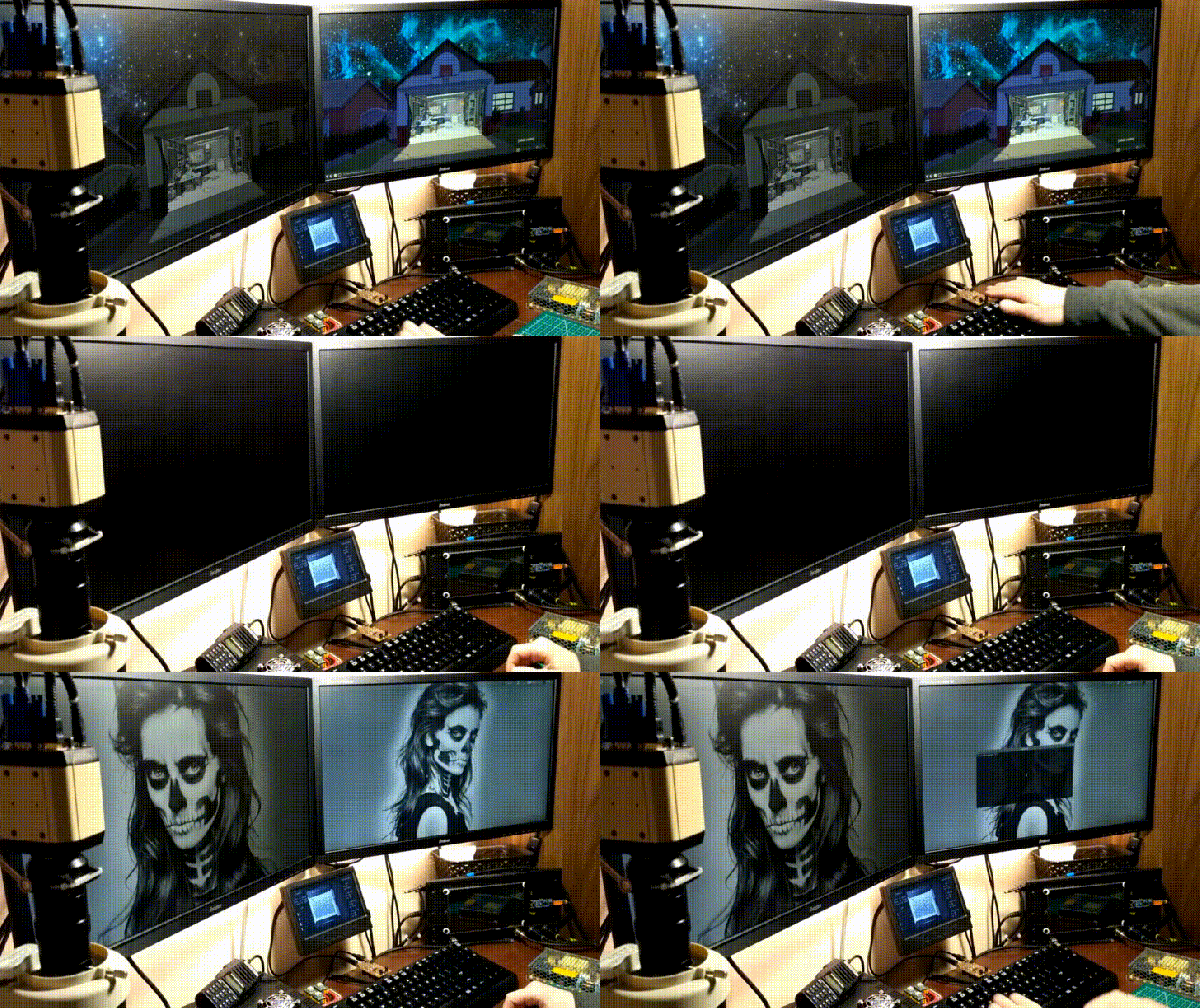
Once upon a time, [hardwarecoder] acquired a Gen8 HP microserver that he began to toy around with. It started with ‘trying out’ some visualization before spiraling off the rails and fully setting up FreeBSD with ZFS as a QEMU-KVM virtual machine. While wondering what to do next, he happened to be lamenting how he couldn’t also fit his laptop on his desk, so he built himself a slick, motion-sensing KVM switch to solve his space problem.

At its heart, this device injects DCC code via the I2C pins on his monitors’ VGA cables to swap inputs while a relay ‘replugs’ the keyboard and mouse from the server to the laptop — and vice-versa — at the same time. On the completely custom PCB are a pair of infrared diodes and a receiver that detects Jedi-like hand waves which activate the swap. It’s a little more complex than some methods, but arguably much cooler.

Using an adapter, the pcb plugs into his keyboard, and the monitor data connections and keyboard/mouse output to the laptop and server stream out from there. There is a slight potential issue with cables torquing on the PCB, but with it being so conveniently close, [hardwarecoder] doesn’t need to handle it much.

Continue reading “Motion-Controlled KVM Switch”

Learning Software In A Soft Exosuit

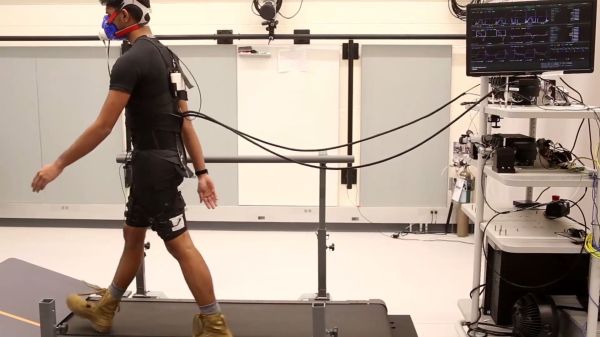
Wearables and robots don’t often intersect, because most robots rely on rigid bodies and programming while we don’t. Exoskeletons are an instance where robots interact with our bodies, and a soft exosuit is even closer to our physiology. Machine learning is closer to our minds than a simple state machine. The combination of machine learning software and a soft exosuit is a match made in heaven for the Harvard Biodesign Lab and Agile Robotics Lab.

Machine learning studies a walker’s steady gait for twenty periods while vitals are monitored to assess how much energy is being expended. After watching, the taught machine assists instead of assessing. This type of personalization has been done in the past, but the addition of machine learning shows that the necessary customization can be programmed into each machine without a team of humans.

Exoskeletons are no stranger to these pages, our 2017 Hackaday Prize gave $1000 to an open-source set of robotic legs and reported on an exoskeleton to keep seniors safe.

Continue reading “Learning Software In A Soft Exosuit”

Polaroid Gets Thermal Printer And Raspberry Pi

Despite what you may have read in the comments, we here at Hackaday are not unaware that there’s something of a “Pi Fatigue” brewing. Similar to how “Arduino” was once a dirty word around these parts, projects that are built around the world’s most popular Linux SBC are occasionally getting dismissed as lazy. Hacker crams Raspberry Pi into an old electronic device, applies hot glue liberally, posts a gallery on Imgur, and boom! Lather, rinse, repeat.
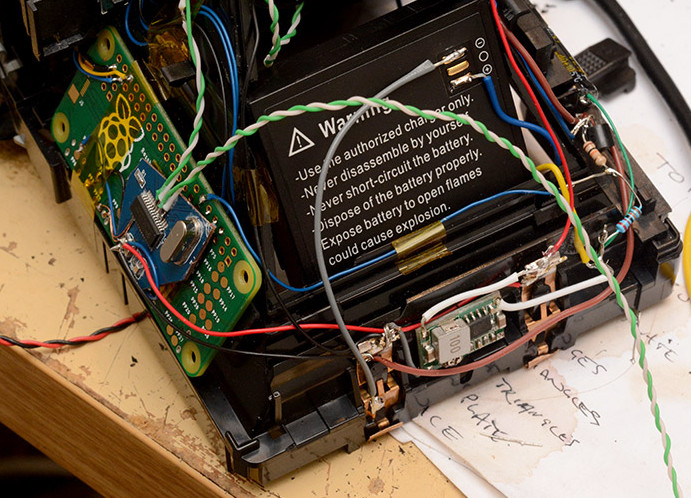
We only mention this because the following project, despite featuring the Raspberry Pi Zero grafted into a vintage Polaroid camera, is anything but lazy. In the impeccably detailed and photographed write-up, [mitxela] explains how the Pi Zero and a thermal camera recreated the classic Polaroid experience of going from shutter button to physical picture in seconds. The workmanship and attention to detail on this build is simply phenomenal, and should quell any doubts our Dear Readers may have about Raspberry Pi projects. For now, anyway.

The video after the break will show you the modded camera in operation and goes over a few highlights of the build, but for this one you really should take the time to read the entire process start to finish. [mitxela] starts off by disassembling the Polaroid camera, complete with plenty of fantastic pictures that show how this legendary piece of consumer electronics was put together. If you’ve never seen the inside of one of these cameras, you might be surprised to see what kind of interesting hardware is lurking underneath that rather unassuming exterior. From the screw-less construction to the circuits with paper substrate, a lot of fascinating engineering went into getting this camera to a mass-market price. Frankly, the teardown alone is worth checking out.

But once the camera has been stripped down to the bare frame, the real fun begins. At the conceptual level, [mitxela] replaces the camera optics with a cheap webcam, the “brains” with a Raspberry Pi Zero, and the film mechanism with the type of thermal printer used for receipts. But how he got it all connected is why this project is so impressive. Nearly every decision made during the design and construction of this camera was for the purposes of reducing boot-time. Nobody wants a camera that takes 30, 15, or even 10 seconds to boot. It has to be available as soon as you need it.

Getting this Linux-powered camera boot up in as little as 2 seconds took a lot of clever software hacks that you’ll absolutely want to check out if you’ve ever considered building an embedded Linux device. You can’t just throw a stock Raspbian image on an SD card and hope for the best. [mitxela] used buildroot to craft a custom Linux image containing only what was needed for the camera to operate, plus a bunch of esoteric tweaks that the Junior Penguin Wrangler would likely never consider. Like shaving a full second off of the boot time by disabling dumping kernel messages to the serial port during startup.

[mitxela] brought his camera to show off at the recent Hackaday London meetup, but it was far from the first time we’ve come across his handiwork. From his servo-powered music box earlier this year to his penchant for tiny MIDI devices, he’s consistently impressed our cold robot hearts.

Continue reading “Polaroid Gets Thermal Printer And Raspberry Pi”

Reprogramming Cheap WiFi Outlets

If you want to retrofit your home with smart outlets and lightbulbs, bust out your wallet. You can easily spend forty dollars for a smart light bulb at your local home supply store, and strips of smart sockets could cost sixty. When [coogle] found a WiFi-enabled four-outlet power strip on Amazon, he couldn’t resist. Sure, the no-name strip would be locked down behind a stupid iPhone interface and will probably turn your house into a botnet, but never mind that: you can easily reprogram these power strips to be whatever you want.

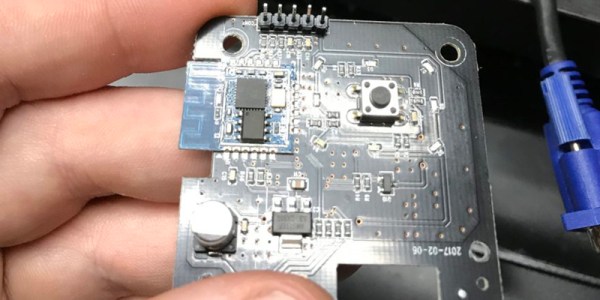
After receiving these power strips and tearing them open, [coogle] found exactly what you would expect from a no-name white goods manufacturer. There’s a board with an Espressif chip and a WiFi antenna, and a second board with a few relays, with a few wires connecting the two. You only need to browse AliExpress for a few minutes to figure out what’s going on here. The brains of the outfit are in the ESP8266, and if you can control that, you have your own Internet of Power Strips.

The problem, then, was reprogramming the ESP8266. This was a version of the chip [coogle] hadn’t seen before, but a quick query with the Google Mother Brain revealed it was a WT8266-S1 module, with all the pins required for programming easily accessible on a convenient header. After connecting this header up to an ESP programming board, [coogle] had all the relevant information including the capacity of the Flash. There’s still a bit more work to make this a functional WiFi power outlet, namely figuring out which GPIOs and wires connect to which relays, but this is effectively a completely Open IoT device right now. All you have to do is bring your own firmware.

Medium Machine Mediates Microcontroller Messages

Connecting computers to human brains is currently limited to the scope of science fiction and a few cutting-edge laboratories. Tapping into some nerves farther from our central wetware is possible and [Peter Buczkowski] shows us his stylish machine for implanting a pattern into our brains without actively having to memorize anything.

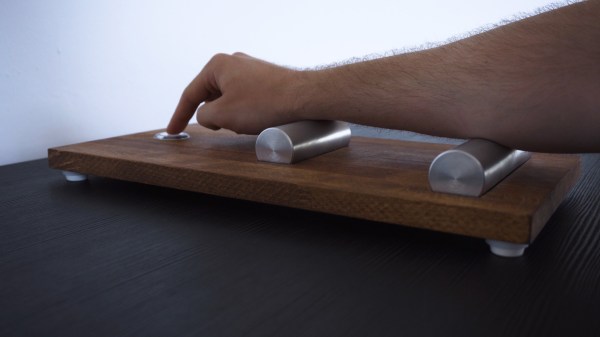
His Medium Machine leverages a TENS unit to activate forearm muscles in a pattern programmed into an Arduino. Users place their forearm across two aluminum electrodes mounted on a tasteful wooden platform and extend a single finger over a button. Electrical impulses trigger the muscles which press the button. That’s all. After repeating the pattern a few times, the users should be able to recite it back on command even if they aren’t aware of what it means. If this sounds like some [Johnny Mnemonic] memory cache, you are absolutely correct. This project draws inspiration from the [William Gibson] novel which became a [Keanu Reeves] movie.

Users can be programmed with a Morse code message or the secret knock to open an attic library or play a little tune. How about learning a piano song?

Continue reading “Medium Machine Mediates Microcontroller Messages”

TensorFlow In Your Browser

If you want to explore machine learning, you can now write applications that train and deploy TensorFlow in your browser using JavaScript. We know what you are thinking. That has to be slow. Surprisingly, it isn’t, since the libraries use Graphics Processing Unit (GPU) acceleration. Of course, that assumes your browser can use your GPU. There are several demos available, include one where you train a Pac Man game to respond to gestures in your webcam to control the game. If you try it and then disable accelerated graphics in your browser options, you’ll see just what a speed up you can gain from the GPU.

Continue reading “TensorFlow In Your Browser”

Delicious Optics, A Chocolate Diffraction Grating

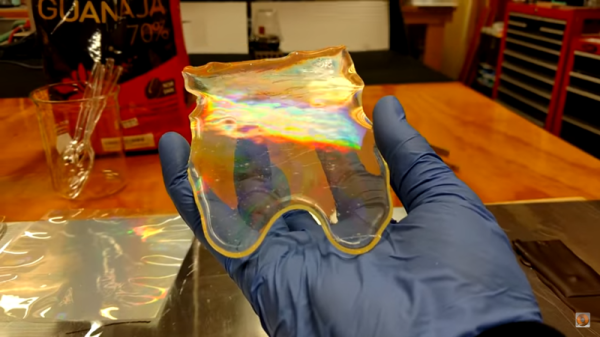
Diffraction gratings are curious things. Score a series of equally spaced tiny lines in a surface, and it will cause reflected or transmitted light to bend and separate into its component wavelengths. This ability gives them all manner of important applications in the field of optics, but they’re also fun to play with. [Tech Ingredients] has done the hard work to find out how to make them out of candy!

The video starts with a basic discussion on the principles of diffraction gratings. The basis of the work is a commonly available diffraction grating, readily available online. It’s a plastic sheet with thousands of microscopic ridges scored into the surface. The overarching method to create a candy version of this is simple — coat the ridged surface in liquid chocolate or sugar syrup, to transfer the impression on to the candy surface when it solidifies. However, the video goes further, explaining every step required to produce a successful end result. The attention to detail is on the level of an industrial process, and shows a mastery of both science and candy processing techniques. If you’ve ever wondered how to properly crystallize chocolate, this video has the knowledge you need.

It’s not often we see candy optics, but we like it — and if you fail, you can always eat your mistakes and try again. If you’re wondering what you can do with a diffraction grating, check out this DIY USB spectrometer.