MIDI To CV The DIY Way

MIDI has been a remarkably popular interface since its inception way back in 1983. Based on existing serial interfaces, and with a broad enough set of features, it remains the defacto standard for communication between musical gear. However, older gear and many modular synths simply don’t grok digital data, instead using analog control voltages to get the job done. Never fear, though – you can convert from one to the other with the goMIDI2CV.

It’s a simple device, hewn from an ATTINY microcontroller. MIDI signals are received at TTL voltage levels, and converted to output voltages by the ATTINY via use of the PWM hardware. A lowpass filter is added to remove the high-frequency content from the output signal.  A 6N138 optocoupler completes the project, to comply with the MIDI standard and ensure the device is not subject to any dangerous voltages from the hardware plugged in.

It’s a simple way to control older non-MIDI compliant hardware, and might make an old modular rig just that much more useful in the studio of today. We’ve seen similar builds before, like this combined CV and Gate converter. 

A Z80 Homebrew Console, With A Bit Of Modern Help

We see a lot of retrocomputing projects here at Hackaday that take devices from the 8-bit era and re-create them in the 21st century. Sometimes they remain period-accurate and stick to all contemporary devices, but in other cases they take full advantage of four decades of advancing technology. [Pkiller]’s Z80 console is one of this later category, creating peripherals for the classic CPU using microcontrollers in the place of the banks of 74 logic or ULA chips that might have graced a 1980s machine.

The video generation hardware produces a PAL signal using an interesting technique involving two RAM buffers. An ATmega644 microcontroller composites a single frame into one of the buffers while another ATmega644 is generating the previous frame of video from the other buffer. On each change of frame the buffers are switched between the two microcontrollers, requiring some extra 74 logic chips. Another AtMega chip provides the Z80 with I/O interfacing, and the sound comes via another dual-buffer microcontroller setup and a quick return to classic hardware with a YM3438 FM synthesis chip. The result can be seen in the video below, and would have not looked out of place in a late-’80s or even early-’90s living room.

Some people might ask why so much trouble should be gone to in the pursuit of a project like this one, but to do so is to miss the point. Sure, a Sega Master System can be had from the usual sources, but in creating  project such as this one the builder has to truly understand the technologies such as PAL generation or the internals of a Z80 in great detail. The result while it is undeniably impressive is almost secondary to the process of reaching it.

Continue reading “A Z80 Homebrew Console, With A Bit Of Modern Help”

Hackaday Links Column Banner

Hackaday Links: March 24, 2019

It has come to my attention that a few of you don’t know about Crystalfontz, an online store where you can find displays of all types, from USB LCD displays to I2C OLEDs, to ePaper displays. Thanks to [arthurptj] for that tip. Yes, Crystalfontz is cool, but have you ever heard of Panelook? Oh boy are there some displays at Panelook. Here’s a 1024 by 768 resolution display that’s less than half an inch across.

The comments section of Hackaday has been pretty tame as of late, so here’s why Apple is the king of design. It’s a question of fillets. There are a few ways to add a fillet to the corner of an icon or a MacBook. The first is to draw two perpendicular lines, then add a fixed radius corner. The Apple way is to make everything a squircle. The ‘squircle’ way of design is that there are no sudden jumps in curvature, and yes, you can do this in Fusion360 or any other design tool. This is also one of those things you can’t unsee once you know about it, like the arrow in the FedEx logo.

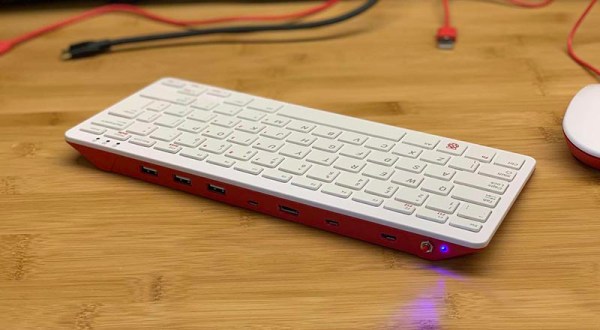
The ESP8266 simply appeared one day, and it changed everything. The ESP32, likewise, also just arrived on the Internet one day, and right now it’s the best solution for a microcontroller, with WiFi, that also does things really fast. Someone over at Espressif is dropping hints of a new microcontroller, with a possible release on April 1st (the same date that Apple released their competitor to the Raspberry Pi). Is it RISC-V? Is it 5V tolerant? Who knows! (Editor’s note: it’s not RISC-V. Though they’re saying that’s in the pipeline.)

The Verge got their hands on an original iPhone engineering validation unit. It’s a breakout board for an iPhone.

San Dimas High School Football Rules

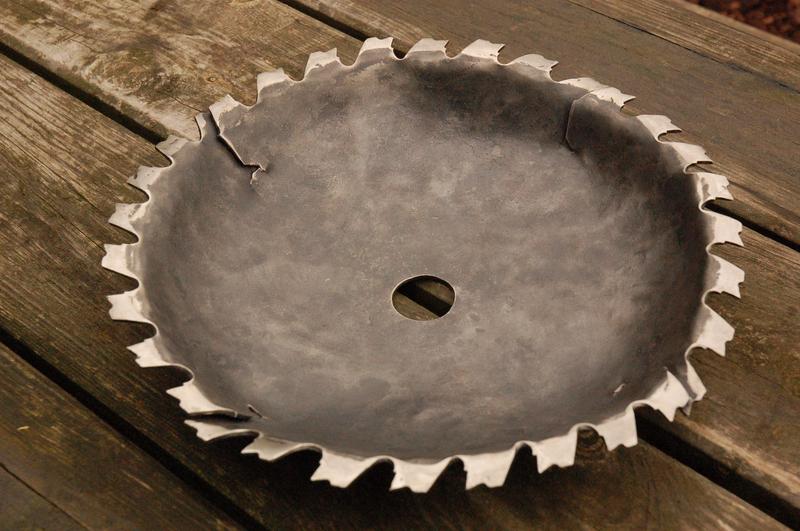
There’s a screwdriver in your toolbox that has a cast clear handle, a blue ferrule surrounding the shaft, and red and white lettering on the side. Go check, it’s there. It’s a Craftsman screwdriver. It’s an iconic piece of design that’s so ubiquitous that it’s unnoticeable. It’s just what a screwdriver is. It’s a prototypical screwdriver. Thanks to the rise of resin and turning craftsmanship, there’s now a gigantic version of this screwdriver.

[The 8-Bit Guy] posted the following message on his Facebook on March 19th: “Just FYI – somebody hacked and totally erased my website. So, it’s going to be down for a while.” At the time of this writing, everything looks okay, which brings up the larger question of why Facebook is still a thing. We’re on a gradient of coolness here, and the sooner you delete your Facebook, the cooler you are. I, for example, deleted my Facebook during the Bush administration, and we all know how cool I am. I’ll never get to the singularity of coolness of kids who never had a Facebook in the first place, but the point remains: delete your Facebook old man.

[SirEdmar] wants to bring Fusion 360 to Linux users. Autodesk wants the same, and they tried a web-based version of Fusion 360, but… it’s a web version of Fusion 360. Right now the best solution is Wine, and thanks to [SirEdamr] 360 works in Wine.

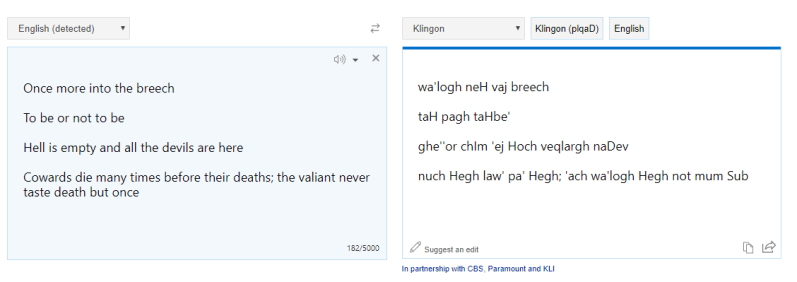
Bing translate does Klingon! How well does it work? Not bad, it could use some work, mostly with non-standard vocabulary:

Here’s The First Person To Put A Pi In The Raspberry Pi Keyboard

Last week, the Raspberry Pi foundation released the first official Raspberry Pi-branded keyboard and mouse. As a keyboard, it’s probably pretty great; it’s clad in a raspberry and white color scheme, the meta key is the Pi logo, there are function keys. Sure, the Ctrl and Caps Lock keys are in their usual, modern, incorrect positions (each day we stray further from God’s light) but there’s also a built-in USB hub. Everything balances out, I guess.

The Pi keyboard started shipping this week, and it took two days for someone to put a Pi zero inside. Here’s how you do it, and here’s how you turn a Pi keyboard into a home computer, like a speccy or C64.

The parts required for this build include the official Pi keyboard, a Pi Zero W, an Adafruit Powerboost, which is basically the circuitry inside a USB power bank, and a LiPo battery. The project starts by disassembling the keyboard with a spudger, screwdriver, or other small wedge-type tool, disconnecting the keyboard’s ribbon cables, and carefully shaving down the injection molded webbing that adds strength to the keyboard’s enclosure. The project is wrapped up by drilling holes for a power LED, a button to turn the Pi on and off, and the holes for the USB and HDMI ports.

One shortcoming of this build is the use of a male-to-male USB cable to connect the keyboard half of the circuitry to the Pi. This can be worked around by simply soldering a few pieces of magnet wire from the USB port on the Pi to the USB input on the USB hub. But hey, doing it this way gives the Official Pi keyboard a convenient carrying handle, and when one of the ports breaks you’ll be able to do it the right way the second time. Great work.

Custom LoRa Pager Designed With Care

LoRa is a useful technology if you need to send data a long way at low power levels. Leveraging this, [5Volt-Junkie] decided to build a small pager named the LoRaNicator.

Those who love a detailed build log will enjoy this. The pager features everything up to and including the kitchen sink. A Cortex M0+ runs the show, flashed with an Arduino compatible bootloader, while a RFM95W module handles the LoRa communications. There’s a pager vibrator and piezo buzzer for notifications, along with a LiPo charger to make keeping the battery topped up easy. There’s even an RTC and soft-power button module.

Even if the LoRa side of things isn’t relevant to your interests, it’s a great example of how to build a useful tool rather than just a proof-of-concept. Things like an easy-to-use interface and simple battery charging go a long way to making something usable in the field. [5Volt-Junkie] even goes so far as to point out that even solder mask matters – if you’re using an infrared oven, your black boards will need a different profile to the usual green PCBs.

All the hard work has paid off, creating an attractive end product that we’d be proud to pack with the rest of our ham gear. LoRa is a useful platform, and as we’ve seen, it can be useful for everything from viticulture to meterology. Video after the break.

Continue reading “Custom LoRa Pager Designed With Care”

A Ruined Saw Blade Becomes A Bowl

Every workshop generates waste, whether it be wood shavings, scrap metal, or fabric scraps, and sometimes that waste seems too good to throw away. [Igor Nikolic]’s hackerspace had a ruined circular saw blade in the trash, and rather than let it go to waste he took it to the forge and fashioned a bowl from it. Then because another blade came his way and he wasn’t quite happy with the first one, he made another.

The second of the two bowls, in its finished state.

Saw blades are not promising material for forge work, being made of a very high-quality hardened steel they do not take well to hammering even when hot. So his first task was to anneal his blade in a kiln, heating it up and then letting it cool slowly to soften it.

Working the blade into a bowl shape was done on a home-made ball anvil. The blade was marked to provide guide rings as an aid to forming, and the bowl shape was progressively built out from the center. The first bowl was a little irregular, in his second try he’d got into his stride. Both bowls were mounted, one on a cut acrylic base, the other on a set of feet.

A project such as this can only be done with a huge amount of work, for which owners of larger forges will typically use a power hammer. [Igor] admits that a swage block (a specialized anvil for forming such curved shapes) would have made his life easier, but we think he’s done a pretty good job.

If you’ve been paying attention to recent Hackaday articles you may have noticed the start of our series on blacksmithing. We’re indebted to [Igor] for the genesis of that piece, for he was operating the portable forge that features in it.

Grabbing The Thread: Spinlocks Vs Mutexes

Getting into the weeds of operating systems is daunting work. Especially when the operating system involved is a fully featured modern PC operating system with millions of lines of code all working together to integrate hardware and software seamlessly. One such operating system “weed” is figuring out how to handle simultaneous tasks when the processor can only really handle one thing at time. For that, you’ll be looking at the difference between spinlocks and mutexes.

Both of these are methods of making sure that the processor completes a task sufficiently before moving on to the next task. Modern computers are so fast (even ignoring multiple cores) that it seems as if they are doing many things at once. In order to maintain this illusion, tasks need ways of locking the processor to that specific task for a certain amount of time. Of course the queue for performing the next task can get complicated as there are often many tasks waiting to use processor time. Spinlocks are a simple way of holding the processor and mutexes are a slightly more complicated way, but which one is the most efficient use of system resources isn’t that straightforward.

If you’ve ever been interested in operating system details, this one goes deep into the intricacies of features most of us have never even considered the existence of. It’s definitely worth a read, though, and is very well written by someone who is clearly an expert. If you want an operating system challenge, you can build your own operating system as well.