Modified 3D Printer Makes A Great Microscope, Too

A false-color polarimetric image of sugar crystals floating in water.

Look past the melty plastic bits, and your average 3D printer is just a handy 3-axis Cartesian motion platform. This makes them useful for all kinds of things, and as [E/S Pronk] shows us, they can easily be modified into an automated polarimetric microscope!

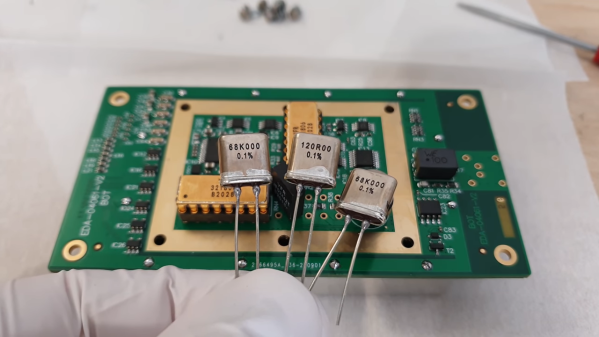
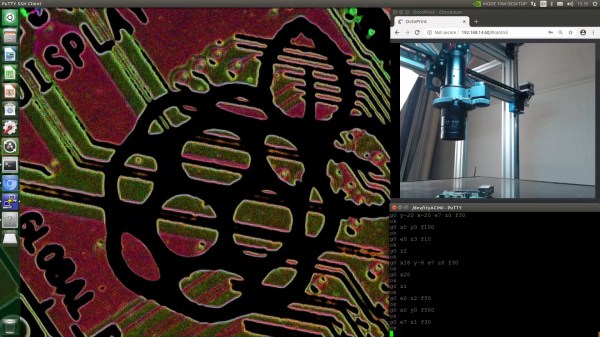
The microscope build actually took two forms. One, a regular digital microscope any of us may be familiar with, using a C-mount microscope lens fitted to a Raspberry Pi HQ camera. The other, a polarimetric microscope, using an Allied Vision Mako G-508B POL polarimetric camera instead, with the same microscope lens. The polarimetric camera takes stunning false-color images, where the color values correspond to the polarization of the light bouncing off an object. It’s incredibly specialized hardware with a matching price tag, but [E/S Pronk] hopes to build a cheaper DIY version down the line, too.

3D printers make excellent microscopes, as they’re designed to make small precise movements and are easily controlled via G-Code. We’ve seen them used for other delicate purposes too – such as this one modified to become a soldering robot. Video after the break.

Continue reading “Modified 3D Printer Makes A Great Microscope, Too”

Should I Use Wheels Or Tracks?

When it comes to dominating offroad performance, many people’s first thought is of tracked vehicles. Bulldozers, tanks and excavators all use treads, and manage to get around in difficult terrain without breaking a sweat. Today, we’re exploring just what makes tracked vehicles so capable, as well as their weaknesses.

It’s All About Ground Pressure

The various parts of a tank’s propulsion system.

Let’s first look at how tank tracks work. There are a huge variety of designs, with differences depending on application. Different trends have been followed over time, and designs for military use in combat differ from those used for low-speed construction machines, for example. But by looking at a basic tank track design, we can understand the basic theory. On tanks, the track or tread itself is usually made up of individual steel links that are connected together with hinges, though other machines may use rubber tracks instead. The tracks are wrapped around one or more drive wheels, often cogged, which directly pull on the track. On the bottom of the vehicle are the road wheels, which ride on top of the track where it lies on the ground.  The weight of the vehicle is carried through the road wheels and passed on to the tread, spreading out the load across a broader area. Outside of this, the track system may also have one or more idler wheels used to keep the track taught, as well as return rollers to guide the track back around without touching the road wheels.

Continue reading “Should I Use Wheels Or Tracks?”

DIY All-Transistor Addressable Pixel

By now most readers should be used to addressable LEDs, devices that when strung out in a connected chain can be individually lit or extinguished by a serial data stream. Should you peer at one under a microscope you’ll see alongside the LED dies an integrated circuit that handles all the address decoding. It’s likely to be quite a complex device, but how simply can its functions be replicated? It’s a theme [Tim] has explored in the TransistorPixel, and addressable LED board that achieves addressability with only 17 transistors.

It uses a surprisingly straightforward protocol, in which a pulse longer than 500ns enables the LED while a shorter one turns it off. Subsequent pulses in a train are passed on down the line to the next device. A 20µs absence of a pulse resets the string and sets it to wait for the next pulse train. Unlike the commercial addressable LEDS there is only a single colour and no suport for gradated brightness, but it’s still an impressive circuit.

Under the hood is some very old-school RTL logic, a monostable to detect the pulse and a selection of gates and a latch to capture the state and forward to the chain. It’s laid out on a PCB in order of circuit function, and while we can see that maybe it’s not a practical addresssable LED for 2021, it’s likely that it could be made into a much smaller PCB if desired.

Perhaps unsurprisingly given the ready availability of addressable LEDs, we’ve not seen many home made ones. This addressable 7-segment display may be the closest.

Homebrew Metrology The CERN Way

We won’t pretend to fully grok everything going on with this open-source 8.5-digit voltmeter that [Marco Reps] built. After all, the design came from the wizards at CERN, the European Organization for Nuclear Research, home to the Large Hadron Collider and other implements of Big Science. But we will admit to finding the level of this build quality absolutely gobsmacking, and totally worth watching the video for.

As [Marco] relates, an upcoming experiment at CERN will demand a large number of precision voltmeters, the expense of which led to a homebrew design that was released on the Open Hardware Repository. “Homebrew” perhaps undersells the build a bit, though. The design calls for a consistent thermal environment for the ADC, so there’s a mezzanine level on the board with an intricately designed Peltier thermal control system, including a custom-machined heat spreader blocker. There’s also a fascinatingly complex PCB dedicated solely to provide a solid ground between the analog input connector — itself a work of electromechanical art — and the chassis ground.

The real gem of this whole build, though, is the vapor-phase reflow soldering technique [Marco] used. Rather than a more-typical infrared process, vapor-phase reflow uses a perfluropolyether (PFPE) solution with a well-defined boiling point. PCBs suspended above a bath of heated PFPE get bathed in inert vapors at a specific temperature. [Marco]’s somewhat janky setup worked almost perfectly — just a few tombstones and bridges to fix. It’s a great technique to keep in mind for that special build.

The last [Marco Reps] video we featured was a teardown of a powerful fiber laser. It’s good to see a metrology build like this one, though, and we have a feeling we’ll be going over the details for a long time.

Continue reading “Homebrew Metrology The CERN Way”