
It’s been an exciting few weeks for me personally on the clacking front. I got a couple of new-to-me keyboards including my first one with ALPS switches, an old TI/99A keyboard with Futaba MD switches, and a couple of what are supposed to be the original Cherry switches (oh man they clack so nicely!) But enough about my keyboard-related fortuitousness, and on to the hacks and clacks!
Putting My Pedals to the Metal
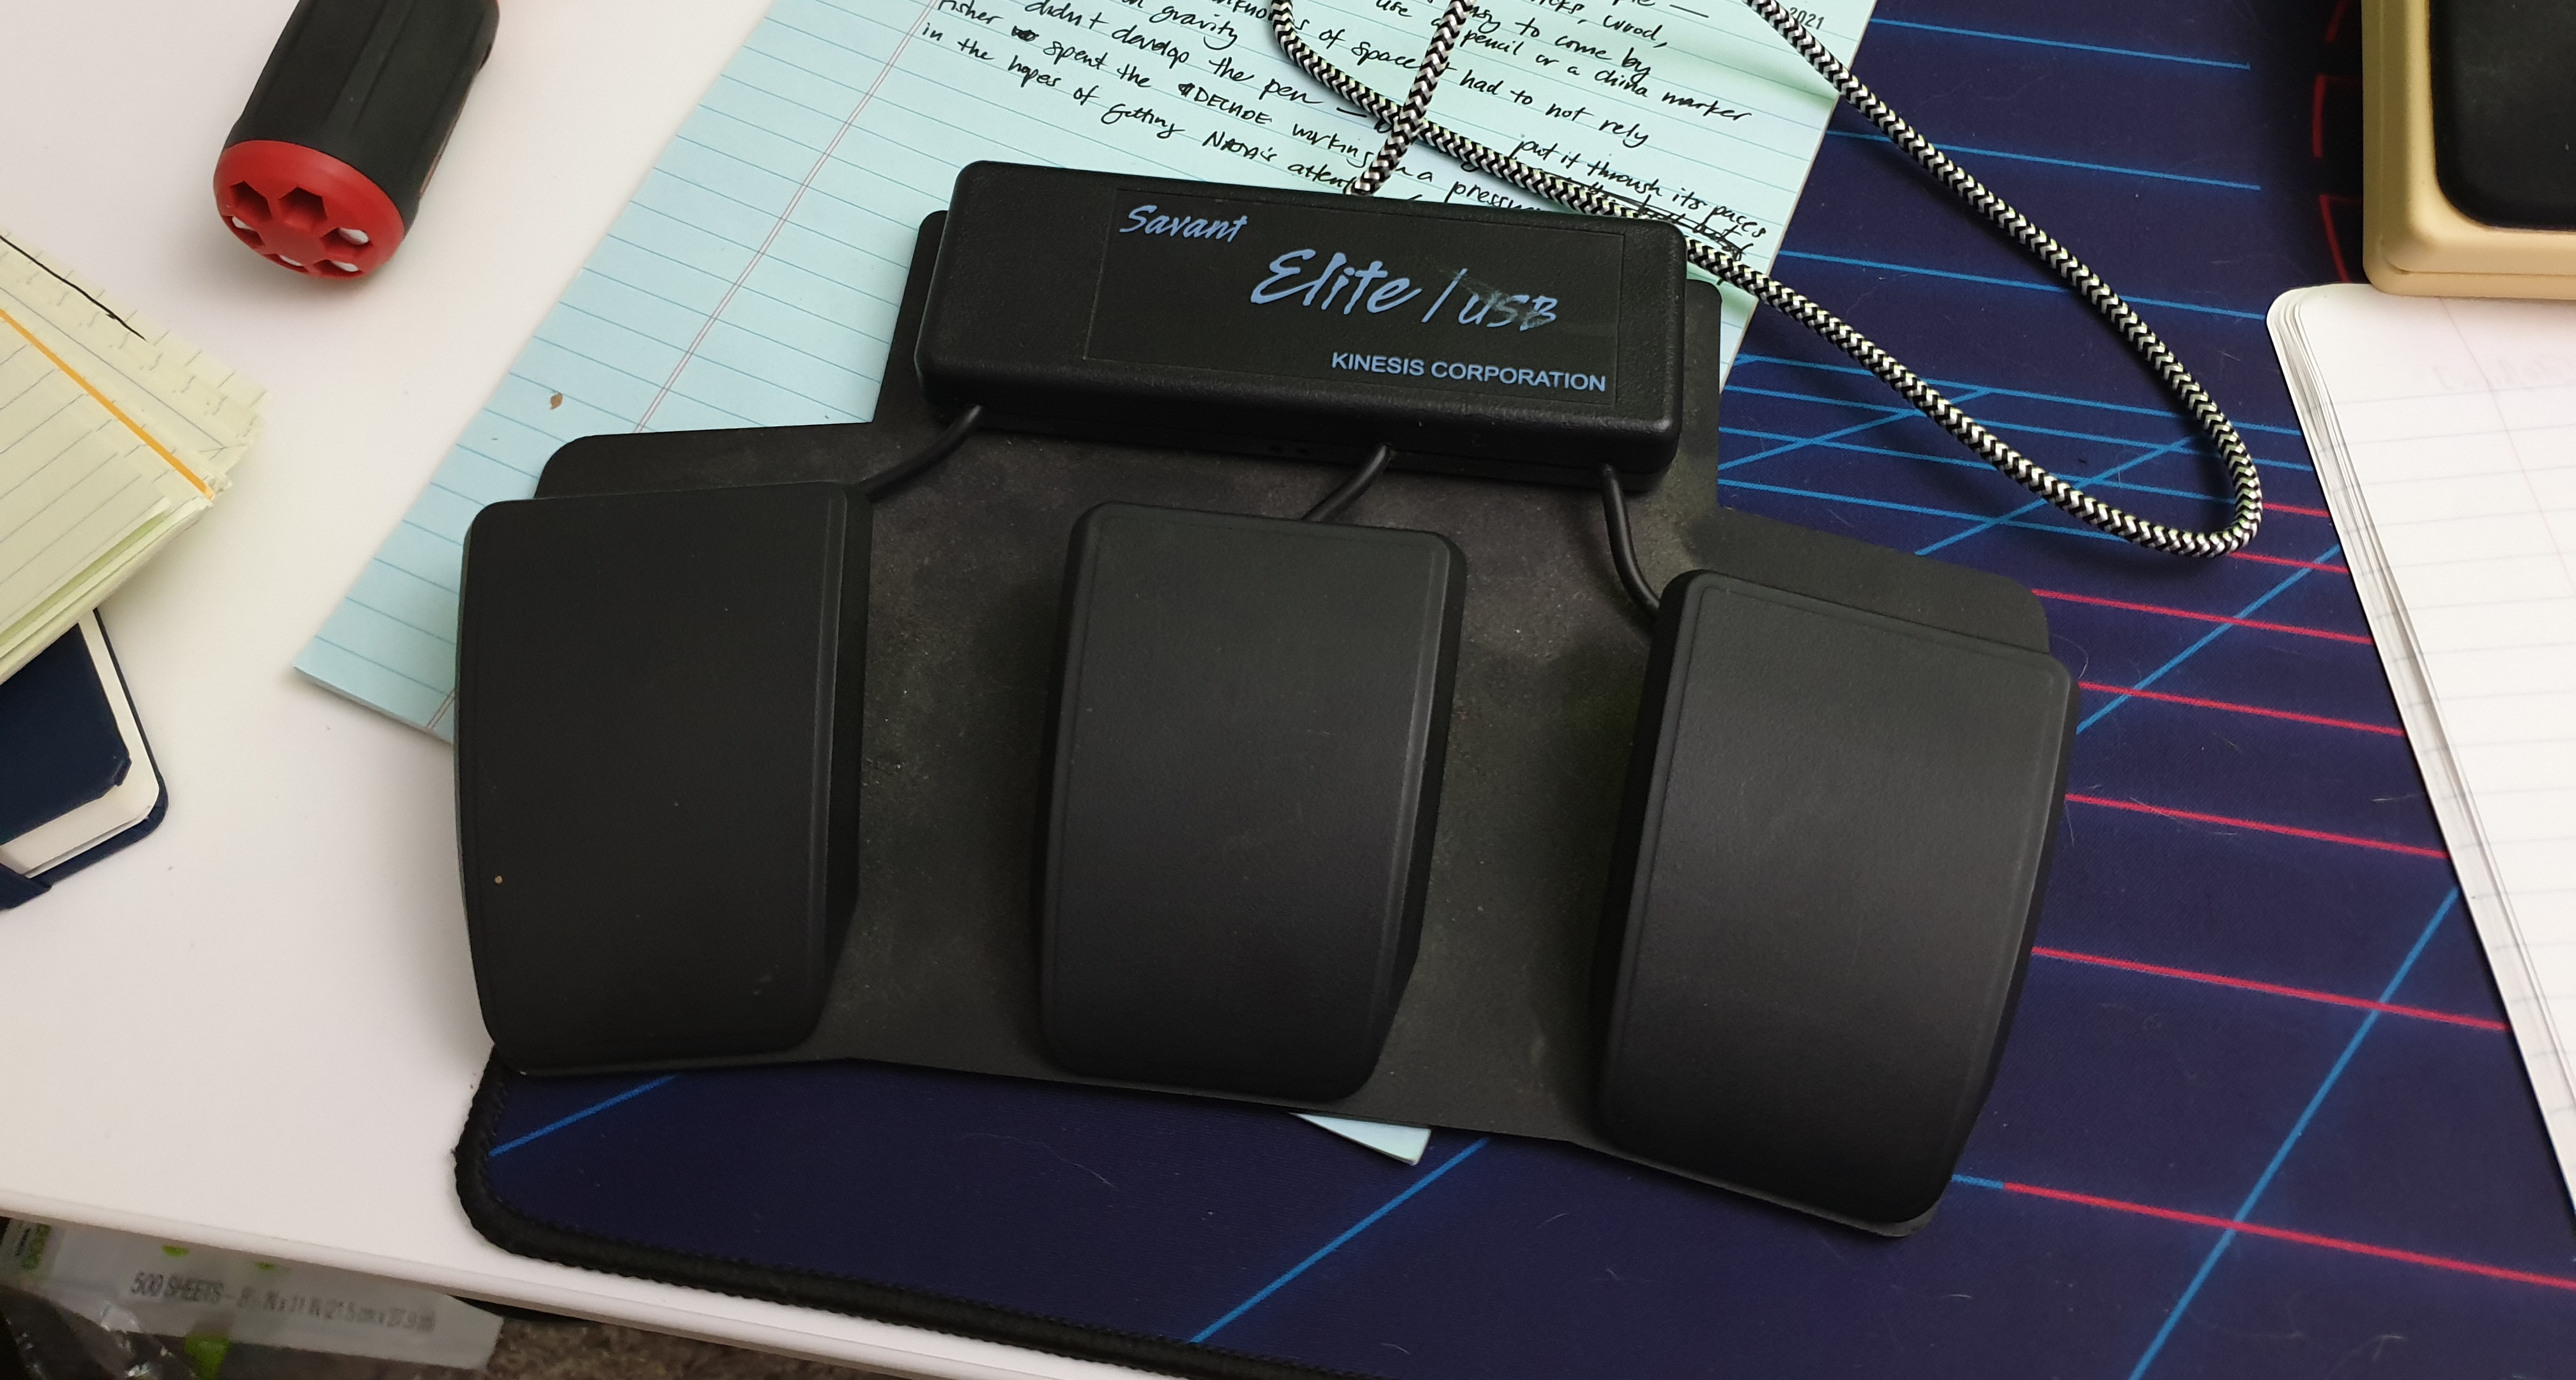 I picked up this Kinesis Savant Elite triple foot pedal from Goodwill. It works fine, but I don’t like the way it’s programmed — left arrow, right arrow, and right mouse click. I found the manual and the driver on the Kinesis website easily enough, but I soon learned that you need a 32-bit computer to program it. Period. See, Kinesis never wrote an updated driver for the original Savant Elite pedal, they just came out with a new one and people had to fork over another $200 or figure something else out.
I’m fresh out of 32-bit computers, so I tried running the program in XP-compatibility mode like the manual says, but it just doesn’t work. Oh, and the manual says you can brick it if you don’t do things correctly, so that’s pretty weird and scary. It was about this time that I started to realize how easy it would be to open it up and just replace the controller with something much more modern. Once I got inside, I saw that all three switches use JST plugs and right angle header. Then I though hey, why not just re-use this set-up? I might have to make a new board, but it how awesome would it be to plug these pedals’ JSTs into my own board?
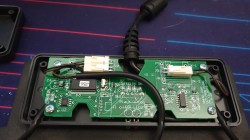
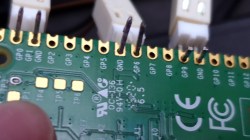
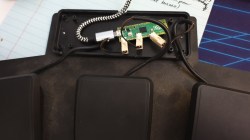
But, I didn’t have to make a new board! As it turns out, the Raspberry Pi Pico has more than enough GPIO pins and distributed ground pins that I was able to de-solder the headers from the Kinesis controller and stick all three sets on one side of the Pico. I barely got the lid screwed back down on the enclosure, but it was worth it.
This pedal set is streets ahead of my all-plastic Shift pedal. It’s made of steel, and the pedals are definitely rugged enough for use with shoes on, though I’m more of a sock-footed typist. So far, I like it. I was already used to using a pedal for Shift, so I assigned that to the middle pedal as a reference point. Left pedal does Ctrl, and right pedal does Alt. My only gripe is that the switches aren’t clicky, so I don’t get that nice auditory feedback that I’m used to. I’m going to see about changing those out, possibly to some heavy key switches like Cherry greens. It’s a little difficult to tell the pedals apart without feeling around for reference, so I’ve got an adhesive felt furniture circle as a temporary homing device while I figure out something cooler to use, like maybe half of a bouncy ball or something.
Check This Out: Keycap Playground
As part of [riskable]’s quest to build a completely 3D-printed keyboard, they made a keycap playground in OpenSCAD that’s really more akin to one of those mega-fun complexes with go-karts and mini-golf and bowling. But, you know, for keycap fun. You want your ‘cap to look like a smashed accordion bellows? Sure. (Can you imagine how fun it would be to pick at those keycaps while you’re thinking of the next line?)
This playground is gigantic, and now it’s open to the public. You can see in the demo video below just how powerful it is for customizing everything from the dish to the corner radius to the legends. Right now it handles DSA and DCA profiles, but [riskable] says that it’s fairly easy to make new ones. If you think this is cool, check out [riskable]’s 3D-printed mag-lev switches that are gonna go underneath these unique keycaps.
Future Hotness: Shift Happens by Marcin Wichary
I’ve been wanting to tell you about this upcoming book, and I just don’t see the point in waiting any longer even though it’s not due out until 2022.
While I was researching August Dvorak and looking for pictures, I came across a helpful tweet by one [Marcin Wichary], a typographer in San Francisco who is working on a book about the complete history of keyboards, including typewriters.
For the last 18 months I’ve been getting periodic updates about the book from [Marcin]’s low-frequency mailing list. Far more than mere updates, each one offers a fascinating lesson about anything from skeuomorphs to moire lines as they relate to printing photographs. If the updates are any indication, it’s going to be deliciously comprehensive and full of fantastic photographs. I can’t wait to get my hands on this book!
Historical Clackers: The Nocoblick Music Typewriter
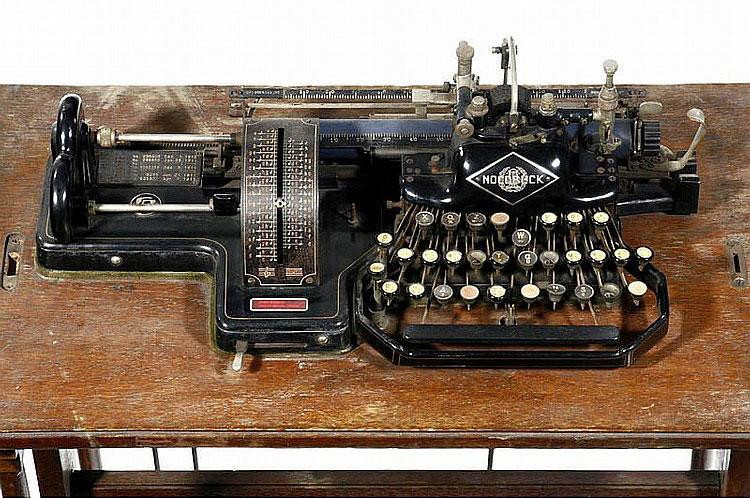
This is not the first music typewriter, but it’s one of the early ones. The Nocoblick Music Typewriter was produced in Cologne, Germany and was in use from 1910 to 1917.
The interesting thing about this machine is that the position of the platen is determined by a scale, which helps place the notes and symbols accurately. At first, the machines used paper pre-printed with staff lines, but later versions laid out the staves as well.
Nocoblicks used an interchangeable kind of type wheel designed by Remington competitor George Blickensderfer – one for music notes, and another for letters. With a simple change of the type wheel and the flick of a lever, it could print lyrics as well. The Nocoblick didn’t sell well for some reason, and when Blickensderfer died in 1917, his type wheel was discontinued, effectively killing off any machine that used it.
ICMYI: Pay Your Respects to (and with) the Giant F key
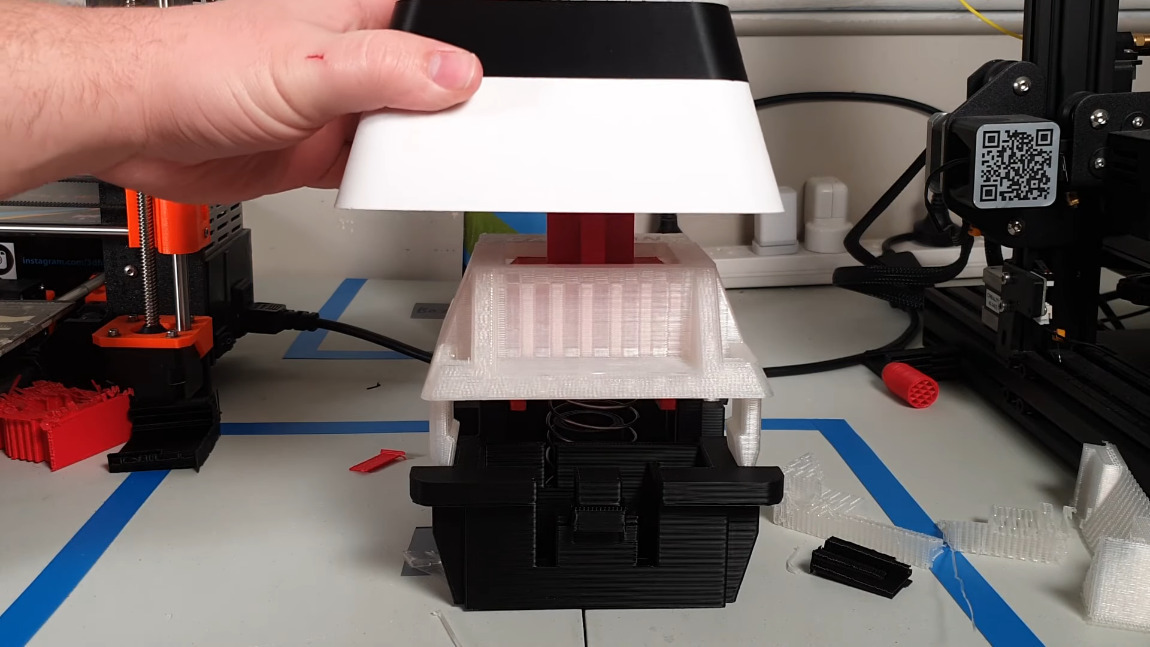 This bad boy shot to the top of r/all when it was posted, and we had to give you our take as soon as possible. It doesn’t clack so much as scrape and ka-chunk, but that is super awesome, too.
[Jaryd] even made their own spring for this beast using a drill and a 3D-printed cylinder chucked into it. But the best part has to be the way it works: by actuating a regular-sized key switch connected to an Arduino.
Got a hot tip that has like, anything to do with keyboards? Help me out by sending in a link or two. Don’t want all the Hackaday scribes to see it? Feel free to email me directly.


Maybe I’m out of the loop, but why is it helpful to have Shift, Control, and Alt on a foot keyboard?
It’s helpful for me because I’ve always been exclusively a left-pinkie Control and Shift user, and my pinkie is now worn out. I’ve been using a pedal for Shift for about eighteen months now, and I totally love it.
What would you put on a foot keyboard, if anything?
For myself when I played with it it was generally specialist function like push to talk, and volume control/pause – when folks come in to talk its handy to be able to give them your whole attention without tabbing out to find the music first, played a little with camera zoom/focus type controls through it too though getting gphoto2 to properly control my camera was tricky enough to not be worth really digging into at the time (though now I might be doing another project with that camera that it would be a handy fit I might just dust the idea off) – being an analogue flight rudder pedal gives you lots of interesting choices.
It would be extremely helpful for a person with use of only one hand…
Why not fit a small feedback motor or two into that case? Turn it up high enough it will give your desired audio feedback, but the haptic feedback I would think would be preferred, and could be customised..
Think I’d rather have a setup more like the current PS controller’s trigger – that looks really slick as a concept and could toughened up to be a foot pedal, giving great versatility beyond just typing, for a while I used my HOTAS pedals for various other things, but they are not a great footprint to go under my desk, and plug in via the throttle, which is minorly inconvenient (read a trip hazard) when you don’t have enough desk space..
Re: feedback motor
Chyrosran22 (on youtube) did a review of an IBM 5251 keyboard from the early days when typewriters were still common. In order make the comparably quiet keyboard match the noise of the older typewriters it had an electric solenoid built in (that thankfully could be disabled). http://www.youtube.com/watch?v=1qw6ebySet0
Oh, I like the haptic feedback idea. Since the click is worn out on the middle pedal, I’ve learned to listen for the release sound, but I would love to change it out. Maybe I can use one of these super-old Cherry switches: https://imgur.com/gallery/1ApMNOm
Or actuate a solenoid. Varying the power to it could change the level of feedback. Handy for when someone in the room complains about your clackety keyboard.
Yeah a Solenoid feedback system is probably easier to fit in the space, even attach directly to each pedal and give them some damping so each feedback event should only be felt in the intended pedal..
Now I really want a decent foot pedal set, with haptic feedback, maybe even a full on trackball or joystick mouse…
did you try the kinesis driver in a virtual machine?
No, but I should have. >_<
If you swap ctrl and shift on your pedals, it will let you heel-toe ctrl+alt and ctrl+shift.
I would love to read a whole article about the Blickerderfer typewriter (not the music notation one, but the line of regular typewriters it was based on). It was a technically superior design, requiring much less space, fewer parts, being easier to manufacture, cheaper and you could change fonts or languages on the fly — what else would you want from a typewriter?
Unfortunately, he patented his design, and then the leading typewriter manufacturers saw him as a threat, and cooperated to put him out of business. Still, the company never stopped innovating, and even made the world’s first electric typewriter — that is in a time when electricity at homes wasn’t even standardized, so they had to make versions for different voltages…
I’d never heard of Blickerderfer typewriters but just googled. Those are some neat typewriters! The only neater typewriter I remember seeing is the one used by Gregory Peck in the film Roman Holiday.
Few piano players would give up the damper pedal at least, 3 are just right. I’d like to have space and backspace at least. However my desk-bench is stand-up or bar chair height and typing is short like these comments. If I had a sit down situation it would go like a fast car.
If you are sock-footed, maybe you could try 2 or 3 keys per foot? Big toe, little toe and something in the middle? Either click switches (perhaps double width?) Or capacitive touch might be an option? Interesting options, anyway.
AIUI, the 3 middle toe ligaments are closely connected, making it difficult, but not impossible, to control them separately.
Ya know, I just finished updating all my case/plate/display/etc .scad files for the latest Riskeyboard 70 prototype and I’ve got 3 extra PCBs (one for me and I already sold one!). I’m looking for a beta tester that can write about their experience putting a fully 3D printed keyboard together. I *can* just 3D print it all and send a working keyboard but that won’t help me figure out if I need to make it easier to 3D print everything.
Anyone over at Hackaday interested? You just need a decent 3D printer (FDM, preferably but resin will work), 300-ish 4x2mm magnets, some M3x6mm (or M3x8) screws (with nuts and washers) 😁. I’ll take care of soldering all the extra fun stuff to the PCB (IR sensor, headers, buzzer, etc). It’ll work best if you’re used to printing PETG but really, any filament works. Clear PETG is best for letting all that sweet sweet RGB on through.
I have some pretty awesome printable “feet” for the keyboard that need to be printed in TPU but honestly you can also just use store-bought (thick) rubber feet too.
Anyway, let me know if you’re interested. Preferred contact is via Discord (riskable#4986) or Matrix (@riskable:matrix.org).
Yo! That sounds amazing. I will hit you up on Discord.
I’m using a Kinesis Advance 2 LF with an Adafruit pedal hacked with a plug recovered from an ADSL router. I use it to turn on the keypad layer. Works a treat, turns on numpad and numbers to Fn keys, let’s me trigger macros, etc.
Gives that keeb lots more value.
That article about fixing moire effect on halftone image scans is really interesting! Well worth breaking it out into its own Hackaday post.
I thought I was getting a nice deal on a M$ Wireless Comfort Keyboard 5050 at a garage sale yesterday.
Very good condition, $10, but I found out it needs to have a specific dongle. So, I’ve opened it up and it has an NRF 24LE1H in it.
Sigh! I’m not sure what to, maybe hardwire it to a Teensy? I don’t see anything (yet) about whether it can talk Bluetooth.
So far, I’ve removed 36 screws to get it apart…
Would it “talk” to one of my old NRF01 boards?
Just took a look at Keyboard Playground. Is the one-sentence Github readme the only documentation there is? Not even a gallery of screenshots on what can be made with it?
I loaded up the most likely SCAD file (the largest) and there are a zillion parameters that come up in Customiser, but it would be good to have an explanation (by screenshot or thumbnail) of what these achieve without having to tweak one and then after waiting ten seconds peer closely to see what’s changed on preview.
Way to get people interested in it… not. Maybe writing some readable, interesting documentation to accompany a comprehensive project is passe these days, the code is the comment sort of thing. I’m sure it can do a lot, but where do I start. I tried mucking with parameters to see if I could get an IBM Selectric keycap with curved sides and top rim out of it, but no such luck, still got squarish modern keycaps.
Would you like an industrial strength upgrade? I found via surplus stores some two pedal (plus a small button in the middle) metal units (quite heavy, won’t shift out of place) that I think originally came from some sort of medical device. They’re just a metal case and switches; you’ll have to build your own electronics for it. I can weigh one if you think you want to ship it from the SF Bay Area.