Comparing A Clone Raspberry Pi Pico 2 With An Original One

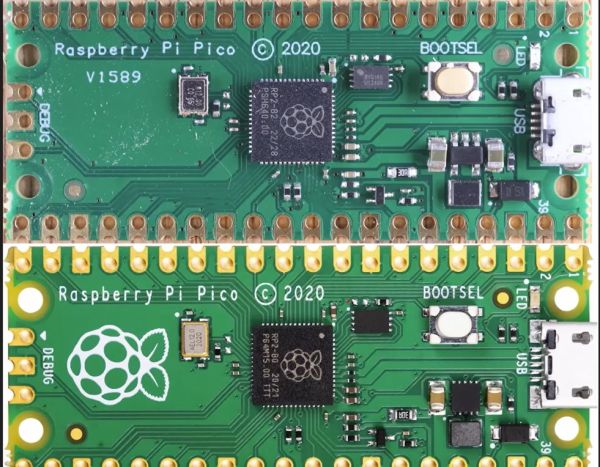
Although [Thomas] really likes the Raspberry Pi Pico 2 and the RP2350 MCU, he absolutely, totally, really doesn’t like the micro-USB connector on it. Hence he jumped on the opportunity to source a Pico 2 clone board with the same MCU but with a USB-C connector from AliExpress. After receiving the new board, he set about comparing the two to see whether the clone board was worth it after all. In the accompanying video you can get even more details on why you should avoid this particular clone board.

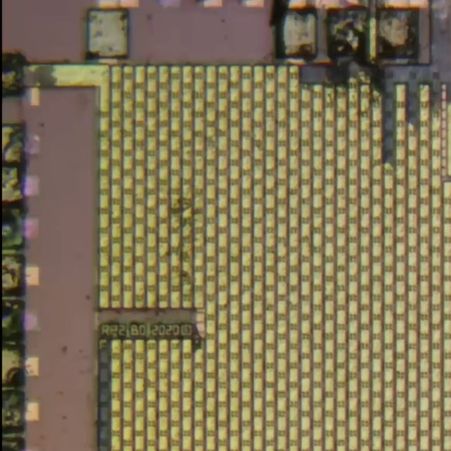
In the video the respective components of both boards are analyzed and compared to see how they stack up. The worst issues with the clone Pico 2 board are an improper USB trace impedance at 130 Ω with also a cut ground plane below it that won’t do signal integrity any favors.

There is also an issue with the buck converter routing for the RP2350 with an unconnected pin (VREG_FB) despite the recommended layout in the RP2350 datasheet. Power supply issues continue with the used LN3440 DC-DC converter which can source 800 mA instead of the 1A of the Pico 2 version and performed rather poorly during load tests, with one board dying at 800 mA load.

Continue reading “Comparing A Clone Raspberry Pi Pico 2 With An Original One”

Comprehensive Power Management For The Raspberry Pi

The Raspberry Pi has been a revolutionary computer in the maker space, providing a full Linux environment, GUI, and tons of GPIO and other interfacing protocols at a considerably low price. This wasn’t its original intended goal, though. Back in the early 2010s it was supposed to be an educational tool for students first, not necessarily a go-to for every electronics project imaginable. As such there are a few issues with the platform when being used this way, and [Vin] addresses his problems with its power management in his latest project.

[Vin]’s main issue is that, unlike a microcontroller, the Raspberry Pi doesn’t have a deep sleep function. That means that even when the operating system is shut down the computer is still drawing an appreciable amount of current, which will quickly drain some batteries. We’ve covered [Vin]’s farm and his use case for the Raspberry Pi in the past, but a quick summary is that these boards are being used in a very rugged environment where utility power isn’t as reliable as he would like.

In [Vin]’s post he not only outlines his design for the board but goes through his design process, starting by using discrete logic components and then trying out various microcontrollers until settling on an ATmega88. The microcontroller communicates with the Raspberry Pi over I2C where the Pi can request a power-down as well as a time for future power-on. A latching relay controlled by the microcontroller ensures the Pi doesn’t drain any battery while the ATmega can put itself into actual sleep in the meantime.

The build for this project goes into an impressive amount of detail, and not only are the designs and code available on the project’s GitHub page but [Vin] also wrote another blog post which uses this project to go over his design philosophy more broadly.

The edge of a laptop is shown with a USB cable plugged into it. the other end of the cable is plugged into a Raspberry Pi Zero.

SSH Over USB On A Raspberry Pi

Setting up access to a headless Raspberry Pi is one of those tasks that should take a few minutes, but for some reason always seems to take much longer. The most common method is to configure Wi-Fi access and an SSH service on the Pi before starting it, which can go wrong in many different ways. This author, for example, recently spent a few hours failing to set up a headless Pi on a network secured with Protected EAP, and was eventually driven to using SSH over Bluetooth. This could thankfully soon be a thing of the past, as [Paul Oberosler] developed a package for SSH over USB, which is included in the latest versions of Raspberry Pi OS.

The idea behind rpi-usb-gadget is that a Raspberry Pi in gadget mode can be plugged into a host machine, which recognizes it as a network adapter. The Pi itself is presented as a host on that network, and the host machine can then SSH into it. Additionally, using Internet Connection Sharing (ICS), the Pi can use the host machine’s internet access. Gadget mode can be enabled and configured from the Raspberry Pi Imager. Setting up ICS is less plug-and-play, since an extra driver needs to be installed on Windows machines. Enabling gadget mode only lets the selected USB port work as a power input and USB network port, not as a host port for other peripherals.

An older way to get USB terminal access is using OTG mode, which we’ve seen used to simplify the configuration of a Pi as a simultaneous AP and client. If you want to set up headless access to Raspberry Pi desktop, we have a guide for that.

Thanks to [Gregg Levine] for the tip!

Looking At A Real Fake Raspberry Pi RP2040 Board

Since the RP2040 microcontroller is available as a stand-alone component, it’s easy enough for third parties to churn out their own variations — or outright clones of — the Raspberry Pi Pico. Thus we end up with for example AliExpress sellers offering their own versions that can be significantly cheaper than the genuine article. The ones that [electronupdate] obtained for a test and decapping session cost just $2.25 a pop.

RP2 B0 stepping imprinted on the die shot.

As can be seen in the top image, the board from AliExpress misses the Raspberry Pi logo on the silkscreen for obvious reasons, but otherwise appears to feature an identical component layout. The QSPI Flash IC is marked on the die as BY250156FS, identifying it as a Boya part.

Niggles about flash ROM quality aside, what’s perhaps most interesting about this teardown is what eagle-eyed commentators spotted on the die shot of the RP2040. Although on the MCU the laser markings identify the RP2040 as a B2 stepping, the die clearly identifies it as an ‘RP2 B0’ part, meaning B0 stepping. This can be problematic when you try to use the USB functionality due to hardware USB bugs in the B0 and B1 steppings.

As they say, caveat emptor.

Continue reading “Looking At A Real Fake Raspberry Pi RP2040 Board”

Hands On WIth The Raspberry Pi Compute Module Zero

We are all familiar enough by now with the succession of boards that have come from Raspberry Pi in Cambridge over the years, and when a new one comes out we’ve got a pretty good idea what to expect. The “classic” Pi model B+ form factor has been copied widely by other manufacturers as has their current Compute Module. If you buy the real Raspberry Pi you know you’ll get a solid board with exceptionally good software support.

Every now and then though, they surprise us, with a board that follows a completely different path, which brings us to the one on our bench today. The Compute Module Zero packs the same quad-core RP3 system-on-chip (SoC) and Wi-Fi module as the Pi Zero 2 W with 512 MB of SDRAM onto a tiny 39 mm by 33 mm postage-stamp module. It’s a Pi, but not as you know it, so what is it useful for? Continue reading “Hands On WIth The Raspberry Pi Compute Module Zero”

Raspberry Pi Gets Desktop Form Factor

Before the Raspberry Pi came out, one cheap and easy way to get GPIO on a computer with a real operating system was to manipulate the pins on an old parallel port, then most commonly used for printers. Luckily, as that port became obsolete we got the Raspberry Pi, which has the GPIO and a number of other advantages over huge desktop computers from the 90s and 00s as well. But if you really miss that form factor or as yearn for the days of the old parallel port, this build which puts a Raspberry Pi into a mini ITX desktop case is just the thing for you.

There are a few features that make this build more than just a curiosity. The most obvious is that the Pi actually has support for PCIe and includes a single PCIe x1 slot which could be used for anything from a powerful networking card to an NVMe to a GPU for parallel computing in largely the same way that any desktop computer might them. The Pi Compute Module 5 that this motherboard is designed for doesn’t provide power to the PCIe slots automatically though, but the power supply that can be installed in the case should provide power not only to the CM5 but to any peripherals or expansion cards, PCIe or otherwise, that you could think of to put in this machine.

Of course all the GPIO is also made easily accessible, and there are also pins for installing various hats on the motherboard easily as well. And with everything installed in a desktop form factor it also helps to improve the cable management and alleviate the rats-nest-of-wires problems that often come with Pi-based projects. There’s also some more information on the project’s Hackaday.io page. And, if you’re surprised that Raspberry Pis can use normal graphics cards now, make sure to take a look at this build from a few years ago that uses completely standard gaming GPUs on the Pi 5.

A photo of the SigCoreUC

SigCore UC: An Open-Source Universal I/O Controller For The Raspberry Pi

Recently, [Edward Schmitz] wrote in to let us know about his Hackaday.io project: SigCore UC: An Open-Source Universal I/O Controller With Relays, Analog I/O, and Modbus for the Raspberry Pi.

In the video embedded below, [Edward] runs us through some of the features which he explains are a complete industrial control and data collection system. Features include Ethernet, WiFi, and Modbus TCP connectivity, regulated 5 V bus, eight relays, eight digital inputs, four analog inputs, and four analog outputs. All packaged in rugged housing and ready for installation/deployment.

[Edward] says he wanted something which went beyond development boards and expansion modules that provided a complete and ready-to-deploy solution. If you’re interested in the hardware, firmware, or software, everything is available on the project’s GitHub page. Beyond the Hackaday.io article, the GitHub repo, the YouTube explainer video, there is even an entire website devoted to the project: sigcoreuc.com. Our hats off to [Edward], he really put a lot of polish on this project.

If you’re interested in using the Raspberry Pi for input/output you might also like to read about Raspberry Pi Pico Makes For Expeditious Input Device and Smart Power Strip Revived With Raspberry Pi.

Continue reading “SigCore UC: An Open-Source Universal I/O Controller For The Raspberry Pi”