Using SDR To Read Your Smart Meter

[BeMasher] was dissatisfied with the cost of other solutions to read his smart meter, so he made a project to read it himself using an rtl-sdr dongle.

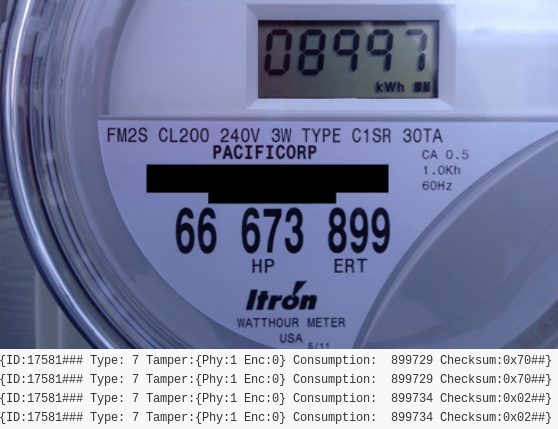
Using his hacking and reverse engineering skills along with a $20 RTL-SDR dongle, [BeMasher] wrote rtlamr to automatically detect and report the consumption information reported by smart meters within range. Though designed for his Itron C1SR, [BeMasher] claims that any electronic receiver transmitter (ERT) capable smart meter should work.

[BeMasher]’s Itron C1SR smart meter broadcasts both interval data and standard consumption in the 915MHz ISM band using a Manchester encoded, frequency hopping spread spectrum protocol. [BeMasher] used the RTL-SDR dongle to do the signal capture and analysed the resulting signal in software afterwards. [BeMasher] did a great job of going through the theory and implementation of analysing the resulting data capture, so be sure to check it for an in-depth analysis.

If the RTL-SDR dongles are too limited for you taste, you might want to check out some hacker friendly SDRs with a little more punch.

Listening To A Smart Scale

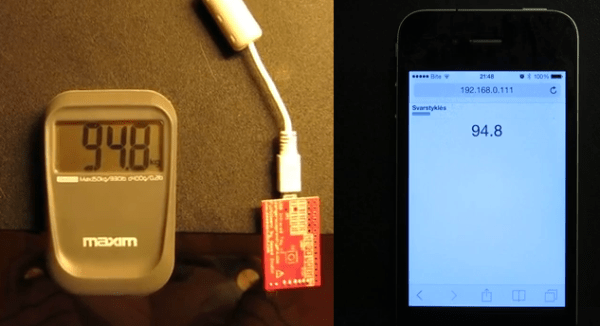
[Saulius] couldn’t find a cost-effective wireless scale that did what he wanted, so he reverse engineered the communication protocol for an off the shelf model to get weight data himself.

[Saulius] bought a cheap Maxim 29-66SH scale that uses infra-red to communicate to a detachable digital readout. Using the USB IR toy, [Saulius] intercepted the messages that were broadcast. After a little reverse engineering and with the help of some Python scripts, he soon discovered the protocol his scale was using to encode weight messages.

[Saulius] went on to write a little web app using JavaScript, SocketIO and Tornado, a light weight Python web server. By connecting to the tiny web server that’s interfaced with a Python script listening for the scales messages received from the USB IR toy, [Saulius] was able to see his weight displayed on his smart phone through a web browser.

Since all the communication is through IR, there is no need to do any invasion of the scale as the receiver can be placed anywhere in line of sight from the transmitter on the scale itself.

Check out the demo video for the whole thing in action. If patching into the scale isn’t hard enough, you should just build one from scratch.

Continue reading “Listening To A Smart Scale”

Smart Reflow Oven Is Over-Engineered

reflow

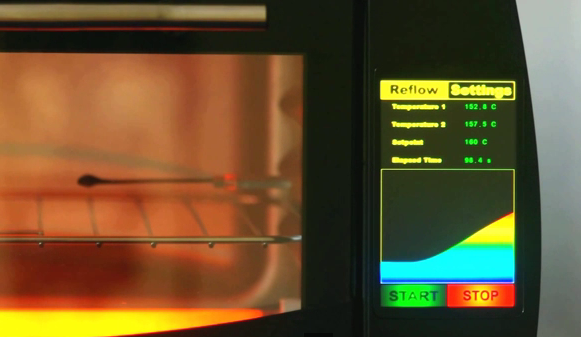
[Linas] reverse engineered an AMOLED HTC 800×480 screen and interfaced it with an STM32 micro-controller, along with some other components, to make a gorgeously over engineered reflow oven.

Under the hood there is a PSoC5LP PID controller to control the 800W IR heating coil and two K-type thermocouples for sensing.

The real beauty is in the relatively small STM32 chip powering the HTC AMOLED screen. The AMOLED screen is high contrast and has a wide viewing angle, giving it a clear crisp view from all front facing viewpoints. Though pushing the limits of what the STM32F429i can do, [Linas] managed to make a very nice “home-grown” user interface, complete with user configurable settings and current temperature graphs.

The user interface looks very responsive and using some clever programming, [Linas] was able to make use of the potential of the screen to provide beautiful plots and interface widgets.

[Linas] goes into quite a bit of detail about the programming involved with rendering to the screen, so be sure to check out the video after the jump.

Continue reading “Smart Reflow Oven Is Over-Engineered”

Nrf24l01+ Using 3 ATtiny85 Pins

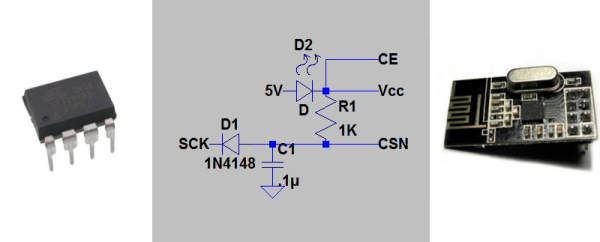
[Ralph] wasn’t satisfied with the required 5 control pins to drive his nrf24l01+ transceiver module, so he used this circuit needing just 3 pin using an ATtiny85.

One of the key components was to effectively drive the chip select (CSN) line from the clock (SCK) line. The nrf24l01+ needs the CSN line to transition from high to low on the beginning of a communication.  [Ralph] put the SCK line behind a diode, put a capacitor in parallel with the CSN line and altered the arduino-nrf24l01 library to encode extra delays for the clock line.  This allowed the CSN line to be driven by the SCK line. Subsequent line transitions during transmission happen too fast to charge the capacitor, leaving the CSN line in a low state.

After tying the chip enable line high and dropping the 5V power line to 1.9-3.6V across a red LED, [Ralph] had an ATtiny85 controlling a nrf24l01+ module.

Though deceptively simple, a very cool hack that opens up a couple more lines on the ATtiny85.

A Clock That Plots Time

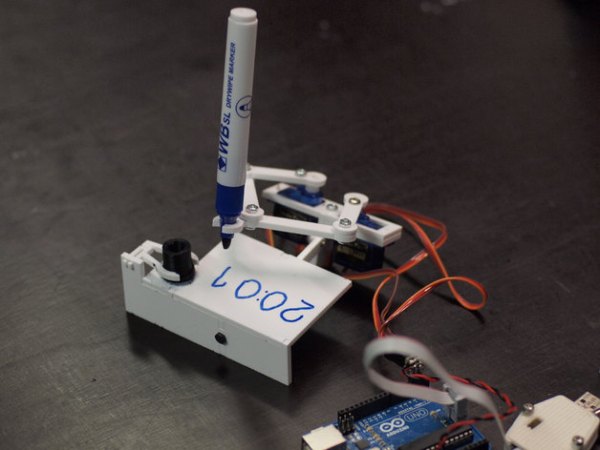
[Johannes] just sent us a tip about his small plotter that plots out the current time.

[Johannes] small clock plotter uses a dry wipe pen to write out the time on a small piece of dry erase board. The design is Made of three small 9g servos, with one to lift the pen off the writing surface and the other two to control a pair of connected jointed arms for the x and y-axis.

The little robot painstakingly wipes away the previous time before scrawling the current time in its place (with minute accuracy).

[Johannes] had hackability in mind when creating this project, making sure to keep to standard parts and making the code and design files available. The hardware for the build can be laser cut or 3D printed. The Arduino sketch can be found on GitHub and the design files can be found on Thingiverse. There are more detailed build instructions on Nuremberg’s FabLab page (translated).  Continue reading “A Clock That Plots Time”

From Schematic To PCB In Four Hours

lpkf_metrix

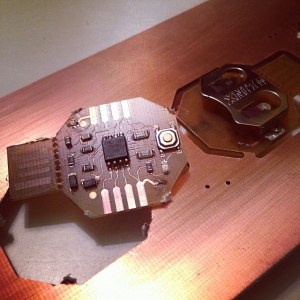
Last super bowl Sunday, instead of checking the game, [Mattw] decided to extend a design and make a PCB of a trinket clone. [Mattw] altered a trinket clone design by [Morgan Penfield Redfield] to shrink it down, perforated the USB connector to allow for easy removal and put most of the parts on a single layer.

After finalizing the design, [Mattw] put it into the LPKF Protolaser S that Seattle’s Metrix Create Space has. For those of you who don’t know, the LPKF protolaser uses a laser to directly ablate off the copper from the boards.  This makes prototyping much faster without the need for a lot of nasty chemicals.

About six minutes in the Protolaser, some component placement by hand followed by a run through their reflow oven and [Mattw] had three boards ready to be tested. All told, about 4 hours from start to finish.

The end circuit looks great and the LPKF protolaser gives us a case of serious tool envy. If you’re like us and don’t have access to the fancy laser you might try our hand at this high-resolutino photo-etch process.

[via reddit]

From Vacuum Cleaner Hacking To Weather Station Reverse Engineering

spectrum

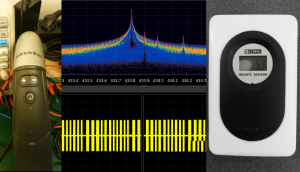
[Spock] wanted to do a little reverse engineering of his Miele brand remote control vacuum cleaner, so he broke out his DVB-T SDR dongle to use as a spectrum analyser. Sure enough, he found a 433.83Mhz signal that his vacuum cleaner remote control was using, but to his surprise, he found a stray QAM256 signal when he expected an ASK  only one.

After a little detective work, [Spock] eventually tracked it down to a cheap weather station he had forgotten about. The protocol for the weather station was too compelling for him to go back to his vacuum cleaner, though. After downloading an rc-switch Arduino library and making a quick stop at his local radio shack to get a 433.92 radio receiver to decode the signal, he reverse engineered the weather station so he could digitally record the temperature output. The Arduino rc-switch library proved unable to decode the signal, but some Python work helped him get to the bottom of it.

With software defined radio becoming more accessible and common place, hacks like these are a nice reminder just how wired our houses are becoming.