Epoxy granite is an overlooked material when it comes to making home CNC builds. As far as time and money goes, when you add in all the equipment it comes out cheaper than an aluminum casting set-up. Epoxy granite has mechanical properties better than cast iron, increased dimensional stability, better vibration damping, and looks awesome when done right. Also, you can cast precision surfaces and threaded holes into your design, which is pretty cool.
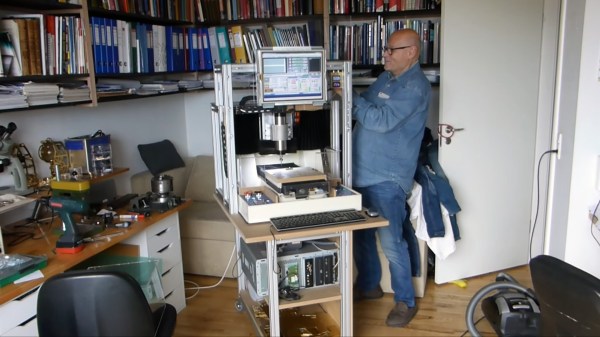
In these two videos by [Jørgen Hegner] we get to watch him and a friend make a matching set of precision CNC machines. It’s built in a similar style to other nice builds we’ve featured. This way of making it needs a bigger footprint than a gantry mill and can’t be built as large. However, it solves a lot of mechanical issues and squaring with the gantry design while not being as difficult to get right as a box or knee mill.
After casting they machined the material embedded in the granite to mount the ways. The ways are linear bearings and ball screws. Expensive, but as the footage shows, very accurate. The rest of the machine is assembled and tuned. Then it gets installed in a home made 80/20 enclosure. We really like the LCD panel that’s incorporated into the front shield of the machine. They really went all out with the CNC control panel. It looks like they can do anything from jog the axis to monitor and control the water cooling for the spindle.
It appears that all the precision work is put to good use as there are some shots at the end of video two of a beautiful clock CNC’d on this machine. Videos after the break.
Previously man was limited in his ability to fish the waters of this world by the power of his arm or his ability to procure the services of a boat. Now, as long as man is willing to risk a thousand dollar drone set-up, he can descend upon unsuspecting fish with robotic precision. It is very unfair, and awesome.
The concept is simple. Buy one of those drones every upper middle class teenager seems to get for Christmas. Attach a streaming camera set-up to it. Next, rig it up so that it can fly the fishing line from the rod out, but when the fish bites the line can easily detach. Finally, attach a friend to the controls of the fishing rod.
After that it’s like shooting fish in an ocean. Fly the drone around, pulling the line behind you, until you see a school of fish. Next, dangle the bait in the center of the school. Inevitably one will strike, the line will detach, and it’s up to your friend to reel in your catch. Either that or a bunch of tuna will wreck your drone and you’ll get to watch a livestream of a thousand dollars sink to the ocean floor. Video after the break.
[Daniel Reetz] spent six years working as a Disney engineer during the day and on his book scanner, the archivist at night. Some time last year, [Daniel] decided enough is enough, got married, and retired from the book scanner business. There’s a bit more to it than that, but before leaving he decided to dump, not just the design, but the entire rationale behind the design into a twenty-two thousand word document.
One of his big theses in this document, is his perceived failure of the open hardware movement. The licenses aren’t adequate, as they are based on copyright law that only applies to software. This makes it impossible to enforce in practice, which is why he released the entire design as public domain. He also feels that open hardware shares design, but not rationale. In his mind this is useless when encouraging improvement, and we tend to agree. In the end rationale is the useful thing, or the source code, behind a design that truly matters. So, putting his money time where his mouth is, he wrote down the rationale behind his scanner.
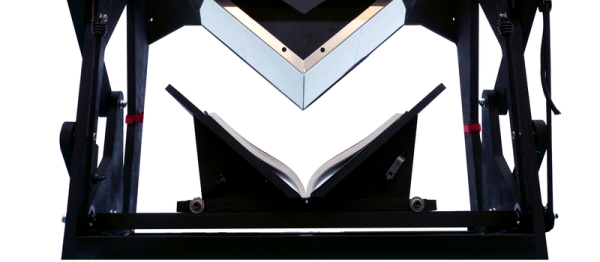
The rationale contains a lot of interesting things. At a first glance the book scanner almost seems a simple design, not the culmination of so much work. Though, once we began to read through his document, we began to understand why he made the choices he did. There’s so much to getting a good scan without destroying the book. For example, one needs a light that doesn’t lose any color information. It doesn’t have to be perfect, as the software can correct the white balance. However, it can’t lean too far away from the natural spectrum, it can’t be too bright, and it can’t be uneven, and it can’t be prohibitively expensive. A lot of thought went into the tent light design.
[Daniel]’s book scanners are immensely popular, and are being used all over the world. He’s certainly made an impact, and the community that formed around his project continues to grow without him. He made some interesting points, and if anything wrote a really good build and design log for the rest of us to learn from.
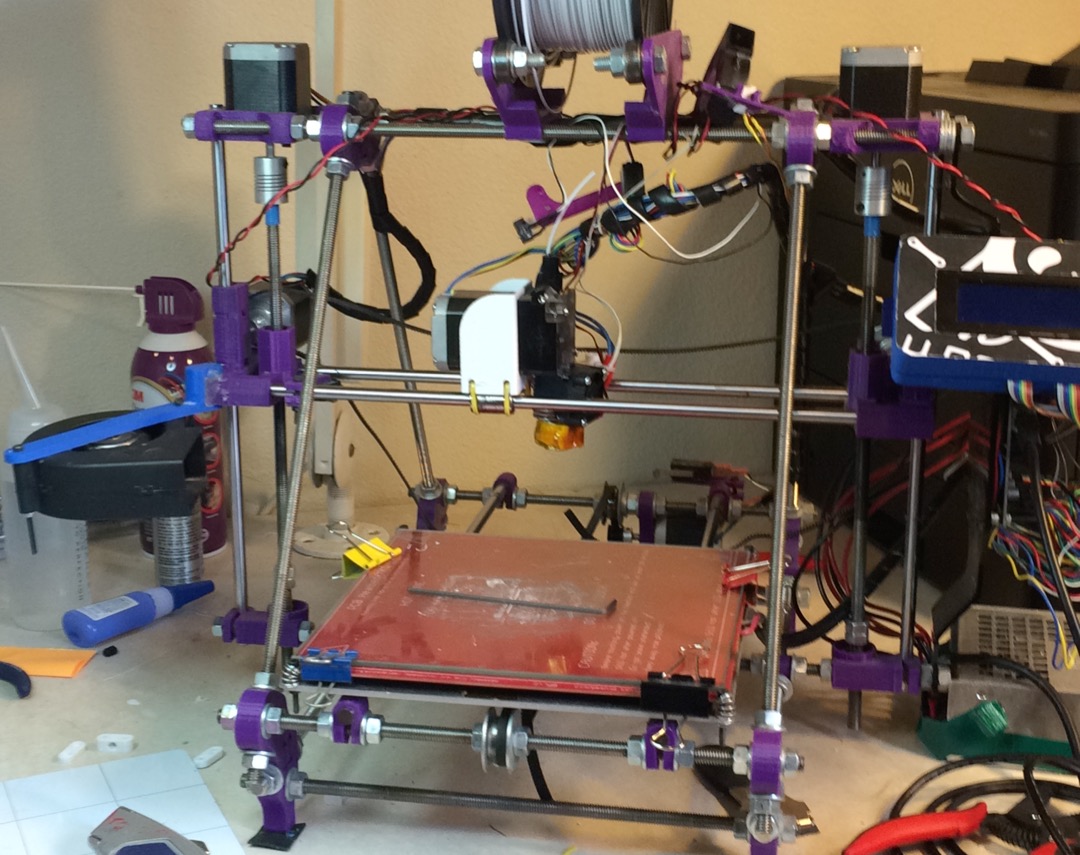
After years of cutting my hands on the exposed threads of my Prusa Mendel i2, it was time for a long overdue upgrade. I didn’t want to just buy a new printer because it’s no fun. So, I decided to buy a new frame for my printer. I settled on the P3Steel, a laser cut steel version of the Prusa i3. It doesn’t suffer from the potential squaring problems of the vanilla i3 and the steel makes it less wobbly than the acrylic or wood framed printers of similar designs.
My trusty i2. Very sharp. It… uh.. grew organically.
I expected a huge increase in reliability and print quality from my new frame. I wanted less time fiddling with it and more time printing. My biggest hope was that switching to the M5 threaded screw instead of the M8 the i2 used would boost my z-layer accuracy. I got my old printer working just long enough to print out the parts for my new one, and gleefully assembled my new printer.
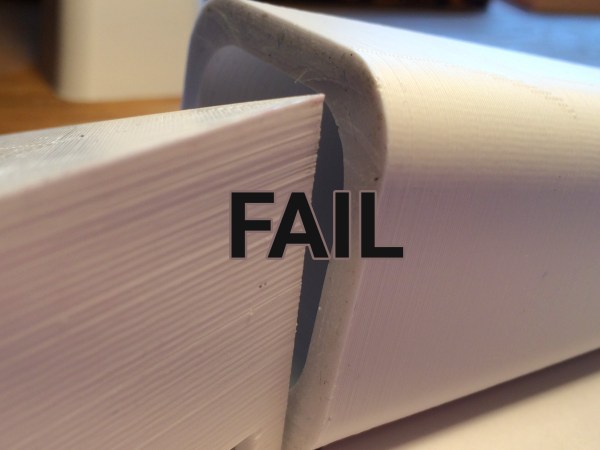
I didn’t wait until all the electronics were nicely mounted. No. It was time. I fired it up. I was expecting the squarest, quietest, and most accurate print with breathtakingly aligned z-layers. I did not get any of that. There was a definite and visible ripple all along my print. My first inclination was that I was over-extruding. Certainly my shiny new mechanics could not be at fault. Plus, I built this printer, and I am a good printer builder who knows what he’s doing. Over-extruding looks very much like a problem with the Z-axis. So, I tuned my extrusion until it was perfect.
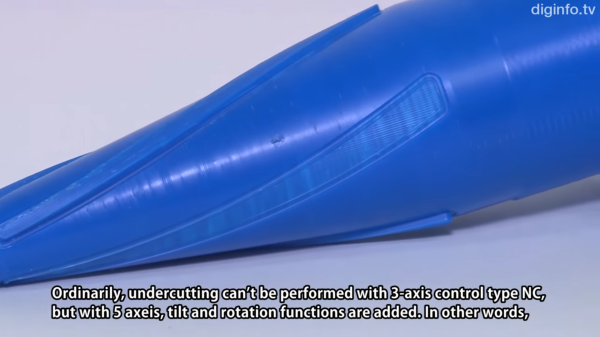
A Japanese lab is investing some time in the possibilities of a 5-axis 3D printer. They show it printing using five axis as well as doing finish machining on a printed part. We’ve covered parts of why this is the right direction to go for 3D printing in another post.
It looks like they have modified an existing industrial machining center for use with a 3D printing nozzle. This feels like cheating, but it’s the right way to go if you want to start playing with the code early. The machines are intensely accurate and precise. After all, building a five axis machine is a well known science, 3D printing with one opens a whole new field of research.
There isn’t too much to show in the video, other than it’s possible and people are doing it. The Five-axis 3D printing and machining is uninteresting, we have been able to machine plastic for a long time.
However, they show one blue part in which the central axis of the part was printed vertically, but revolute splines along its outer perimeter were printed normal to the surface of the already printed 3D part. Which is certainly not commonly done. Video after the break.
Did [TobiasWeis] build a mirror that’s better at reflecting his image? No, he did not. Did he build a mirror that’s better at reflecting himself? We think so. In addition to these philosophical enhancements, the build itself is really nice.
The display is a Samsung LCD panel with its inconvenient plastic husk torn away and replaced with a new frame made of wood. We like the use of quickly made 3D printed brackets to hold the wood at a perfect 90 degrees while drilling the holes for the butt joints. Some time with glue, band clamps, and a few layers of paint and the frame was ready. He tried the DIY route for the two-way mirror, but decided to just order a glass one after some difficulty with bubbles and scratches.
A smart mirror needs an interface, but unless you own stock in Windex (glass cleaner), it is nice to have a way to keep it from turning into an OCD sufferer’s worst nightmare. This is, oddly, the first justification for the Leap Motion controller we can really buy into. Now, using the mirror does not involve touching the screen. [Tobias] initially thought to use a Raspberry Pi, but instead opted for a mini-computer that had been banging around a closet for a year or two. It had way more go power, and wouldn’t require him to hack drivers for the Leap Motion on the ARM version of Linux.
After that is was coding and installing modules. He goes into a bit of detail about it as well as his future plans. Our favorite is programming the mirror to show a scary face if you say “bloody mary” three times in a row.
Long ago, when I wanted a plywood sheet, I would go to the local big box hardware store and buy whatever was at the center of the optimization curve for cheapest and nicest looking. I would inevitably suffer with ultra-thin veneers on the top, ugly cores, unfinishable edges, warping, voids, and other maladies of the common plywood. One day I said enough is enough and bothered the salesman at my local lumber supply until he showed me one that wasn’t awful.
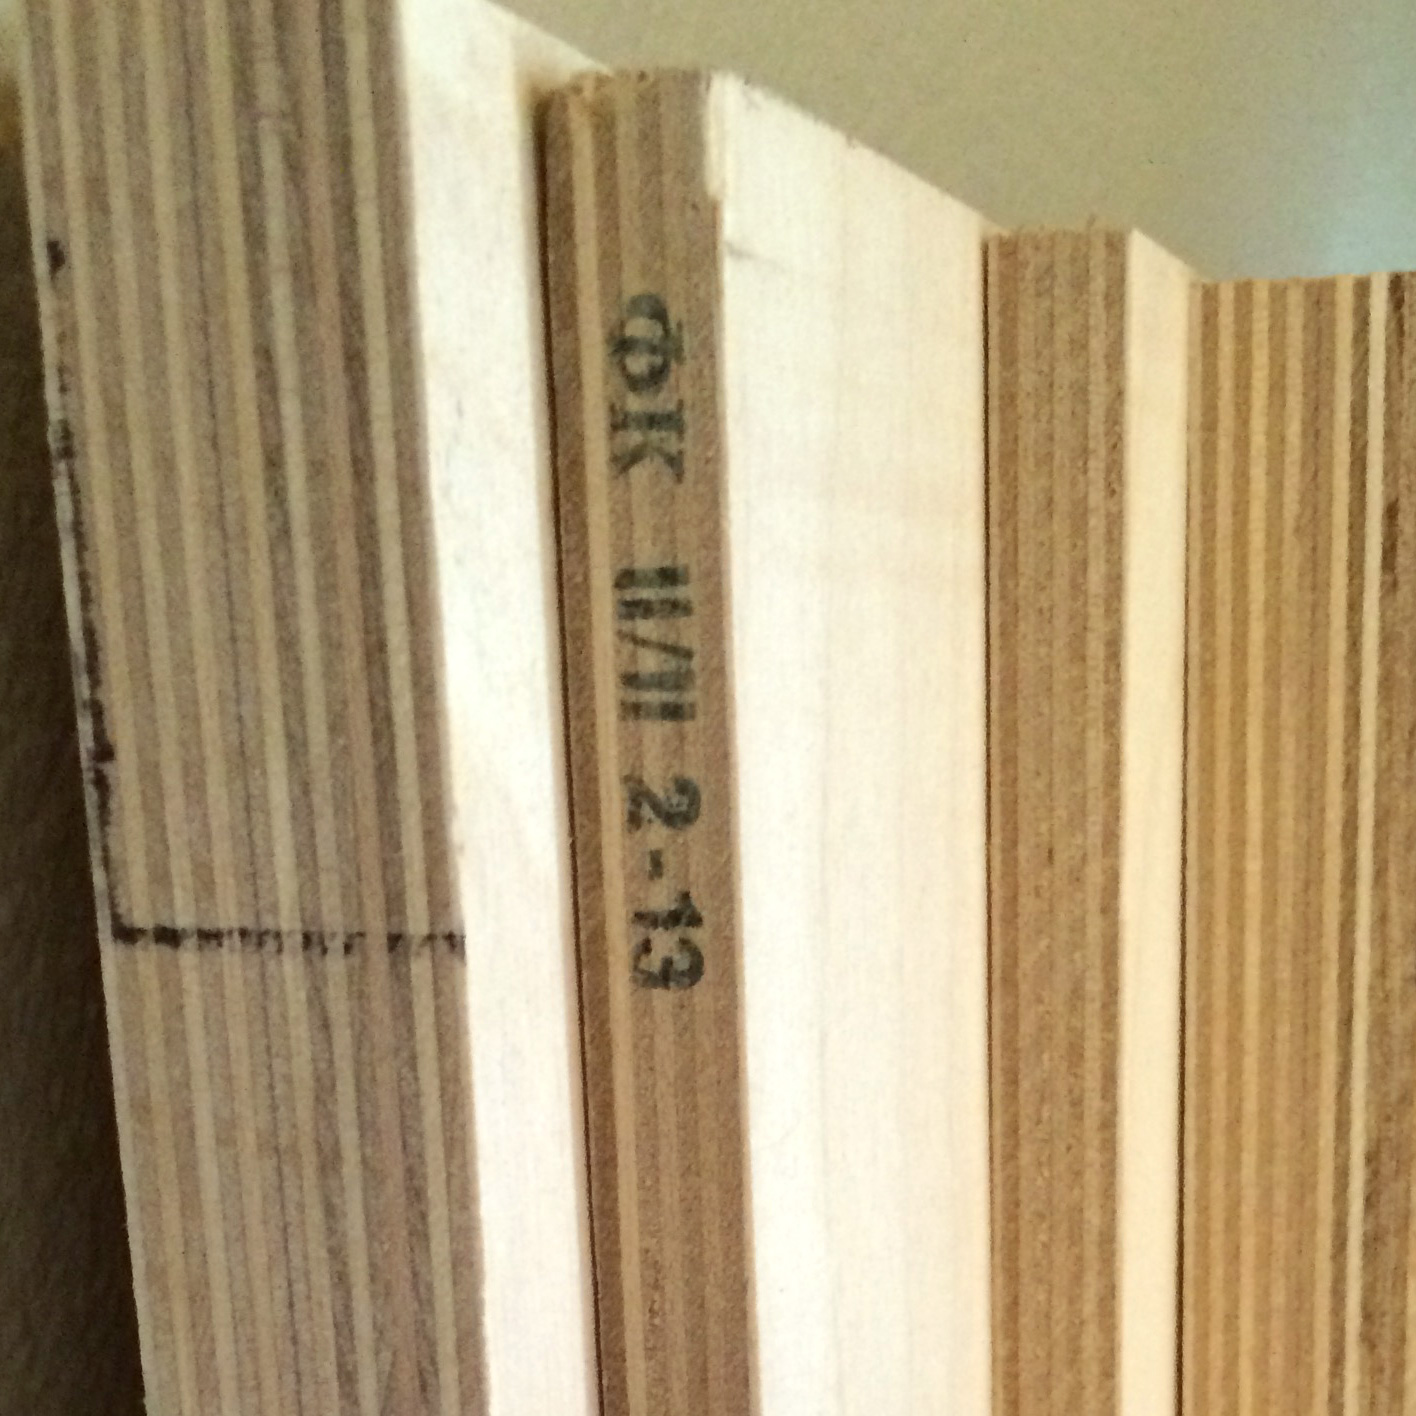
There are subtle clues that the Baltic Birch I’ve purchased is Russian.
Baltic birch differs from other plywoods in a few ways. Regular plywood is usually made locally from the cheapest possible core wood in alternating grain layers laminated together with a hardwood veneer on the top. There are interior and exterior grades. The exterior grades are usually made with a different glue, but don’t necessarily denote a higher quality or stability. Some of the glues used can be toxic. Wear a respirator. In normal plywood, the ATSM or BB standards only apply to the face veneers used to finish the product. The core can be of whatever quality is convenient for the manufacturer.
True Baltic Birch is made in the Baltic Region with the biggest producers being Russia and Finland. Outside of the US it is sometimes called Finnish Birch or Russian Birch plywood for this reason. It is made from only top quality birch veneers laminated together with no filler wood. It is also unique in the care taken to make sure each layer of the wood is patched so there are no voids. All Baltic Birch is made with exterior grade glue, and when properly sealed will work for outdoor applications. There are grades of Baltic birch for marine applications and exceptionally void free aircraft grade plywood at a much higher cost.
The easiest way to spot Baltic Birch if you’re American is its form factor. Baltic birch comes in 1525 x 1525 mm squares, which approximates to 5 ft x 5 ft. Some people have said that manufacturers have started to produce 4 ft x 8 ft sheets specifically for the North American market, but this information comes with a caveat that these are usually lower grades made locally or in China parading under the name. The metric form factor extends to the thicknesses of the sheets. In America they will be sold as inch, but fit pretty closely to a metric form.
3 mm ≈ 1/8″ (3 plies)
6 mm ≈ 1/4″ (5 plies)
9 mm ≈ 3/8″ (7 plies)
12 mm ≈ 1/2″ (9 plies)
18 mm ≈ 3/4″ (13 plies) – From [3] Ultimate guide to Baltic birch.
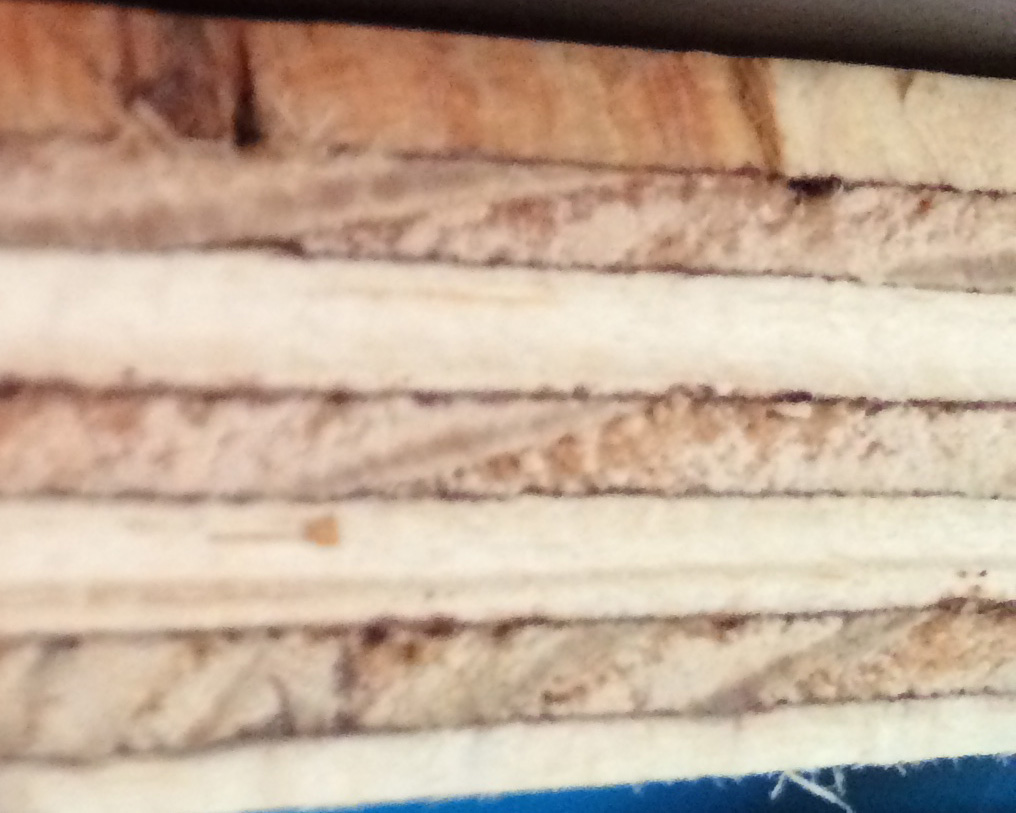
The core of regular hardware store plywood. Pretty bad in comparison.
There are some really nice practical features of Baltic Birch. One of my favorites is the absolute uniformity of the layers. This means that two pieces of birch can be laminated together and the seam between the two becomes indistinguishable. I’ve used this to make cases by CNC routing out the inside of a sheet of Baltic birch, drilling some holes for alignment pins, and then laminating the whole assembly together. We’ve covered a few readers who have had similar ideas. Since the layers are uniform you can also do interesting things when combined with a CNC router. For example, carefully milling away the layers you can get a topographic map of the object.
Baltic Birch is also significantly flatter and more stable than other plywood options. It is commonly the material used for fences on expensive tables saws. It moves less during temperature swings and changes in ambient moisture. This is one of the reasons it’s popular with fine furniture builders. This also makes Baltic birch a good option for home CNC builds, certainly better than MDF . Due to the higher quality wood and better manufacturing it is quite strong as well. It is a great structural wood.
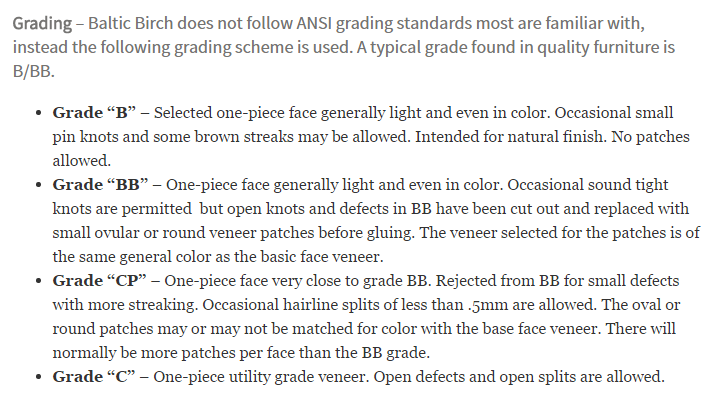
Explanation of the grading scale for Baltic Birch from [1] Dan’s hobbies.Baltic birch holds stains very well on both its faces and its edges. It’s as easy to paint and glue as any wood. As far as surface finish goes it’s important to note that as mentioned previously, Baltic Birch is graded to a different scale than regular plywood. The grades will determine how the face veneers are treated. B/B is the highest grade with both sides being defect free. B/BB is much more common and is what you are likely to find. I have not found C or CP grades in the US. My guess is that we have plenty of low grade plywoods to compete with it. It is likely found nearer to the areas where it is produced.
This is on the non-finishing side of a Baltic Birch panel. You can see the care taken to fix knots and voids. This will be done through the whole sheet. The face of the board will not have marks. This is a B/BB grade sheet. If it was B/B both sides would be without patches.
Baltic birch is more expensive than the regular grade stuff. So a sheet of ¾” thick Oak veneer plywood with a pine core, interior grade, from Lowes is about 35 US dollars where a similar sheet of 18mm Baltic Birch will run around 65 dollars.
I’ll still occasionally purchase a cheaper sheet of plywood when I have a non-critical application (like garage shelving), but when I am doing something precise or nice I’ll spend the extra on the birch plywood. While I love this material, I am by no means a wood worker. Have any of you had experience with this plywood? Is there an even better plywood out there?
I’ve left my sources below for further reading. [3] Ultimate Guide to Baltic Birch is very good.