1btn – An Open Source Dash

The availability of cheap radios, omni-present WiFi and powerful web services means the IoT wave is here to stay. Amazon got into the act with its “do only one thing” Dash button. But a more interesting solution would be an IoT “do it all” button.

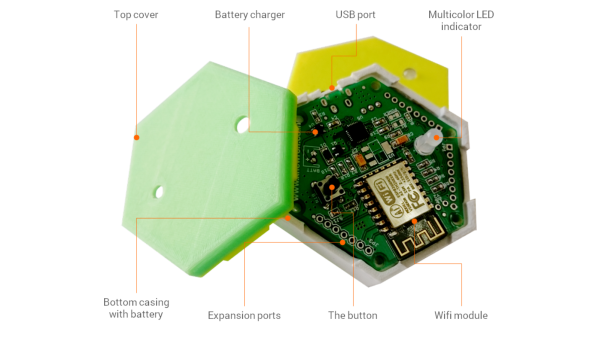
[Anand] has been working on his 1btn Open Source WiFi connected IoT button for a while. It connects to the Internet over WiFi to trigger whatever action you have assigned to it using a simple, online interface. It’s reconfigurable and open source. Which means it can be used in pretty imaginative ways, and if needed, can be re-flashed with your own custom firmware should you decide to really get under its hood.

The 1btn’s ESP8266 module is usually in sleep mode, waking up when the button is pressed, making the connection, performing the task and then going back to sleep once confirmation is received. A Red/Green LED indicates if the action was successful or not. You can set it up to send e-mails, messages, tweets or perform actions via a custom script, API or the IFTTT – maker channel. To make it hacker friendly, all of the ESP8266 GPIO pins are accessible via headers. This makes it convenient to add external sensors, for example. There’s also a (unpopulated) QFN footprint to allow adding an ATmega device (168P/328P) whose GPIO pins are also accessible via headers. This opens up a large number of additional applications for the device such as home automation.

On the software side, the 1btn connects to a web console, where you can set up an account, configure the device, register its MAC ID, assign it an alias and set up its actions. All of the source files for the 1btn – firmware, enclosure, schematic, BOM, PCB layout and example use cases – are posted on his Github repository.

The HackadayPrize2016 is Sponsored by:

Soda Fridge Hack To Fix A Lazy People Problem

[Paul] participated in a hackathon at work and created a hack to help solve what was ultimately a people problem. A soda fridge at work wasn’t getting refilled when empty. Instead of trying to make people less lazy, [Paul] went with making the fridge more needy.

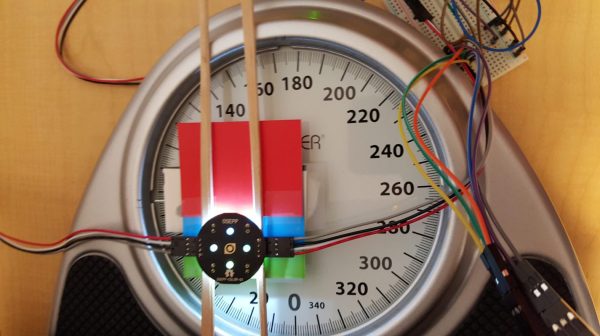
The first thing [Paul] did was make a soda fridge refill sensor from a scale. As the fridge got emptier, it got lighter. The scale senses that and can decide it’s time for a refill. The only part missing was how to read the output from the scale. To do that, he took an unusual approach.
Continue reading “Soda Fridge Hack To Fix A Lazy People Problem”

ESP8266 Or MKR1000?

If you are a regular Hackaday reader, you’ve probably seen plenty of ESP8266 projects. After all, the inexpensive device is a workhorse for putting a project on WiFi, and it works well. There is a processor onboard, but, most often, the onboard CPU runs a stock firmware that exposes an AT command set or Lua or even BASIC. That means most projects have a separate CPU and that CPU is often–surprise–an Arduino.

It isn’t a big leap of logic to imagine an Arduino with an integrated WiFi subsystem. That’s the idea behind the MKR1000. But the real question you have to ask is: is it better to use an integrated component or just put an Arduino and ESP8266 together?

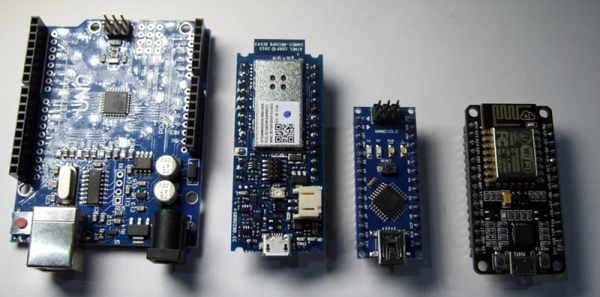
[Andreas Spiess] not only asked the question, but he answered it in a YouTube video (see below). He examines several factors on the MKR1000, the Arduino Due and Uno, and several other common boards. The examination covers performance, features, and power consumption.

Continue reading “ESP8266 Or MKR1000?”

Six Years Of Work And Rationale In A DIY Book Scanner Documented

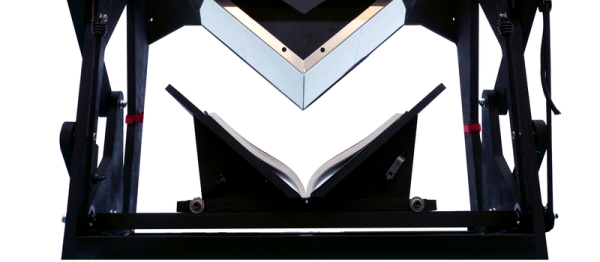
[Daniel Reetz] spent six years working as a Disney engineer during the day and on his book scanner, the archivist at night. Some time last year, [Daniel] decided enough is enough, got married, and retired from the book scanner business. There’s a bit more to it than that, but before leaving he decided to dump, not just the design, but the entire rationale behind the design into a twenty-two thousand word document.

One of his big theses in this document, is his perceived failure of the open hardware movement. The licenses aren’t adequate, as they are based on copyright law that only applies to software. This makes it impossible to enforce in practice, which is why he released the entire design as public domain. He also feels that open hardware shares design, but not rationale. In his mind this is useless when encouraging improvement, and we tend to agree. In the end rationale is the useful thing, or the source code, behind a design that truly matters. So, putting his money time where his mouth is, he wrote down the rationale behind his scanner.

The rationale contains a lot of interesting things. At a first glance the book scanner almost seems a simple design, not the culmination of so much work. Though, once we began to read through his document, we began to understand why he made the choices he did. There’s so much to getting a good scan without destroying the book. For example, one needs a light that doesn’t lose any color information. It doesn’t have to be perfect, as the software can correct the white balance. However, it can’t lean too far away from the natural spectrum, it can’t be too bright, and it can’t be uneven, and it can’t be prohibitively expensive. A lot of thought went into the tent light design.

[Daniel]’s book scanners are immensely popular, and are being used all over the world. He’s certainly made an impact, and the community that formed around his project continues to grow without him. He made some interesting points, and if anything wrote a really good build and design log for the rest of us to learn from.

Saving Lives With Open-Source Electrocardiography

A few months ago, MobilECG wowed us with a formidable electrocardiograph (ECG, also EKG) machine in the format of a business card, complete with an OLED display. We’ve seen business card hacks before, but that was the coolest. But that’s peanuts compared with the serious project that it supports: making an open-source ECG machine that can actually save lives by being affordable enough to be where it’s needed, when it’s needed.

The project, MobilECG, is an open-source, wearable device that supports all of the major ECG modes. In their talk, [Péter Isza] and [Róbert Csordás] taught us a lot about what that exactly entails and how the heart works. We learned a lot, and we’ll share some of that with you after the break.

Continue reading “Saving Lives With Open-Source Electrocardiography”

My precision mechanism adjuster. NSFW. As in if you use one of these to adjust a precision mechanism at work you'll get fired. Home use is fine tho;)

Fail Of The Week: My 3D Printer Upgrade

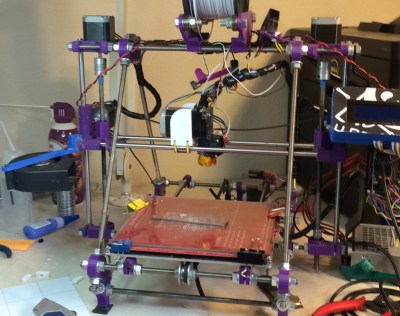
After years of cutting my hands on the exposed threads of my Prusa Mendel i2, it was time for a long overdue upgrade. I didn’t want to just buy a new printer because it’s no fun. So, I decided to buy a new frame for my printer. I settled on the P3Steel, a laser cut steel version of the Prusa i3. It doesn’t suffer from the potential squaring problems of the vanilla i3 and the steel makes it less wobbly than the acrylic or wood framed printers of similar designs.

My trusty i2. Very sharp. It... uh.. grew organically.
My trusty i2. Very sharp. It… uh.. grew organically.

I expected a huge increase in reliability and print quality from my new frame. I wanted less time fiddling with it and more time printing. My biggest hope was that switching to the M5 threaded screw instead of the M8 the i2 used would boost my z-layer accuracy. I got my old printer working just long enough to print out the parts for my new one, and gleefully assembled my new printer.

I didn’t wait until all the electronics were nicely mounted. No. It was time. I fired it up. I was expecting the squarest, quietest, and most accurate print with breathtakingly aligned z-layers. I did not get any of that. There was a definite and visible ripple all along my print. My first inclination was that I was over-extruding. Certainly my shiny new mechanics could not be at fault. Plus, I built this printer, and I am a good printer builder who knows what he’s doing. Over-extruding looks very much like a problem with the Z-axis. So, I tuned my extrusion until it was perfect.

Continue reading “Fail Of The Week: My 3D Printer Upgrade”

Japanese Lab Builds 5-Axis 3D Printer

A Japanese lab is investing some time in the possibilities of a 5-axis 3D printer. They show it printing using five axis as well as doing finish machining on a printed part. We’ve covered parts of why this is the right direction to go for 3D printing in another post.

It looks like they have modified an existing industrial machining center for use with a 3D printing nozzle. This feels like cheating, but it’s the right way to go if you want to start playing with the code early. The machines are intensely accurate and precise. After all, building a five axis machine is a well known science, 3D printing with one opens a whole new field of research.

There isn’t too much to show in the video, other than it’s possible and people are doing it. The Five-axis 3D printing and machining is uninteresting, we have been able to machine plastic for a long time.

However, they show one blue part in which the central axis of the part was printed vertically, but revolute splines along its outer perimeter were printed normal to the surface of the already printed 3D part. Which is certainly not commonly done. Video after the break.

Continue reading “Japanese Lab Builds 5-Axis 3D Printer”