On the last day of DEF CON, I talked to some charity hackers, checked out the lockpicking village, and learned how insecure my router is in the wireless village.

DEF CON: Hacking Charities And Routers
Where’s Cardboard Snowden?
On the last day of DEF CON, I talked to some charity hackers, checked out the lockpicking village, and learned how insecure my router is in the wireless village.
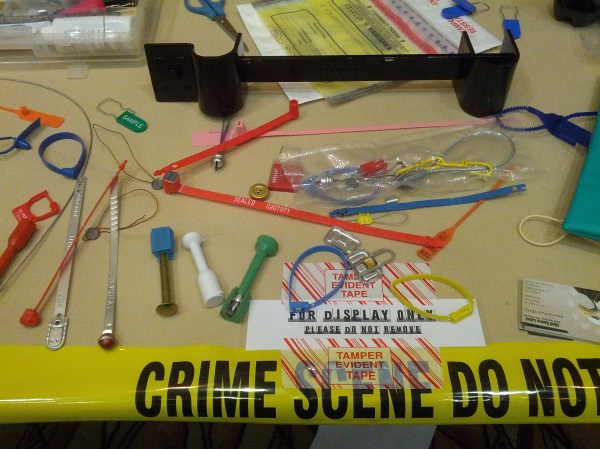
For day two of DEF CON, I checked out tamper evident devices, the contests area, and a few embedded talks. Read all about it after the break.
Continue reading “DEF CON: Tamper Evidence, Contests, And Embedded Talks”
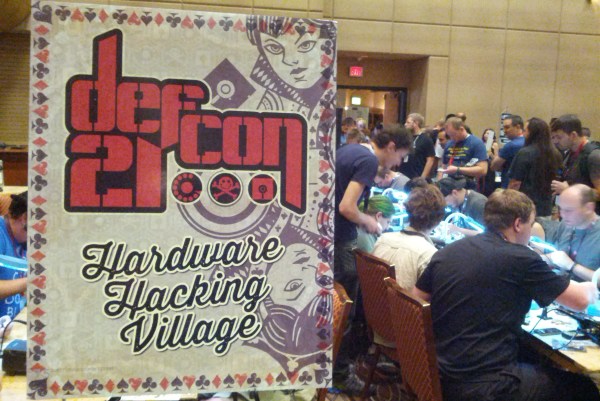
The first full day of DEF CON was packed with hacking hardware and cars. I got to learn about why your car is less secure than you might think, pick some locks, and found out that there are electronic DEF CON badges after all. Keep reading for all the detail.

I’ve arrived at the Rio Casino in Las Vegas, Nevada for DEF CON 21. Over the next couple of days, I’ll be talking about what I get up to here.
The main event today is registration, which means getting a neat badge. This year’s badge was designed by [Ryan Clarke]. According to the DEF CON booklet, they are “non-electronic-electronic” badges this year, and DEF CON will be alternating between electronic badges every other year.
The playing card design is printed on a PCB, and uses the silkscreen, solder mask, and copper layers to provide three colors for the artwork. The badge is a crypto challenge, featuring some cryptic characters, numbers, and an XOR gate. I don’t have any ideas about it yet, but some people are already working hard on cracking the code.
Tomorrow, I’ll be heading to a few talks including one on hacking cars that we discussed earlier, and one on decapping chips. I’ll also be checking out some of the villages. The Tamper Evident Village is premiering this year, and they’ll be showing off a variety of tamper proofing tech. I’ll also try to get to the Beverage Cooling Contraption Contest, where competitors build devices to cool beverages (ie, beer) as quickly as possible.
If you have any DEF CON tips, let me know in the comments.
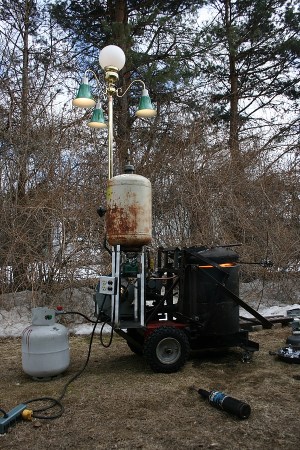
If you want to do casting at home, you’ll need a way to melt metal. [Jake]’s DIY foundry furnace gets hot enough to melt aluminium, and is built out a mix of scrap parts.
The chamber of the furnace is built out of a water heater tank which has been lined with a special cement that refracts heat. The furnace is heated by a Babington burner. This type of burner works by atomizing the fuel and injecting it into the furnace. They are good for burning waste oil to achieve high heats.
A scrap Volkswagen oil pump and a cordless drill are used to feed oil into the burner. Once it’s fired up, the furnace takes about 10 minutes to melt the 11 pounds of metal that it can hold. [Jake] melted about 40 pounds of aluminium alloy from scrap alloy wheels in 2 hours, which should be more than enough for a home casting project.
After the break, check out the overview of the device and a demo of melting aluminium.
When brewing your own beer, temperature control is important. If the temperature isn’t regulated correctly, the yeast will be killed when it’s added to the wort. It’s best to cool the wort from boiling down to about 25 C quickly before adding yeast.
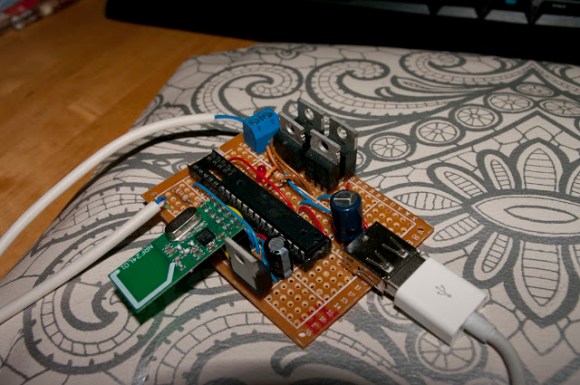
To do this, [Kalle] came up with a wireless temperature controller for his home brewing setup. The device uses a heat exchanger to cool the wort. An ATmega88 connected to a H-bridge controls a valve that regulates flow through the heat exchanger. It reads the current temperature from a LM35 temperature sensor and actuates the valve to bring the wort to a set point.
A neat addition to the build is a wireless radio. The nRF24L01 module provides a wireless link to a computer. There’s an Android application which communicates with the computer, providing monitoring of the temperatures and control over the set point from anywhere [Kalle] can get an internet connection.
Most microcontroller manufacturers give you some kind of free development toolchain or IDE with their silicon products. Often it’s crippled, closed source, and a large download. This is pretty inconvenient when you want to have firmware that’s easy to build and distribute. I’ve found many of these toolchains to be annoying to use, and requiring closed source software to build open source firmware seems less than desirable.
It’s possible to build code for most microcontrollers using command line tools. You’ll need a compiler, the device manufacturer’s libraries and header files, and some method of flashing the device. A lot of these tools are open source, which lets you have an open source toolchain that builds your project.
Setting up these tools can be a bit tricky, so I’m building a set of templates to make it easier. Each template has instructions on setting up the toolchain, a Makefile to build the firmware, and sample code to get up and running quickly. It’s all public domain, so you can use it for whatever you’d like.
Currently there’s support for AVR, MSP430, Stellaris ARM, and STM32L1. More devices are in the works, and suggestions are welcome. Hopefully this helps people get started building firmware that’s easy to build and distribute with projects.


