Tour Of Advanced Circuits – A PCB Manufacturer

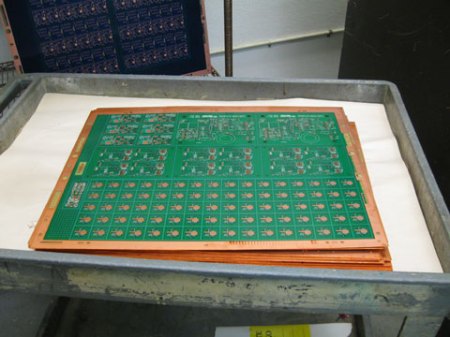
Although not a hack in itself, many of you may be interested in seeing how a printed circuit board is made in the manufacturing world.  This tour of Advanced Circuits does a good job of explaining the process. The article explains how a PCB will go through a CAD/CAM review, drilling, deburring, and the various chemical etch, plating, and curing processes.

Although many hackers make their own PCBs, having it professionally done can be a good option depending on how many copies are needed. One benefit of this is that PCBs can be checked by an optical inspection process, or even by a “flying lead” machine which works by contacting leads automatically in a computer controlled setup.

A video of this incredible machine is included after the break.  Around 0:26 is when it really starts to get going. Continue reading “Tour Of Advanced Circuits – A PCB Manufacturer”

The PixBoard

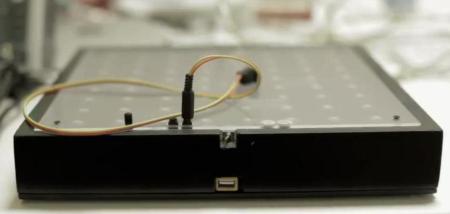
Many hacks are, of course, interesting in their own right. Hacks like this one, however, fulfill a much greater purpose by helping people overcome their disabilities. The PixBoard is “an illuminated board adapted for disabled people, especially for people with cerebral palsy, giving them access to games using shift technology.”

This device was developed for a girl that has cerebral palsy and can’t control her arms or legs effectively. In order to interact with the world more effectively to play board games and the like, this system was developed. The PixBoard scans an 8×8 matrix of LEDs allowing her to select the piece to be moved and where to move it. This is done using only simple buttons and the processor’s timer.

The system is controlled using an Arduino, so anyone is free to create their own games for this system depending on the situation. The following video is in Spanish, but shows this device in action around 1:20. Continue reading “The PixBoard”

FPGA MIDI Interface

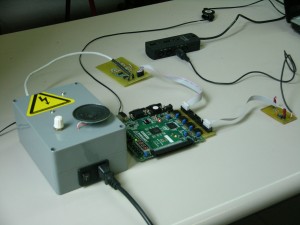
Hacking and digital music seem to be very much related arts. This very well built hack goes through the process of creating a MIDI synthesizer using a field programmable gate array (FPGA) and several other components.

A laptop is used as the MIDI interface which runs through a filter and then to the FPGA. This translated signal then goes through a digital to analog converter and finally to the amplifier and speakers. The FPGA is especially interesting as this chip is an array of logic gates that can be programmed however one wants. In this case, the wavetable principle is used to generate sound.

Although this is no Kaossilator yet, this device is a great start and very functional. If you’ve ever wanted to build your own electronic instrument, check out this hack. Also, check out the video after the break! Continue reading “FPGA MIDI Interface”

Automatic Micro-Copter Cameraman

For those of you that are extreme sports participants, this “MikroKopter” may be the solution you’ve been waiting for.  When combined with a helmet mounted camera, this additional view should do a great job of capturing your every trick.

This setup attaches a camera to a six-rotor mini helicopter to follow and video the action. In true drone form, the camera is controlled automatically via a “point of interest” tracking transmitter.  The helicopter, however, appears to be controlled by a human operator.

There is really a lot going on with this setup from the micro helicopter itself to the tracking system (really neat how it calculates the camera angle), so be sure to check out their website. Also, be sure to check out the video of everything in action after the break. Continue reading “Automatic Micro-Copter Cameraman”

3 Axis Plotter Made From Spare Parts

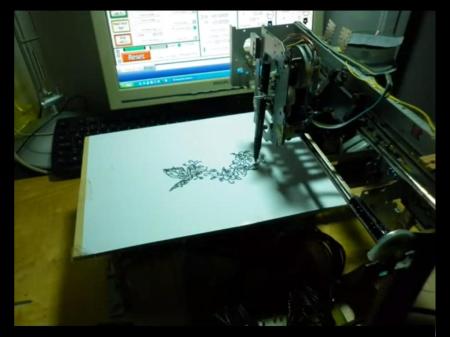
The plotter featured above was, according to the author, made almost entirely of salvaged parts. In addition to what he had accumulated, only $20 in parts was needed to complete this build. Pretty good considering the thousands of dollars that a new plotter goes for.

Control of all axes is accomplished using unipolar stepper motors.  In this case only one unipolar motor was available along with two bipolar motors. [Lovro] actually hacked these into a unipolar setup to save costs on the build.

Mach3 control software along with a parallel port is used to control the steppers. A similar “junk” setup could be used to power a CNC mill or laser engraver, so think twice before tossing that old printer in the trash!  Check out the video of this plotter in action after the break! Also, see this hack for a similar laser engraving machine using Mach3 control software. Continue reading “3 Axis Plotter Made From Spare Parts”

Equipment Needed To Get “Started” In Electronics

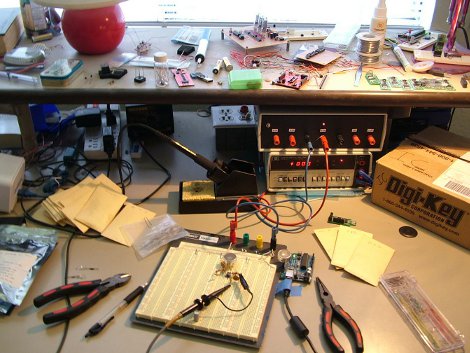
[Kenneth] is a Mechanical Engineer who likes to dabble in electronics. Besides providing us with an excellent picture of his workbench, he has put together a list of things that you’ll need as you learn to work with electronics. A beginner electronics kit from one of a number of different sources may work for some, but others may not be interested in a kit.

[Kenneth] gives links and recommendations for categories of: books, electrical equipment, development tools, components, digital electronics, and analog chips. As he puts it, this post is a “gigantic list of everything I would buy right now to replace my entire workshop if mine were to disappear.”  This is a great list of things you may need if you’re starting out.  If you have some experience, this list may introduce you something new. Check out some of [Kenneth’s] other projects like his cloud chamber or the Chumby webserver that he made.

The Infrared Graduation Cap

It’s graduation time for many high schoolers, and while many students would love to decorate their caps, administration generally looks down upon this practice. [Victor], however, thought of a way around this.

The human eye cannot see infrared light, but camcorders generally can. Putting these two concepts together with a couple of infrared LEDs, [Victor] was able to make a cap that displayed his decoration in everyone’s “digital memory”, but wouldn’t be detected until the video of the offense was displayed. Hopefully by the time the prank is detected, [Victor] will have successfully graduated and presumably gone on to other pursuits.

An ATmega 168 controls this hat to display his message, “Congratulations Class of 2011,” in Morse code. What a creative use of both old and new technology to pull off an awesome graduation prank. Be sure to check out the video after the break to see how everything was put together. Continue reading “The Infrared Graduation Cap”