PCB Solder Pad Repair & Cleanup

What do you do when your motherboard is covered in electrolytic grime, has damaged pads and traces that are falling apart? You call [RetroGameModz] to work their magic with epoxy and solder.

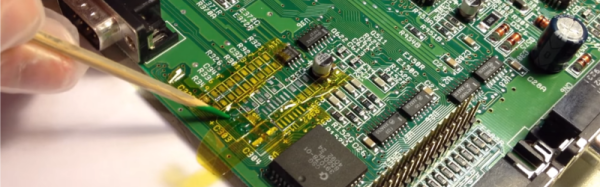
While this video is a bit old, involved repair videos never go out of style. What makes this video really special is that it breaks from the common trend of “watch me solder in silence” (or it’s close cousin, “watch me solder to loud music”). Instead, [RetroGameModz] walks you through what they’re doing, step by step in their repair of a motherboard. And boy do they have their work cut out for them: the motherboard they’re working on has definitely seen better days. Specifically, it was better before corrosion from a leaking electrolytic capacitor and the well-meaning touch of its owner.

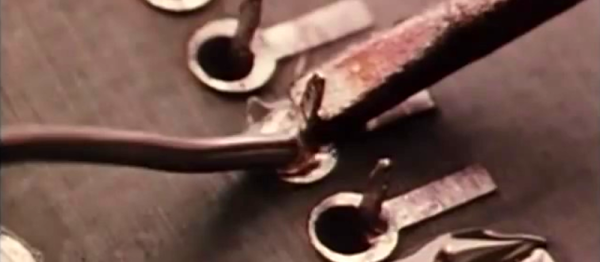
After a quick review of the damage, all of the components are removed from the battle zone. Then the cleaning begins, taking special precautions not to rip pads up. After everything’s cleaned up, things get really interesting. [RetroGameModz] starts to make their own pads from raw copper using the old pads as templates to replace the missing ones on the motherboard. After a bit of epoxy, it’s hard to tell that the pads were handmade, they fit in so well.

This epoxy trick is also used to deal with some heavily damaged traces, cool! During this repair, [RetroGameModz] used an epoxy that is heat resistant up to 315°C for 60 seconds. If you ever find any kind of epoxy on the market that is specified to be heat resistant up to more than 315°C, [RetroGameModz] would be quite happy if you could leave some info in the comment section, as they’ve found high-temperature epoxies quite difficult to source.

This goes to show that some repairs really should be done by professionals. [RetroGameModz] surely agrees, stating that “If you are not a repair technician and your motherboard has stopped working, it would be in the best of your own interest not to attempt a repair that you really cannot handle.” Good advice. But, we can never resist trying to fix things ourselves before handing things off to the more experienced. Call it a vice, or a virtue; we’ll call it fun.

What do you think? Are there some repairs you rely on technicians for? Or do you fix everything yourself? Let us know in the comments.

Continue reading “PCB Solder Pad Repair & Cleanup”

Gateway To Metal Casting

Casting is an exciting and very useful pastime, but it’s not exactly common these days. That’s a problem whether you’re just getting started or have been doing it for years: everyone can use the advice of another. Fear not! The US Department of Energy is here to help with the Industrial Metal’s Program’s Metal Casting cornucopia.

Although not strictly a hack, this is certainly a facilitator of hacks and any experienced user would do themselves some good by perusing the site. Click on the maps to find complex issues presented remarkably well for papers at this level of rigor. Seriously, check them out.

However, since these papers go into such depth, we can’t really say the material is beginner friendly. That’s not to say it would be bad for a newbie to read through, just that it might be a bit discouraging. But, if you need to figure out where to start in the maze of molds and sand and molten metal, we might have some articles that might help you out.

Do y’all know of any good casting resources on the interwebs? If so, leave ’em in the comments!

Thanks [RunnerPack] for sending this in.

Key To Soldering: Pace Yourself

When writing my last article, I came upon something I thought had been lost to the seven seas of YouTube: the old-school “Basic Soldering Lesson” series from Pace Worldwide.

This nine-episode-long series is what retaught me to solder, and is a masterpiece, both in content and execution. With an episode titled “Integrated Circuits: T0-5 Type Packages & Other Multi-leaded Components” and a 20-minute video that only focuses on solder and flux, it’s clear from the get-go that these videos mean business. Add that to the fact that the videos are narrated by [Paul Anthony], the local weatherman in the Washington DC area back in the 80s and 90s, these videos are a joy to watch.

Even if you know what you’re doing, don’t skip the first video. It’s where the “workpiece indicator” concept, which runs throughout the series, is introduced.

Covering everything from what solder really is to how to correctly solder integrated circuits, this series has it all, even if it’s slightly dated. And, while it’s not a hack, it’s a great way to rejuvenate your soldering skills or give someone a hot start on their soldering journey.

Speaking of which, we’ve seen many things designed to educate, but one size certainly does not fit all. Do y’all know of any well-made sources that teach foundational topics that are as accessible as this series? If so, let us know in the comments.

The first video in the series is after the break. In sum, they’re long but worth it.

Continue reading “Key To Soldering: Pace Yourself”

Oscilloscope Mod For The Blues

Roughly 8% of males and 0.6% of females are red-green color blind, and yet many common oscilloscopes use yellow and green for the traces for their two-channel readouts. Since [Roberto Barrios] is afflicted by deuteranopia, a specific form of red-green colorblindness that makes differentiating between yellow and green hard, if not impossible, he got to work hacking his Agilent oscilloscope to make it more colorblind friendly.

Starting with a tip from [Mike] from the EEVblog forums, [Roberto Barrios] set out to rewire the LCD interface and swap the red and green signals. That way yellow will turn bluish (red component replaced by blue) and it could be seen as “very different now” from the green trace on the readouts. Sounds simple right? Well, slight issue: the 0.5 mm pitch of the connector. He did not want to design a PCB and wait a few weeks to receive it, so he decided on using 0.1 mm wires held together with Kapton tape to route each signal individually from one connector to the other. After an hour under the microscope, it was done. And boy, his work is impressive, go check it out.

Voila! It worked splendidly. Now [Roberto Barrios] can use his scope. And, the stock UI is mostly grey or white, so swapping the red and blue channels did not change much the appearance of the interface. Moreover, the switch had a small unintentional bonus, the loading screen is much cooler now with an edgy red sky. Further, [Roberto Barrios] “would not be [himself] if [he] could resist changing the CH1 button backlight LED to blue, to match the new trace color. So, no [he] couldn’t.”

This was a well done and very functional oscilloscope mod, but if you need more frivolity in your life, fear not: we’ve got your back with real-time Quake played on an oscilloscope.

A Switched Game Boy Advance SP

After Nintendo’s wild success with the Wii U, Nintendo released it’s Nintendo Switch. The switch functions primarily as a home console, stagnantly connected to a display. However, Nintendo switched things up a bit: the Switch can be removed from its dock for standalone tablet-like use. But there’s a slight problem: when the Switch is in portable mode, it leaves behind a bleak and black box. What’s one to do? Worry not: [Alexander Blake] is here to save the day with a Game Boy Advance SP and an X-Acto knife.

After casually noting that the main control board of the Switch was roughly Game Boy Advance SP sized, [Alexander Blake], aka [cptnalex], knew it was meant to be. After retrieving his broken Game Boy Advance SP from his closet, [cptnalex] set to work turning his Game Boy into a Nintendo Switch dock. When he was done, the results were stunning, especially considering the fact that this is his first console mod. Moreover, the very fact that he did it all with an X-Acto knife rather than a Dremel is astounding.

With the screen providing support to the Switch, [cptnalex’s] design leaves some to be desired for long term use. But we know for sure that [cptnalex’s] design does, in fact, work. Due to naysayers of the internetTM, [cptnalex] filmed a video of his dock in uses (embedded after the break). But, what the design lacks in structural stability, it more than makes up for in aesthetics. On the device itself, [cptnalex’s] history with controller painting shines through.

If you want to see more of [cptnalex’s] work, you can follow him on Instagram. For more console mods that will take your breath away, look no farther than [Bungle’s] vacuum formed portable N64.

Continue reading “A Switched Game Boy Advance SP”

3D Printed Radiation Patterns

Radiation patterns for antennas can be utterly confusing, especially when presented in two dimensions, as they usually are. Fear not, [Hunter] has your back with 3D printed and color-coded radiation patterns.

In the field of antenna design, radiation patterns denote the relationship between the relative strength of radio waves emitted from antennas and the position of a receiver/transmitter in 3D space. In practice, probes can be used to transmit/receive from documented locations around an antenna while recording signal intensity, allowing researchers and engineers to determine the characteristics of arcane antennas. These measurements are normally expressed as two-dimensional slices of three-dimensional planes. Naturally, this sometimes (often) complex geometry is difficult for all but the most spatially inclined to mentally conceptualize with only the assistance of a 2D drawing. With computers came 3D models, but [Hunter] wasn’t satisfied with a model on a screen: they wanted something they could hold in their hands.

To that end, [Hunter] simulated several different antenna structures, cleaned up the models for 3D printing, and 3D printed them in color sandstone, and the end result is beautiful. By printing in colored sandstone through Shapeways, [Hunter] now has roughly walnut-sized color-coded radiation patterns they can hold in their hand. To save others the work, [Hunter] has posted his designs on Shapeways at Ye Olde Engineering Shoppe. So far, he has a horn antenna, dipole, inset fed patch antenna and a higher order mode of a patch antenna, all of which are under 15.00USD. Don’t see the antenna radiation pattern of your dreams? Fret not, [Hunter] is looking for requests, so post your ideas down in the comments!

Further, beyond the immediate cool factor, we can see many legitimate uses for [Hunter’s] models, especially in education. With more and more research promoting structural rather than procedural learning, [Hunter’s] designs could easily become a pedagogical mainstay of antenna theory classes in the future. [Hunter] is not the only one making the invisible visible, [Charles] is mapping WiFi signals in three dimensions.

Video after the break.

Continue reading “3D Printed Radiation Patterns”

Automotive Radar And The Doppler Effect

With more and more cars driving themselves, there is an increasing demand for precise environment aware sensors. From collision avoidance to smooth driving, environmental awareness is a must have for any self-driving cars. Enter automotive radar: cool, precise and relatively cheap. Thanks to a donated automotive radar module, [Shahriar] gifts us with a “tutorial, experiment and teardown.”

Before digging into the PCB, [Shahriar] explains the theory. With just enough math for the mathmagically inclined and not too much for the math adverse, [Shahriar] goes into the details of how automotive radar is different from normal stationary radar.

Only after a brief overview of the Doppler effect, [Shahriar] digs into the PCB which reveals three die-on-PCB ASICs responsible for generating and receiving 77GHz FMCW signals coupled to a 2D array of antennas. Moreover, [Shahriar] points out the several microwave components such as “rat-race couplers” and “branchline couplers.” Additionally, [Shahriar] shows off his cool PCB rulers from SV1AFN Design Lab that he uses as a reference for these microwave components. Finally, a physical embodiment of the Doppler effect radar is demonstrated with a pair of Vivaldi horn antennas and a copper sheet.

We really like how [Shahriar] structures his video: theory, followed by a teardown and then a physical experiment to drive his lesson home. If he didn’t already have a job, we’d say he might want to consider teaching. If the video after the break isn’t enough radar for the day, we’ve got you covered.

Continue reading “Automotive Radar And The Doppler Effect”