Living Logic: Biological Circuits For The Electrically Minded

Did you know you can build fundamental circuits using biological methods? These aren’t your average circuits, but they work just like common electrical components. We talk alot about normal silicon and copper circuits ‘roud here, but it’s time to get our hands wet and see what we can do with the power of life!

In 1703, Gottfried Wilhelm Leibniz published his Explication de l’Arithmétique Binaire (translated). Inspired by the I Ching, an ancient Chinese classic, Leibniz established that the principles of arithmetic and logic could be combined and represented by just 1s and 0s. Two hundred years later in 1907, Lee De Forest’s “Audion” is used as an AND gate. Forty years later in 1947, Brattain and H. R. Moore demonstrate their “PNP point-contact germanium transistor” in Bell Labs (often given as the birth date of the transistor). Six years later in 1953, the world’s first transistor computer was created by the University of Manchester. Today, 13,086,801,423,016,741,282,5001 transistors have built a world of progressing connectivity, automation and analysis.

While we will never know how Fu Hsi, Leibniz, Forest or Moore felt as they lay the foundation of the digital world we know today, we’re not completely out of luck: we’re in the midst’s of our own growing revolution, but this one’s centered around biotechnology. In 1961, Jacob and Monod discovered the lac system: a biological analog to the PNP transistor presented in Bell Labs fourteen years earlier. In 2000, Gardner, Cantor, and Collins created a genetic toggle switch controlled by heat and a synthetic fluid bio-analog2. Today, AND, OR, NOR, NAND, and XOR gates (among others) have been successfully demonstrated in academic labs around the world.

But wait a moment. Revolution you say? Electrical transistors went from invention to computers in 6 years, and biological transistors went from invention to toggle button in 40? I’m going to get to the challenges facing biological circuits in time, but suffice it to say that working with living things that want to be fed and (seem to) like to die comes with its own set of challenges that aren’t relevant when working with inanimate and uncaring transistors. But, in the spirit of hacking, let’s dive right in. Continue reading “Living Logic: Biological Circuits For The Electrically Minded”

New Method For Measuring Lots Of Resistors Using Very Few Wires

[Daqq] is back at it again with the linear algebra, and he’s now come up with a method for determining the resistance of lots of resistors using little of wires and loads of math.

Like any reasonable person, [daqq] decided it would be fun to “solve one of those nasty [electrical engineering] puzzles/exercises where you start out with a horrible mess of wires and resistors and you are supposed to calculate the resistance between two nodes.” You know, just an average Saturday night. At the time, he was also fascinated by Charlieplexing – an awesome technique that either allows one to control multiple polarized components, such as LEDs, simply by connecting them in a specific way. After toying with the idea for a while, [daqq] found that using just Charlieplexing would be“a horrible mess” but he didn’t stop there. Drawing inspiration from Charlieplexing, he came up with the idea to connect things in such a way that every node is connected by one connection to every other node – a complete graph from a topological view point (this makes so much more sense visually). From here, he was able to set pins to HIGH, LOW, or INPUT and gather all the data needed to solve his linear system of equations.

Now, there is a balance to everything, and while this system can determine the resistance of .5*N(N-1) resistors using just N wires, it also a memory and computation hungry method. Oh well, can’t have it all. But, while it’s computationally hungry, [daqq] got it working on an ATMega32, so it’s not an unmanageable feat. And, let’s not forget to mention [daqq’s] wonderful writing. Even if you don’t know linear algebra (or would rather forget), it’s a good read from a theory perspective. So good, in fact, that [daqq] is getting published in Circuit Cellar!

We love to see theory in the hacker world, so keep it coming! But, while we wait (wink wink), there’s always time to review the basic Hacker Calculus and check out our past math-related articles.

Full Color PCB Business Card

[Sjaak], in electronic hobbyist tradition, started to design a PCB business card. However, he quickly became disillusioned with the coloring options made available by the standard PCB manufacturing process. While most learn to work with a limited color palette, [Sjaak] had another idea. PCB decals for full-color control.

As [Sjaak] realized early in his PCB journey, the downside of all PCB business cards (and PCBs in general) is the limited number of colors you can use which are dictated by the layers you have to work with: FR4, soldermask, silkscreen and bare copper. Some people get crafty, creating new color combinations by stacking layers for hues, but even that technique doesn’t come close to a full palette.

The commercial off-the-shelf out of the box solution [Sjaak] found was decal slide paper. For those of you not prone to candle making or car decorating, decals are printable plastic film that can be used to decorate ceramics, glass or other smooth surfaces. Both clear and white versions can be found in most hobby stores. Once obtained, an inkjet or laser printer can print directly onto the photo paper-like material, lending the decals an infinite range of colors.

[Sjaak] bought clear film and designed his PCB with black soldermask and white silkscreen. Once the PCBs had come in, [Sjaak] got to work applying the decals with a transfer method by placing one into water, waiting a bit until the decal lets loose and then are carefully applied to a PCB. [Sjaak] reports that the process is a bit trickery because the film is very thin and is easily crinkled. But, difficulties overcome, the PCB then needs to dry for twenty-four hours. From there, it’s into the oven for 10 minutes at 248 degrees Fahrenheit (120 degrees Celsius) followed by an optional clear coating. Although the process is a bit involved, judging from his pictures we think the results are worth it, producing something that would stand out; which, in the end, is the goal of a PCB business card.

With all this in mind, we think that the logical progression is to incorporate digital logic or go full DIY and CNC or laser engrave your own business card.

Optogenetics For 100 Euros

Larval zebrafish, Drosophila (fruit fly), and Caenorhabditis elegans (roundworm) have become key model organisms in modern neuroscience due to their low maintenance costs and easy sharing of genetic strains across labs. However, the purchase of a commercial solution for experiments using these organisms can be quite costly. Enter FlyPi: a low-cost and modular open-source alternative to commercially available options for optogenetic experimentation.

One of the things that larval zebrafish, fruit flies, and roundworms have in common is that scientists can monitor them individually or in groups in a behavioural arena while controlling the activity of select neurons using optogenetic (light-based) or thermogenetic (heat-based) tools.

FlyPi is based on a 3D-printed mainframe, a Raspberry Pi computer, and a high-definition camera system supplemented by Arduino-based optical and thermal control circuits. FlyPi features optional modules for LED-based fluorescence microscopy and optogenetic stimulation as well as a Peltier-based temperature simulator for thermogenetics. The complete version with all modules costs approximately €200 with a layman’s purchasing habits, but for those of us who live on the dark side of eBay or the depths of Taobao, it shouldn’t cost more than €100.

Once assembled, all of the functions of FlyPi can be controlled through a graphical user interface. As an example for how FlyPi can be used, the authors of the paper document its use in a series of “state-of-the-art neurogenetics experiments”, so go check out the recently published open access paper on PLOS. Everything considered the authors hope that the low cost and modular nature, as well as the fully open design of FlyPi, will make it a widely used tool in a range of applications, from the classroom all the way to research labs. Need more lab equipment hacks? Don’t worry, we’ve got you covered. And while you’re at it, why not take a spin with the RWXBioFuge.

A Chrome Extension For Being A Jerk

What do you do to someone you want to make suffer, slowly? Specifically, at around 70% speed. To [Stephen], the answer is clear, you hit them where it really hurts: YouTube.

Creatively named “Chrome Engine,” [Stephen]’s diabolical Chrome extension has one purpose: be annoying. Every day, it lowers playback rate by 1% on YouTube. It’s a linear progression: 100% the first day, 99% the second day, 98% the third day, etc. It only stops 30 days later, once it hits its target rate of 70% the original speed. This progression is designed to be slow enough not to be noticed. Its icon is nothing more than the standard Chrome icon as [Stephen] firmly believes in the tactic of hiding in plain sight.

But that’s not all, it’s the minute details that drive the ball home. For instance, rather than using local storage to keep track of playback speed, the Chrome sync storage is used. This ensures that, as long as the extension is installed, playback rate will be synchronized between all of your friend’s(if you can even call them that) devices. It even targets casual YouTube users: [Stephen] has specifically designed their extension so that it won’t drop playback by more than 1% at a time. If the victim goes on vacation, the playback speed won’t drop when they’re away and will resume as soon as they’re back.

The last feature, the one [Stephen] is the proudest of, is that the extension manages to keep the YouTube speed controls working as intended. If the victim tries to play at half speed, their videos will be at half speed … of the slower playback rate set by the extension. And it gets even better! You may not know this if you don’t dally around with playback rates, but the audio tends to stop playing when videos are reduced below 50% of their original speed. Fear not! [Stephen] has accounted for this idiosyncrasy! If the victim selects a speed at or above 0.5x, a minimum cap is added so that the actual playback rate will be equal to or above 0.5x. If they select slower than this, they don’t expect sound anyway, so all bets are off.

Check it out here, may your friends (frenemies?) beware. We’re adding it to our April Fools arsenal, even if it is a bit early.

Smart Gun Beaten By Dumb Magnets

[Plore], a hacker with an interest in safe cracking, read a vehemently anti-smart-gun thread in 2015. With the words “Could you imagine what the guys at DEF CON could do with this?” [Plore] knew what he had to do: hack some smart guns. Watch the video below the break.

Armed with the Armatix IP1, [Plore] started with one of the oldest tricks in the book: an RF relay attack. The Armatix IP1 is designed to fire only when a corresponding watch is nearby, indicating that a trusted individual is the one holding the gun. However, by using a custom-built $20 amplifier to extend the range of the watch, [Plore] is able to fire the gun more than ten feet away, which is more than enough distance to be dangerous and certainly more than the few inches the manufacturers intended.

Not stopping there, [Plore] went to the other extreme, creating what he calls an “electromagnetic compatibility tester” (in other words, a jammer) that jams the signal from the watch, effectively preventing a legitimate gun owner from firing their gun at 10 to 20 feet!

Not one to call it quits, [Plore] realised that the gun prevented illicit firing with a simple metal pin which it moved out of the way once it sensed the watch nearby. However, this metal just happened to be ferrous, and you know what that means: [Plore], with the help of some strong magnets, was able to move the pin without any electrical trickery.

Now, we’ve already covered the many hurdles that smart guns face, and this specific investigation of the state of smart gun technology doesn’t make the picture look any brighter. We’re aware that hindsight is always 20/20, so let us know in the comments how you would fix the problems with the Armatix IP1.
Continue reading “Smart Gun Beaten By Dumb Magnets”

Fidget Spinner Gigantor

Had enough of fidget spinners yet? If you haven’t heard, a toy that consists of a bearing in the center of a multi-lobed flat structure that’s designed to spin around the bearing’s axis with little force has taken the world by storm. Usually, these devices are about 10cm in diameter or less. But, everything is bigger in Texas. So, naturally, students from the University of Texas at Dallas got to work making the largest fidget spinner in the world.

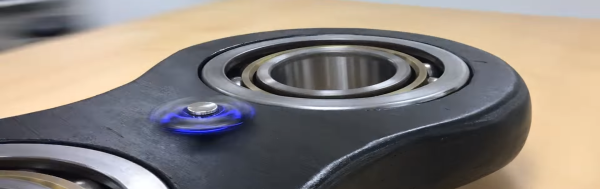
Clocking in at 150 pounds and 45 inches in diameter, this thing is undeniably huge. The structure is made out of what looks to be veneered plywood glued together to make a ~2.5in thick structure to put their bearings in. And, after washing their bearings with soapy water, the students get to work press fitting their 2.2in by 10.5in ball bearings into their painted wooden structure. Their video embedded below is an entertaining watch, it starts with a gag, but moves on the project afterwards.

Haven’t gotten enough fidget spinner news? Fear not, we’ve got you. [MakerStorage] has a fidget spinner designed to teach STEAM. Just in case manually spinning a fidget spinner is above you, we’ve got robots on the job. Want to see something more vibrant? How about POV on a fidget spinner?And if you’ll never get tired of fidget spinners, we’ve got a fidget spinner for that too.

Continue reading “Fidget Spinner Gigantor”