Trobot: Kickstarting The 6-axis Minature Robot Arm

Having already made it to three hardware development versions, [Toby Baumgartner] is looking for some financial backing to make version four of this robot arm possible.

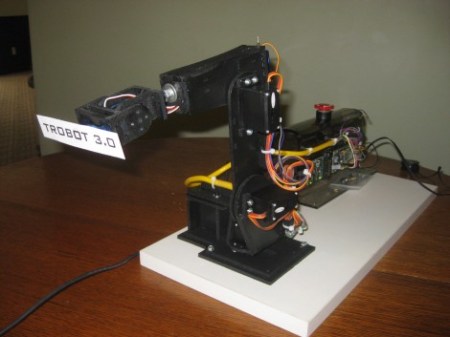
He’s modelling the arm after much larger ABB industrial robots. Like those, it mounts on a stationary base, and features movement along six axes.  The first couple of iterations even used ABB Software’s RobotStudio for control. This is the same software used by the full-sized robots, and features a special design language to integrate the robots into just about any production facility.

We don’t think the need for high-end software used with these small manipulator arms is very great, but we could see the finished product used for small-scale assembly line work some day. In the mean time these might be useful in your own projects. [Toby] has been using an mBed microcontroller board as the hardware driver. It communicates with the computer via an Ethernet connection and he’s even working on an Android interface right now.

Check out a video demonstration of version 2 and 3 embedded after the break.

Continue reading “Trobot: Kickstarting The 6-axis Minature Robot Arm”

Working With I2C Port Expanders

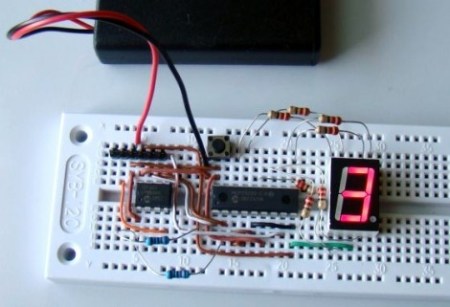
There are times when you don’t need much processing power for your project but you do need a lot of I/O pins. It often doesn’t make economic sense to choose a larger microcontroller just to get extra pins so the answer is to use a port expander chip. [Raendra] posted a guide for using one of these chips, it’s a Microchip MCP23008 chip that uses the I2C protocol for communications.

You are probably already familiar with using shift registers like the 595 series for port expansion. There can be benefits to using an I2C device instead. One of them comes when using multiple port expander chips. With cascading shift registers you must always shift in the data for the entire chain of chips. But I2C devices are individually addressable, so you only need to push data over the I2C bus for the chips that need to be changed, the others will remain unaffected. It is especially easy to use these if you already have another I2C device in your project design as the addition only requires the connection of the SDA and SCL lines. Keep them in mind for future undertakings.

Arduino Hits The Battlefield — For Real

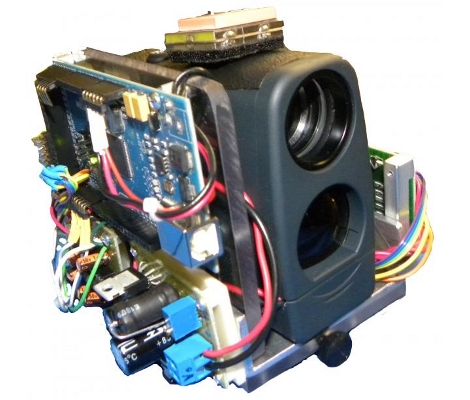
We’re not sure if this is the first time, but here’s some pretty solid proof that Arduino has found its way into the weapons of war. The creators, [Derek Wales], [John Eischer], and [George Hopkins] are all Electronics Engineering majors at West Point. They came up with this idea after seeing video footage of a firefight in Afghanistan where combat soldiers were calling in artillery strikes using a compasses and GPS devices. It’s an all-in-one unit that can provide the same information quickly and accurately. The prototype above, which they call the DemonEye, contains a laser range finder, digital compass, and a GPS module. The article also states that it contains a mini-computer but we recognize that as an Arduino Mega (thanks to Miguel over at Areopago 21 for noticing this first and sending in the tip about it).

The prototype apparently comes in at $1000. Okay, it seems a bit high but not out of the ballpark. What we can’t understand is how the second generation of devices was billed out at $100,000 for five more units. What’s the going rate for laying out military-grade PCBs?

Mini-cannon Built From A BBQ Lighter Fires Airsoft Pellets

[Nighthawkinlight] has made his own palm cannon to shoot Airsoft pellets. His process, which he guides us through step-by-step in the video after the break, definitely invokes MacGyver buy using commonly available parts in a way they were not intended.

He starts with a barbecue lighter, removing the screws and plastic housing to get at the clear plastic butane reservoir which serves as the body of the cannon. The butane is carefully released from the tank, and the output valve is modified to receive the barrel. In this case the barrel from an old Airsoft gun was used, but a metal pen housing could do the trick as well. The spark igniter from the lighter is also reused, but two bolts have been screwed into the reservoir and are used as probes for the igniter wires. In order to fire this one-shot-wonder, a cotton swab soaked in 90% alcohol is inserted through the bolt on the left side. After inserting an Airsoft pellet the trigger is pulled to ignite the vapors.

Continue reading “Mini-cannon Built From A BBQ Lighter Fires Airsoft Pellets”

Converting A Laptop Computer Into A Desktop Machine

[Michael Chen] found himself in possession of a thoroughly broken laptop. The hinges connecting the screen to the body of the computer were shot, and the battery was non-functional. After a bit of thinking he decided that it wouldn’t take much to resurrect the hardware by turning it into a desktop machine.

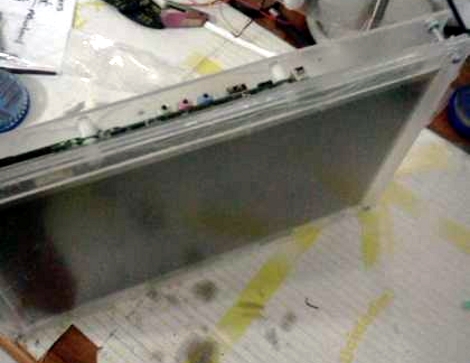
At the core of this hack is the hardware that you must keep for the computer to function. That is, the LCD screen, the motherboard, hard drive, and the AC/DC brick that powers it. [Michael] ditched everything else; the case, keyboard, trackpad, webcam, etc. Next he started building his own enclsure out of acrylic. First he sandwiched the LCD screen between a full sheet of acrylic and a bezel that was one inch wide on each side. Next, another full sheet was used to mount the motherboard and hard drive. You can see how the three sheets are connected by nuts and bolts in the image above. It looks like the only other alteration he made was to relocate the power button to a more convenient spot.

Once a USB keyboard and mouse are added he’s back up and running. We’ve got our eye on an old XP laptop that might end up seeing this conversion to become a dedicated shop computer. We just need to build in some more dust protection.

Beginner Concepts: Designing Transistor Control Circuits

Need to switch something on or off using a microcontroller? Using a transistor is one of the best ways to do this, but how exactly do you design properly for transistor switching? [Ben Krasnow] put together a tutorial in which he does an excellent job of explaining the ins and outs of designing transistor control circuits.

We’ve embedded his twenty-minute video after the break. In it he talks about the use of transistors, the difference between NPN and PNP transistors, and the design specifics you need to know when working with them. We think that beginners will find [Ben’s] demonstration of how to calculates Hfe, which is the base current necessary to fully switch the transistor. If this is gibberish to you, have no fear. [Ben’s] instruction is clear and easily understandable.

The one thing we missed in the video is clarification about base current protection for PNP transistors. [Ben] mentions that there’s no easy circuitry that can be used on the base of a PNP  to regulate flow from the emitter to the base, but he doesn’t elaborate. Otherwise, it’s everything we could have wanted on the topic.

Continue reading “Beginner Concepts: Designing Transistor Control Circuits”

Halloween Props: Trash Can Jack-in-the-box

Last year [Bob] didn’t let the little kids get some candy and continue on their way without giving them quite a fright first. His modified trashcan lures you in and then scares the bejesus out of you.

He calls it Oscar the Trash-bot. The image on the left shows a ghoulish-looking head peeking out of the partially opened lid of the trash can. It has some movement, but is slow and quiet. The small, slow movements catch your eye and seem safe enough. Until you get a bit closer. A range finder triggers when the unsuspecting victim draws near, causing a much bigger, faster, and bloodier beast to pop up and stick out a claw. Check out the two videos after the break. One of them shows the claw mechanism, which is made with the help of a brake cable and shows very realistic and blazingly fast movement. The other is an overview of how the entire setup works.

Continue reading “Halloween Props: Trash Can Jack-in-the-box”