Candied LEDs Are A Light, Tasty Treat

rock_candy_diffused_leds

[Emily Daniels] recently snagged a free iPad in the Instructables “Play with your food challenge” with an interesting way to work with LEDs. Growing up, most kids attempted to make, or at least have seen rock candy be produced. [Emily] thought it would be interesting to mix LEDs with the stuff to see what she could come up with, and her candied LEDs are the result.

The process is pretty straightforward, and involves mixing up a batch of supersaturated sugar syrup in which LEDs are suspended. The LEDs act as a nucleation point for the crystal formation, growing a nice solid coating of sugar after a couple weeks’ time. After some cleaning up, the LEDs can be connected to a coin cell battery or similar, as you would normally do. The sugar acts as a diffusing medium for the LEDs, giving them a nice soft beam pattern.

Obviously you likely wouldn’t want to use these for any long-term electronics project, but it’s a fun activity for the kids, and it could be a good way to incorporate electronics into baked goods.

Wireless Hackerspace Music Control

skipbutton_bitlair.nl

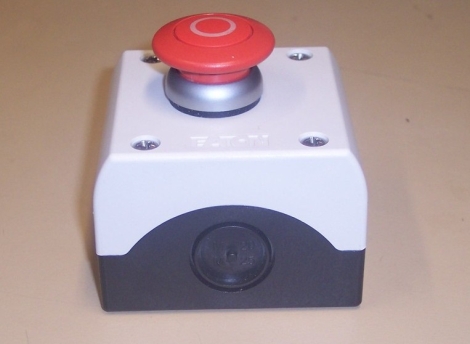
The crew at the Netherlands-based Bitlair hackerspace love their music, and have set up a digital jukebox for their workshop using mpd and fookebox. One problem that you run into with a bunch of different people working in one place is that everyone has their own distinct taste in music. The rhythmic “wub wub wub” of Dubstep might be great for some while leaving others trying to solder while simultaneously covering their ears. To ensure that everyone can exercise a musical veto (a la Empire Records) now and again, they built a Skipbutton which allows members to change what’s playing.

The button allows users to skip to the next song in the queue. as well as to control the volume of the space’s sound system. It uses an Arduino pro mini to run the show, sending signals to the mpd daemon using a 433 MHz transmitter. Bitlair is pretty large and they often spend time outdoors, so they had to ensure that the Skipbutton worked wherever they did. To do this, they built a Yagi-Uda antenna at the receiving end to ensure that the button functions no matter where it’s being triggered from.

Check out their wiki if you’re interested in making a similar system for your home or hackerspace – all of the code and schematics are available for the taking.

Vintage Camera Retrofit Perfect For Trolling Strangers

vintage_camera_retrofit

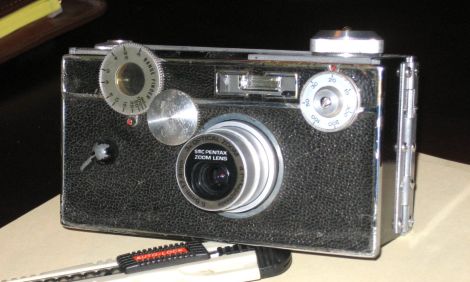
[John] likes making things out of unusual junk, and decided to build something for the sole purpose of trolling others. He thought it would be funny to stuff a new digital camera into the body of an old, obsolete camera, just to see how people would react to it.

He considered several different cameras, including a bulky old Polaroid, eventually settling on a far more manageable Argus C3. The camera wasn’t quite big enough to fit his new digicam inside, so he built a mock body using black micarta. He attached the Argus’ front and back to his plastic box, then spent some time fitting his digital camera inside. He transferred knobs from the original camera to his new false body, adding to the authenticity, before taking it out for some test shots.

You can see the final result above, and we think you would be hard pressed to notice that there’s something amiss with his camera unless you spent some time taking a closer look at it. He says that it works well for the most part, and it’s definitely a conversation starter. People are always puzzled by the fact that he is using such and old camera, and doubly so when he tells them it can take about 4,000 shots before he has to “develop” his pictures.

Remote-controlled VMUSIC2 Audio Player

ir_controlled_vmusic2_audio_player

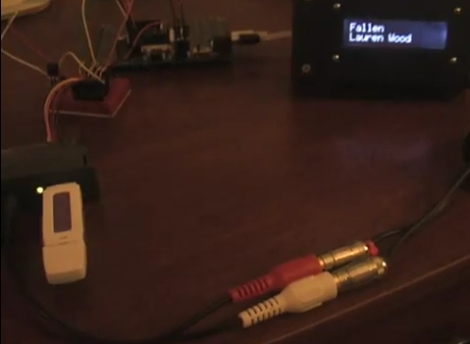
[Ron] was looking for a way to play his MP3s around the house without having to use his computer. He also wanted the ability to remotely control his tunes with an old camcorder remote he had sitting around – not exactly a feature you would find in an off the shelf personal audio player.

Ultimately, he decided to construct his own remote-controlled audio player using a VMUSIC2 audio module, which can decode MP3s from any standard USB drive. The VMUSIC2 is controlled by a Propeller demo board, which also handles receiving and decoding IR signals from his camcorder remote. While he was originally dumping ID3 tag data to his computer for debugging purposes, he recently added an LCD screen for displaying song information in a more useful manner.

The MP3 player seems to work pretty well if the video below is any indication, though it’s begging for a nice enclosure to tie things together. We like the project so far, so we’re sure [Ron] won’t fail to impress when it’s completely finished.

Continue reading “Remote-controlled VMUSIC2 Audio Player”

Slick Music Synchronized Light Show Uses UV LEDs And Water

music_synchronized_light_show

[mike6789k] wanted to spice up his dorm room, so he built a cool music synchronized light show that struck us as being very well thought out. We have seen similar music-based visualizations before, but they tend to be pretty basic, relying on volume more than actual audio frequencies to trigger the lighting.

[mike6789k] didn’t want to build “just another” synchronized light show, and his all-analog approach gives a true representation of the music being played instead of just flashing lights along with the beat. Using a trio of simple filters, he broke the audio signals down into three distinct frequency bands before being driven through a high gain transistor to power a set of LEDs.

We were pretty impressed at how bright the display was given that he is using UV LEDs, but the 1W diodes seem to have no problem lighting up the place when aimed through the UV-reactive water, as you can see in the video below.

If you’re looking to make something similar for your next party, the folks over at Buildlounge were able to wrangle a schematic out of [mike6789k], which you can find here.

Continue reading “Slick Music Synchronized Light Show Uses UV LEDs And Water”

Cheap Ikea Camera Boom Ensures Shake-free Video

ikea_webcam_jig

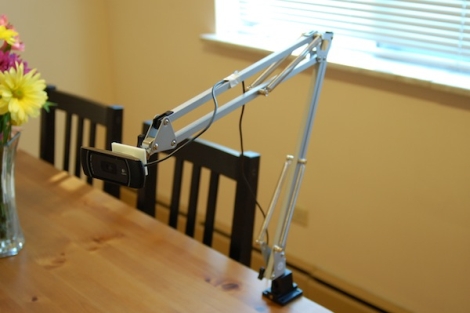
[Chris] recently got himself a nice web cam for documenting his Makerbot builds, and much like [Dino], he was looking for a way to get a bird’s-eye view of the action while keeping the camera nice and steady. While [Dino] ventured off to the hardware store, [Chris] tried a few different options that included tape, before heading off to Ikea to see what he could find.

$9 and a few Swedish meatballs later, he was on his way home with a “TERTIAL Work Lamp” that can be mounted on virtually any desk-like surface. He had to remove most of the web cam’s useless mounting hardware, doing the same with the lamp’s light fixture. He put together a small bracket in Google Sketchup, which he then printed out using his Makerbot.

It fit perfectly, and now he can get steady video of his Makerbot prints every single time.

Sweet Octocopter Takes The RED Epic To New Heights

red_epic_octocopter

So you’ve got a $40k+ RED Epic video camera and you need to get it from all the way down here to all the way up there. Sure, you could rent an expensive crane and take your shots from above that way, but why bother with that when you can fly instead?

German video effects company OMStudios decided that it was up to the task of finding a crane alternative, so they built a crazy octocopter drone to get the camera up to where they needed it. Figuring that if four rotors is good eight is even better, the group’s octocopter lifts the camera to heights of up to 150 meters, which is pretty impressive considering the weight of its payload.

While we might be a little hesitant to trust such an expensive camera to a glorified RC helicopter, it actually looks pretty solid from the video. Besides, we’re pretty sure these guys know what they are doing since they have a RED camera in the first place.

[via Engadget]

Continue reading “Sweet Octocopter Takes The RED Epic To New Heights”