Wireless LCD Streaming For The ANENG AN870 Multimeter

Having the information shown on the display of a digital multimeter also recorded off-screen can be incredibly useful, but unless the device exposes something like SCPI on a network interface, you will have to get creative. In the case of the budget ANENG AN870 digital multimeter (DMM), [Bits und Bolts] really wanted to show its display clearly as an overlay in OBS instead of just the camera view, but with said DMM not offering an easy way he had to resort to just copying the data sent to its multiplexed LCD.

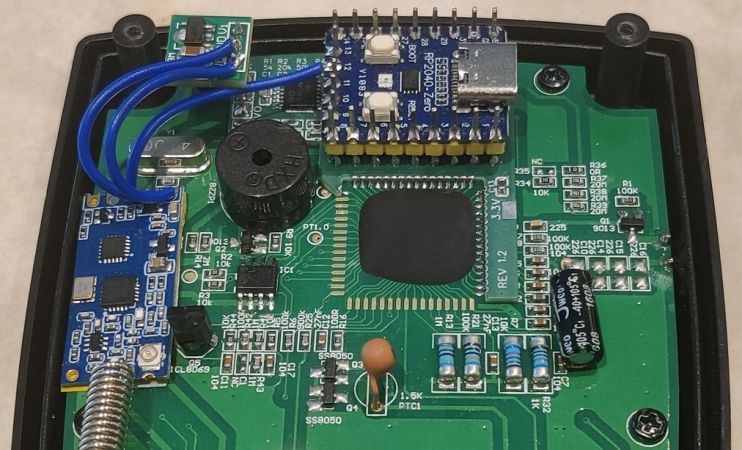
The GitHub project page contains the background information, as well as the instructions if you too have this DMM. It might of course also be useful as the jumping off point for your own DMM modification. In total the project requires three modules: an RP2040 Zero and HC-12 433 MHz transceiver on the DMM side, and another HC-12 plus ESP32-C3 module on the receiving side. A boost module is also added to generate 3.3 V out of the 2.4 V – 3 V provided by the meter’s two AA cells.

To be able to read the LCD signal lines, a custom PCB was created that is installed inside the DMM. With the LCD’s segments mapped, this meant being able to send a perfect copy of the display’s state to the ESP32-C3 and from there making it available via WiFi.

Continue reading “Wireless LCD Streaming For The ANENG AN870 Multimeter”
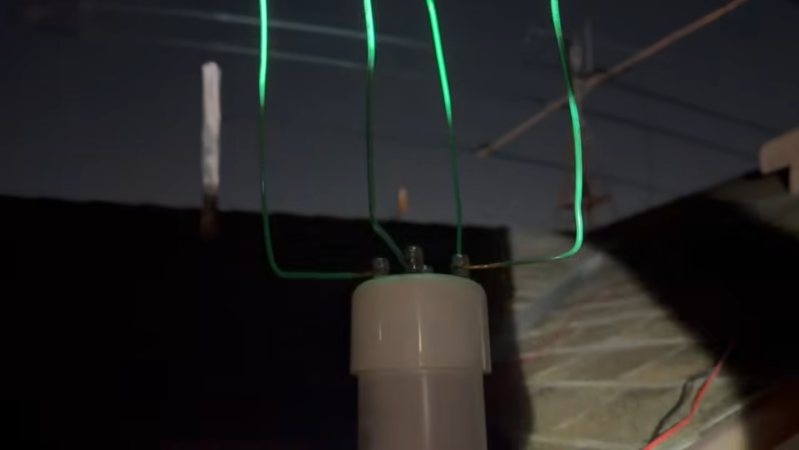
Building A Low-Cost Satellite Tracker

Looking up at the sky just after sunset or just before sunrise will reveal a fairly staggering amount of satellites orbiting overhead, from tiny cubesats to the International Space Station. Of course these satellites are always around, and even though you’ll need specific conditions to view them with the naked eye, with the right radio antenna and only a few dollars in electronics you can see exactly which ones are flying by at any time.

[Josh] aka [Ham Radio Crash Course] is demonstrating this build on his channel and showing every step needed to get something like this working. The first part is finding the correct LoRa module, which will be the bulk of the cost of this project. Unlike those used for most Meshtastic nodes, this one needs to be built for the 433 MHz band. The software running on this module is from TinyGS, which we have featured here before, and which allows a quick and easy setup to listen in to these types of satellites. This build goes much further into detail on building the antenna, though, and also covers some other ancillary tasks like mounting it somewhere outdoors.

With all of that out of the way, though, the setup is able to track hundreds of satellites on very little hardware, as well as display information about each of them. We’d always favor a build that lets us gather data like this directly over using something like a satellite tracking app, although those do have their place. And of course, with slightly more compute and a more directed antenna there is all kinds of other data beaming down that we can listen in on as well, although that’s not always the intent.

Continue reading “Building A Low-Cost Satellite Tracker”

RF Remote Made Easy

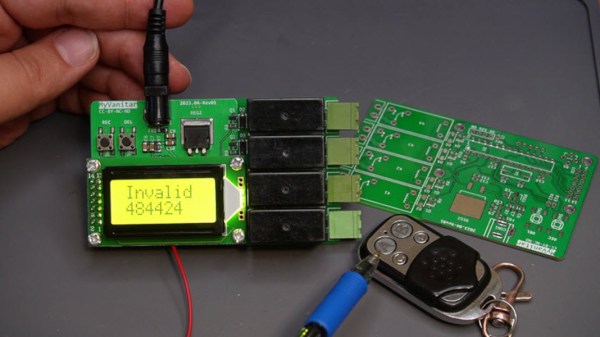
The 433 MHz spectrum is a little bit of an oddball. It’s one of the few areas of the radio spectrum which is nearly universally unlicensed Outside of the US, it’s an open playground for devices that adhere to the power restrictions and other guidelines about best practices. IoT devices operate here, as well as security systems and, of course, remote controls. And, using a few off-the-shelf parts [hesam.moshiri] shows us how to take advantage of this piece of spectrum by designing and building a programmable and versatile 4-channel 433 MHz remote control.

Built around an ATmega8 microcontroller, making it easy to work with Arduino sketches, and with a 2×8 character LCD for ease-of-use when not connected to a computer, the wireless switching device can store up to 80 remote control codes in its EEPROM memory. This was one of the harder parts for [hesam] to sort out, but using structures to store the data for the codes eventually solved the problems. A simple GUI makes using it with whatever remote happens to be on hand fairly straightforward, including the ability to record codes from existing remotes on the fly and also to associate those codes with specific actions.

Schematics and a bill of materials are available on the project’s page, making this fairly accessible to those looking to add some wireless connectivity to a project, home automation system, or IoT device. It’s mainly set up as a switching device, but with some modifications could be put to work doing more complex tasks. The 433 MHz spectrum is an exciting place to be, too, and things like setting up entire security systems using it are not too far removed from a switching device like this.

[Editor’s note: As many mentioned in the comments, 433 MHz is a licensed ham band in the USA (ITU Region 2), so you can’t use it without a license. (Get one, it’s easy.)  In the USA, the equivalent band is at 315 MHz, which is why garage door remotes usually come with a 315/433 choice. Either way, check your local laws before you transmit.]

Continue reading “RF Remote Made Easy”

Decoding 433 MHz Signals With Arduino & Raspberry Pi

433 MHz radio signals are all around us. They’re used for things like smart power plugs, garage door openers, and home weather stations. Decoding these signals can allow you to interface and work with these devices on your own terms. To help in those efforts, [Joonas Pihlajamaa] has written a three-part tutorial on decoding these signals.

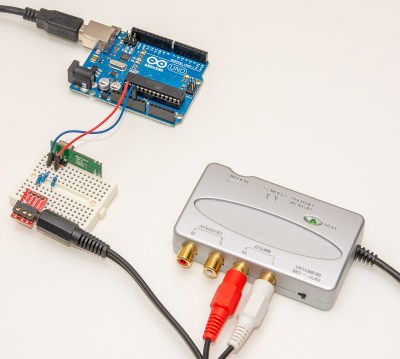
A soundcard makes for a very cheap oscilloscope.

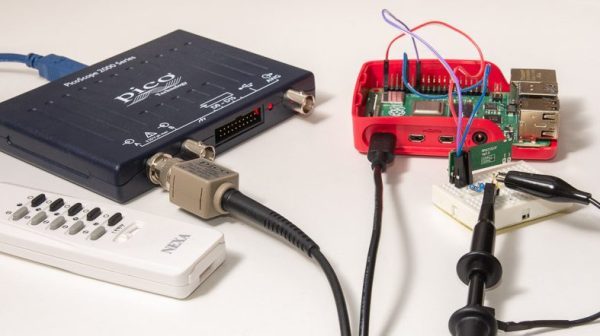
The focus of the tutorials is decoding the signals of a Nexa radio-controlled smart plug. [Joonas] first explores using an Arduino to do the job, paired with a RFM210LCF-433D radio receiver module. This setup dumps out data to a computer over serial for decoding. [Joonas] then tried an alternative strategy, using a soundcard as a “poor man’s oscilloscope” to do the same job, using the same radio module and using Audacity for signal analysis. Finally, [Joonas] brought out the big guns, hooking up a Picoscope digital oscilloscope to a Raspberry Pi 4 for a more deluxe attempt at decoding the signals.

The tutorial goes to show that higher-end tools can make such a job much easier. However, the cheaper techniques are a great way of showing what can be done with the bare minimum in tools. We’re hoping for an exciting fourth part to [Joonas’s] work, where he instructs us on how to decode 433 MHz signals by drinking huge amounts of caffeine and staring at a very fast blinking LED. If you’ve got your own nifty signal analysis (or SIGINT!) hacks, be a good sport and drop them into the tipsline!


Low-Cost 433 MHz Door Sensors Get Open Firmware

It’s an unfortunate reality these days that if you see a cheap piece of consumer electronics, there’s a good chance its only cheap because it’s designed to lock you into some ecosystem where you’ll either end up paying a subscription, or worse, have your personal information sold behind your back. One of the best tools we have against these sort of anti-consumer practices is the development of open source firmware replacements that put control of the device into the hands of the community, rather than a corporation.

Now, thanks to the work of [Jonathan Armstrong] we have such a firmware for the 433 MHz magnetic door and window sensors that you can pick up on AliExpress for $4 USD a piece. The new firmware not only ensures you can use these sensors with a wide array of receivers, but adds a number of new features over their stock configuration. Continue reading “Low-Cost 433 MHz Door Sensors Get Open Firmware”

Unintentional Emissions

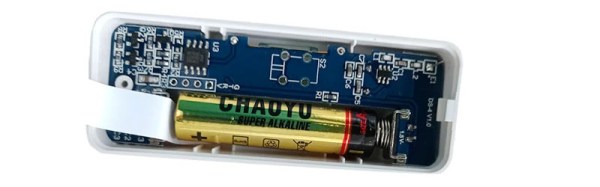
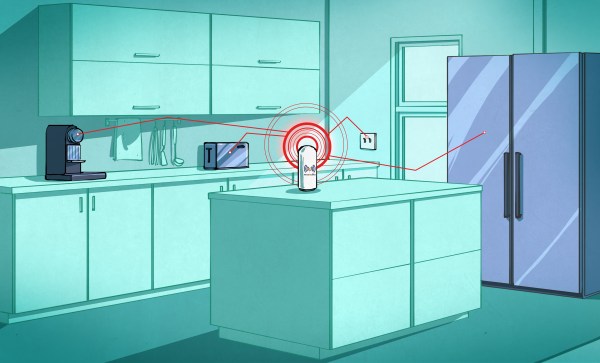
First, it was the WiFi router: my ancient WRT54G that had given me nearly two decades service. Something finally gave out in the 2.4 GHz circuitry, and it would WiFi no more. Before my tears could dry, our thermometer went on the fritz. It’s one of those outdoor jobbies that transmits the temperature to an indoor receiver. After that, the remote for our office lights stopped working, but it was long overdue for a battery change.

Meanwhile, my wife had ordered a new outdoor thermometer, and it too was having trouble keeping a link. Quality control these days! Then, my DIY coffee roaster fired up once without any provocation. This thing has worked quasi-reliably for ten years, and I know the hardware and firmware as if I had built them myself – there was no way one of my own tremendously sophisticated creations would be faulty. (That’s a joke, folks.) And then the last straw: the batteries in the office light remote tested good.

We definitely had a poltergeist, a radio poltergeist. And the root cause would turn out to be one of those old chestnuts from the early days of CMOS ICs – never leave an input floating that should have a defined logic level. Let me explain.

The WRT54G was the hub of my own home automation system, an accretion of ESP8266 and other devices that all happily speak MQTT to each other. When it went down, none of the little WiFi nodes could boot up right. One of them, described by yours truly in this video, is an ESP8266 connected to a 433 MHz radio transmitter. Now it gets interesting – the thermometers and the coffee roaster and the office lights all run on 433 MHz.

Here’s how it went down. The WiFi-to-433 bridge failed to connect to the WiFi and errored out before the part of the code where it initialized GPIO pins. The 433 MHz transmitter was powered, but its digital input was left flopping in the breeze, causing it to spit out random data all the time, with a pretty decent antenna. This jammed everything in the house, and apparently even once came up with the command to turn on the coffee roaster, entirely by chance. Anyway, unplugging the bridge fixed everything.

This was a fun one to troubleshoot, if only because it crossed so many different devices at different times, some homebrew and some commercial, and all on different control systems. Until I put it together that everything on 433 MHz was failing, I hadn’t even thought of it as one event. And then it turns out to be a digital electronics classic – the dangling input!

Anyway, hope you enjoyed the ride. And spill some copper for the humble pull-down resistor.

Teardown: Impassa SCW9057G-433 Alarm System

This series of monthly teardowns was started in early 2018 as an experiment, and since you fine folks keep reading them, I keep making them. But in truth, finding a new and interesting gadget every month can sometimes be a chore. Which is why I’m always so thankful when a reader actually sends something in that they’d like to see taken apart, as it absolves me from having to make the decision myself. Of course it also means I can’t be blamed if you don’t like it, so keep that in mind as well.

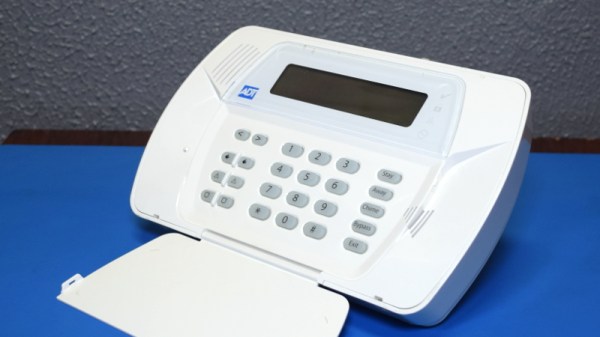
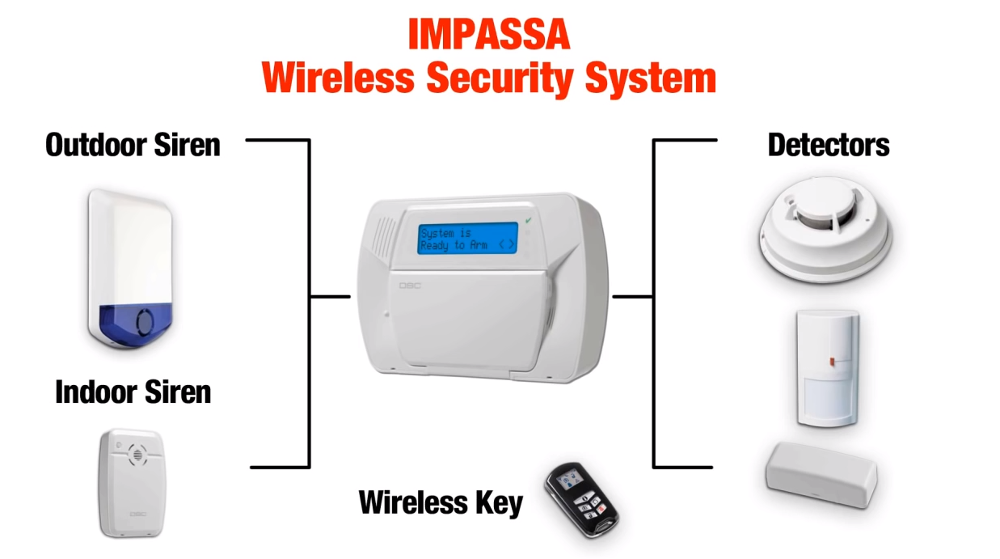
Coming our way from the tropical paradise of Eastern Pennsylvania, this month’s subject is an ADT branded Impassa SCW9057G-433 alarm system that was apparently pulled off the wall when our kind patron was moving house. As you might have guessed from the model number, this unit uses 433 MHz to communicate with various sensors and devices throughout the home, and also includes a 3G cellular connection that allows it to contact the alarm monitoring service even if the phone line has been cut.

Diagram of Impassa home security setup
The alarm can connect to a wide array of 433 MHz devices.

From how many of these are on eBay, and the research I’ve done on some home alarm system forums, it appears that you can actually pick one of these up on the second-hand market and spin your own whole-house alarm system without going through a monitoring company like ADT. The extensive documentation from Impassa covers how to wire and configure the device, and as long as the system isn’t locked when you get it, it seems like wiping the configuration and starting from scratch isn’t a problem.

If it’s possible to put together your own homebrew alarm system with one of these units at the core, then it seems the least we can do is take it apart and see what kind of potentially modifiable goodies are waiting under that shiny plastic exterior.

Continue reading “Teardown: Impassa SCW9057G-433 Alarm System”