Building A Smart Airsoft Gun With Open Source Hardware

[matt8588] designed a smartgun rig for his Airsoft shotgun (YouTube, embedded below). He has a Rasperry Pi 3 mounted inside a PEQ box connected to an infrared camera with an IR tac light helping with illumination. A series of buttons control a crosshair pattern superimposed on the camera image, which is displayed on a tablet. You can also reposition the crosshairs to shoot further away. One of the buttons triggers a signal on the transmitter, for setting off Airsoft claymores during battle. A second Pi, a Zero, connects to an BerryIMU sensor that controls a “traffic light” arrangement of 12mm LEDs that warn him when he’s moving the gun too much to be accurate.

If you want to check out [Matt’s] progress, he’s posted videos of him showing off the gun’s accuracy, including one after the break in which he shoots accurately from a standing position while looking down at the tablet. You can find code for both Pi’s on his GitHub repository.

We suppose it goes without saying that Hackaday has a plethora of Airsoft projects. We especially love the Airsoft sentry gun, the rover-mounted Airsoft gun, and the drone-mounted POV Airsoft turret we published.

Continue reading “Building A Smart Airsoft Gun With Open Source Hardware”

Hackaday Prize Entry: Stroke Rehabilitation Through Biofeedback

Students at Purdue University’s Weldon School of Biomedical Engineering created ExoMIND, an Arduino-powered glove that helps a stroke victim recover by tracking the range of motion the patient experiences.

A set of 7 accelerometers in the fingers, wrist, and forearm track the range of movements the patient is experiencing with that hand. An accelerometer on the back of the hand serving as a reference. Meanwhile, an EMG sensor working with a conductive fabric sleeve to measure muscle activity. The user follows a series of instructions dished out by an interactive software program, allowing the system to test out the patient’s range of motion at the beginning of the regime as well as to record whether any improvement was noted at the end. The data is used by a physical therapist to personalize the treatment plan. The interactive program also raises the possibility of patients self-directing their exercises with the ExoMIND telling them how to adjust their motion to get the most out of the experience.

Produced as part of the university’s MIND Biomedical Engineering Club, the ExoMIND prototype was designed by three interdisciplinary teams focusing on electronics, materials, and programming, respectively.

Continue reading “Hackaday Prize Entry: Stroke Rehabilitation Through Biofeedback”

Hackaday Prize Entry: Watching Out For Forest Fires

Hackaday Prize entrant [Danie Copnradie] lives in South Africa where wildfires are a major problem. Every year, humans and animals are killed, crops are destroyed, and property is lost. The FireBreakNet project aims to deploy wireless environmental sensors that alert farmers, park rangers, and emergency personnel when fires break out.

According to [Danie], firefighting services are underfunded in South Africa, with farmers and their employees having to do a lot of the work involved in firefighting with their own equipment. Having access to a network of early warning sensors would allow for faster response times, saving money and lives.

The goals of the project include a low price, easy deployment, low power consumption, physical ruggedness, and scalability. Currently, [Danie] is testing Adafruit Feather as well as Texas Instruments LaunchPad for the brains of each node, taking readings from CO2 and temperature sensors, optical air quality sensors as well as optical flame sensors.

Atari 2600 In A Game Cartridge

[PJ Evans] had a ruined game cartridge lying around, just waiting for a project. As Activision’s F-14 Tomcat game for the Atari 2600 console, it seemed ripe for use as a project enclosure of some sort. When he came across a couple of 9-pin D-sub joystick ports, he had an idea. He realized his Rasperry Pi Zero could fit inside the cartridge. Add a power button, TV color selector, difficulty switch, as well as select and reset buttons, and you have an emulator.

[PJ]’s Pi Zero had more than enough GPIO pins to accommodate all of those buttons and switches plus a bunch more for the joysticks. Why not put the emulator inside a game cartridge? In terms of software [PJ] looked into Adafruit’s Retro Gaming with Raspberry Pi resource, which has tons of suggestions for setting up game emulators. He decided on the RetroPie operating system to help him map out all of the pins, with Stella doing the actual Atari 2600 emulation.

Thanks, @seb_ly]!

Use All That Extra Space With PCB Panelization

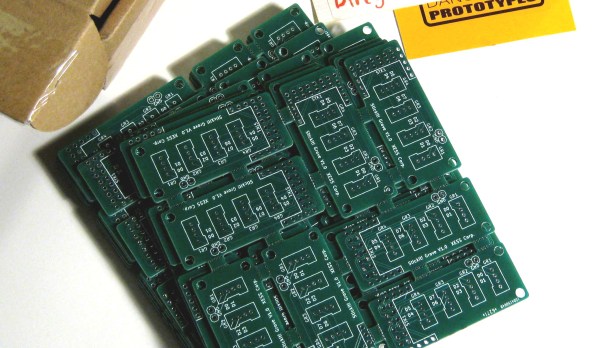
Anyone who’s made a PCB has encountered the conundrum of having to pay for space that you don’t use… for instance, designing a round PCB and seeing the corners go to waste. The solution? Smaller boards added to the blank spots.

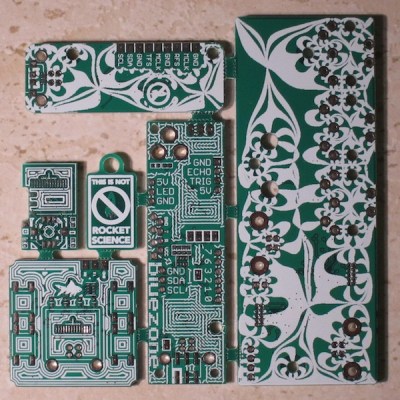
One logical stumbling block might be that you simply don’t have a small PCB design ready to go. Latvian hacker [Arsenijs] created a resource of small PCBs that can be dropped into those blank spots, as well as a tutorial on how to combine the gerbers into a single panel.

Great minds think alike, and this guide is following hot on the heels of [Brian Benchoff’s] article on panelization. They’re both a great read. It’s interesting to think that not long ago we would see multiple guides on home etching boards and now we’ve climbed the production ladder to guides that help better utilize PCB fab houses. Neat!

This project seems a logical spinoff of [Arsenijs]’s ZeroPhone Pi smartphone project, a finalist for the 2017 Hackaday Prize that makes a low-cost phone using a stack of PCBs. One imagines that while prototyping the phone [Arsenijs] ended up with a lot of wasted space! Fill that up with smaller designs like breakouts, or decorative items like a hackerspace business card. If you’re looking for small PCBs you can find a few in the files area of the project on Hackaday.io. Otherwise, you can share yours and [Arsenijs] will add them.

Download And Laser Your Own Pulleys

[Scott Swaaley] needed a bunch of timing pulleys for the clock he was building. He had already decided on the MXL profile, but he needed so many of these toothed pulleys in so many configurations (hex-bored, hubless) that it would blow out his budget. Plus, he wanted them transparent as well. So why not just laser them out of acrylic?

Not finding anything useful on the manufacturers’ sites, [Scott] decided to create his own web application to generate the shapes and download them as SVGs, dreaming of a resource like Gear Generator except for timing pulleys instead of involute spur gears. [Scott] has the application running on his GitHub. You can create MXL, XL, and L pulleys with any number of teeth and any hole size. From there you can output as an SVG and laser or mill the pulley.

There’s a lot of potential for projects made with pulleys and we’ve covered them extensively. Check out a 3D-printed strain wave gear, an inexpensive XY table, and even a remote operated gate for more pulley ideas.

Best Product Entry: Telescope Control With RDuinoScope

The Hackaday Prize is more than just giving tens of thousands of dollars to hardware hackers. It’s also about funding the next batch of Open Source hardware products. Alongside The Hackaday Prize — the contest where we’re funding hardware that will change the world, — we’re also giving away $30,000 to the project that will best become a product. It’s almost like we’re funding hardware startups here.

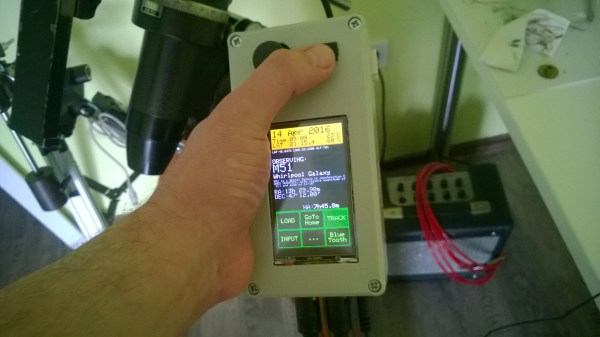
[Dessislav Gouzgounov] wanted to build a small piece of hardware — a GoTo for his telescope. This handheld controller would allow him to use software to align the telescope with whatever celestial body he’s checking out.

Many GoTos simply interface with a laptop, but [Dessislav] built a standalone system centered around an Arduino Due and 240×400 touch screen, with GPS, RTC, and Bluetooth under the hood. It works on both hemispheres and contains a database of 250 celestial objects, features different speeds for time-delayed tracking of celestial, lunar, and solar phenomena, and it can work with any stepper-equipped telescope.

We covered [Dessislav]’s previous version of the RDuinoScope, but he’s improved the project considerably with over 2,400 lines of code including a new menu system and added a star atlas showing the location of the sky at which the telescope is currently pointed, among other improvements. The project is open source and you can learn more about it on [Dessislav]’s project page or check out his code on GitHub.

Continue reading “Best Product Entry: Telescope Control With RDuinoScope”