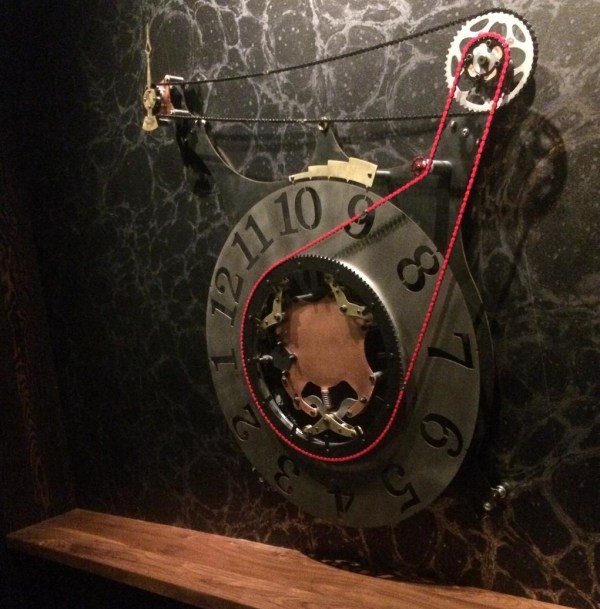
Getting paid to do what you enjoy is a special treat. A machinist and fabricator by trade — hobbyist hacker by design — [spdltd] was commissioned to build a mechanical art installation with a steampunk twist. Having complete creative control, he convinced his client to let him make something useful: a giant electro-mechanical clock.
Pieced together from copper, brass, steel, aluminium, and stainless steel, this outlandish design uses an Arduino Yun — a combination Linux and Arduino microcontroller board — to control the stepper motor and query the internet for the local time. Upon boot, the clock auto-calibrates by rotating the clock face until a sensor detects an extra peg and uses that to zero on twelve o’clock; the Yun then grabs the local time over the WiFi and sends the stepper motor a-spinning ’till the correct time is displayed.
At first glance, you may find it hard to get an accurate read of what time it is, but an accent piece’s pegs denote the quarter hour once it lines up with the notch above each hour. At least this one doesn’t require you to match colours or do much math to check the time.
Camping and road trips are a heck of a lot of fun, despite lacking many of the creature comforts that come from a house and its amenities. We’re all for fire-cooked meals, but sometimes, you want a cook-top and a sink to make cooking on the go a quick process. What if you could pack up a kitchen into a box and take it with you?
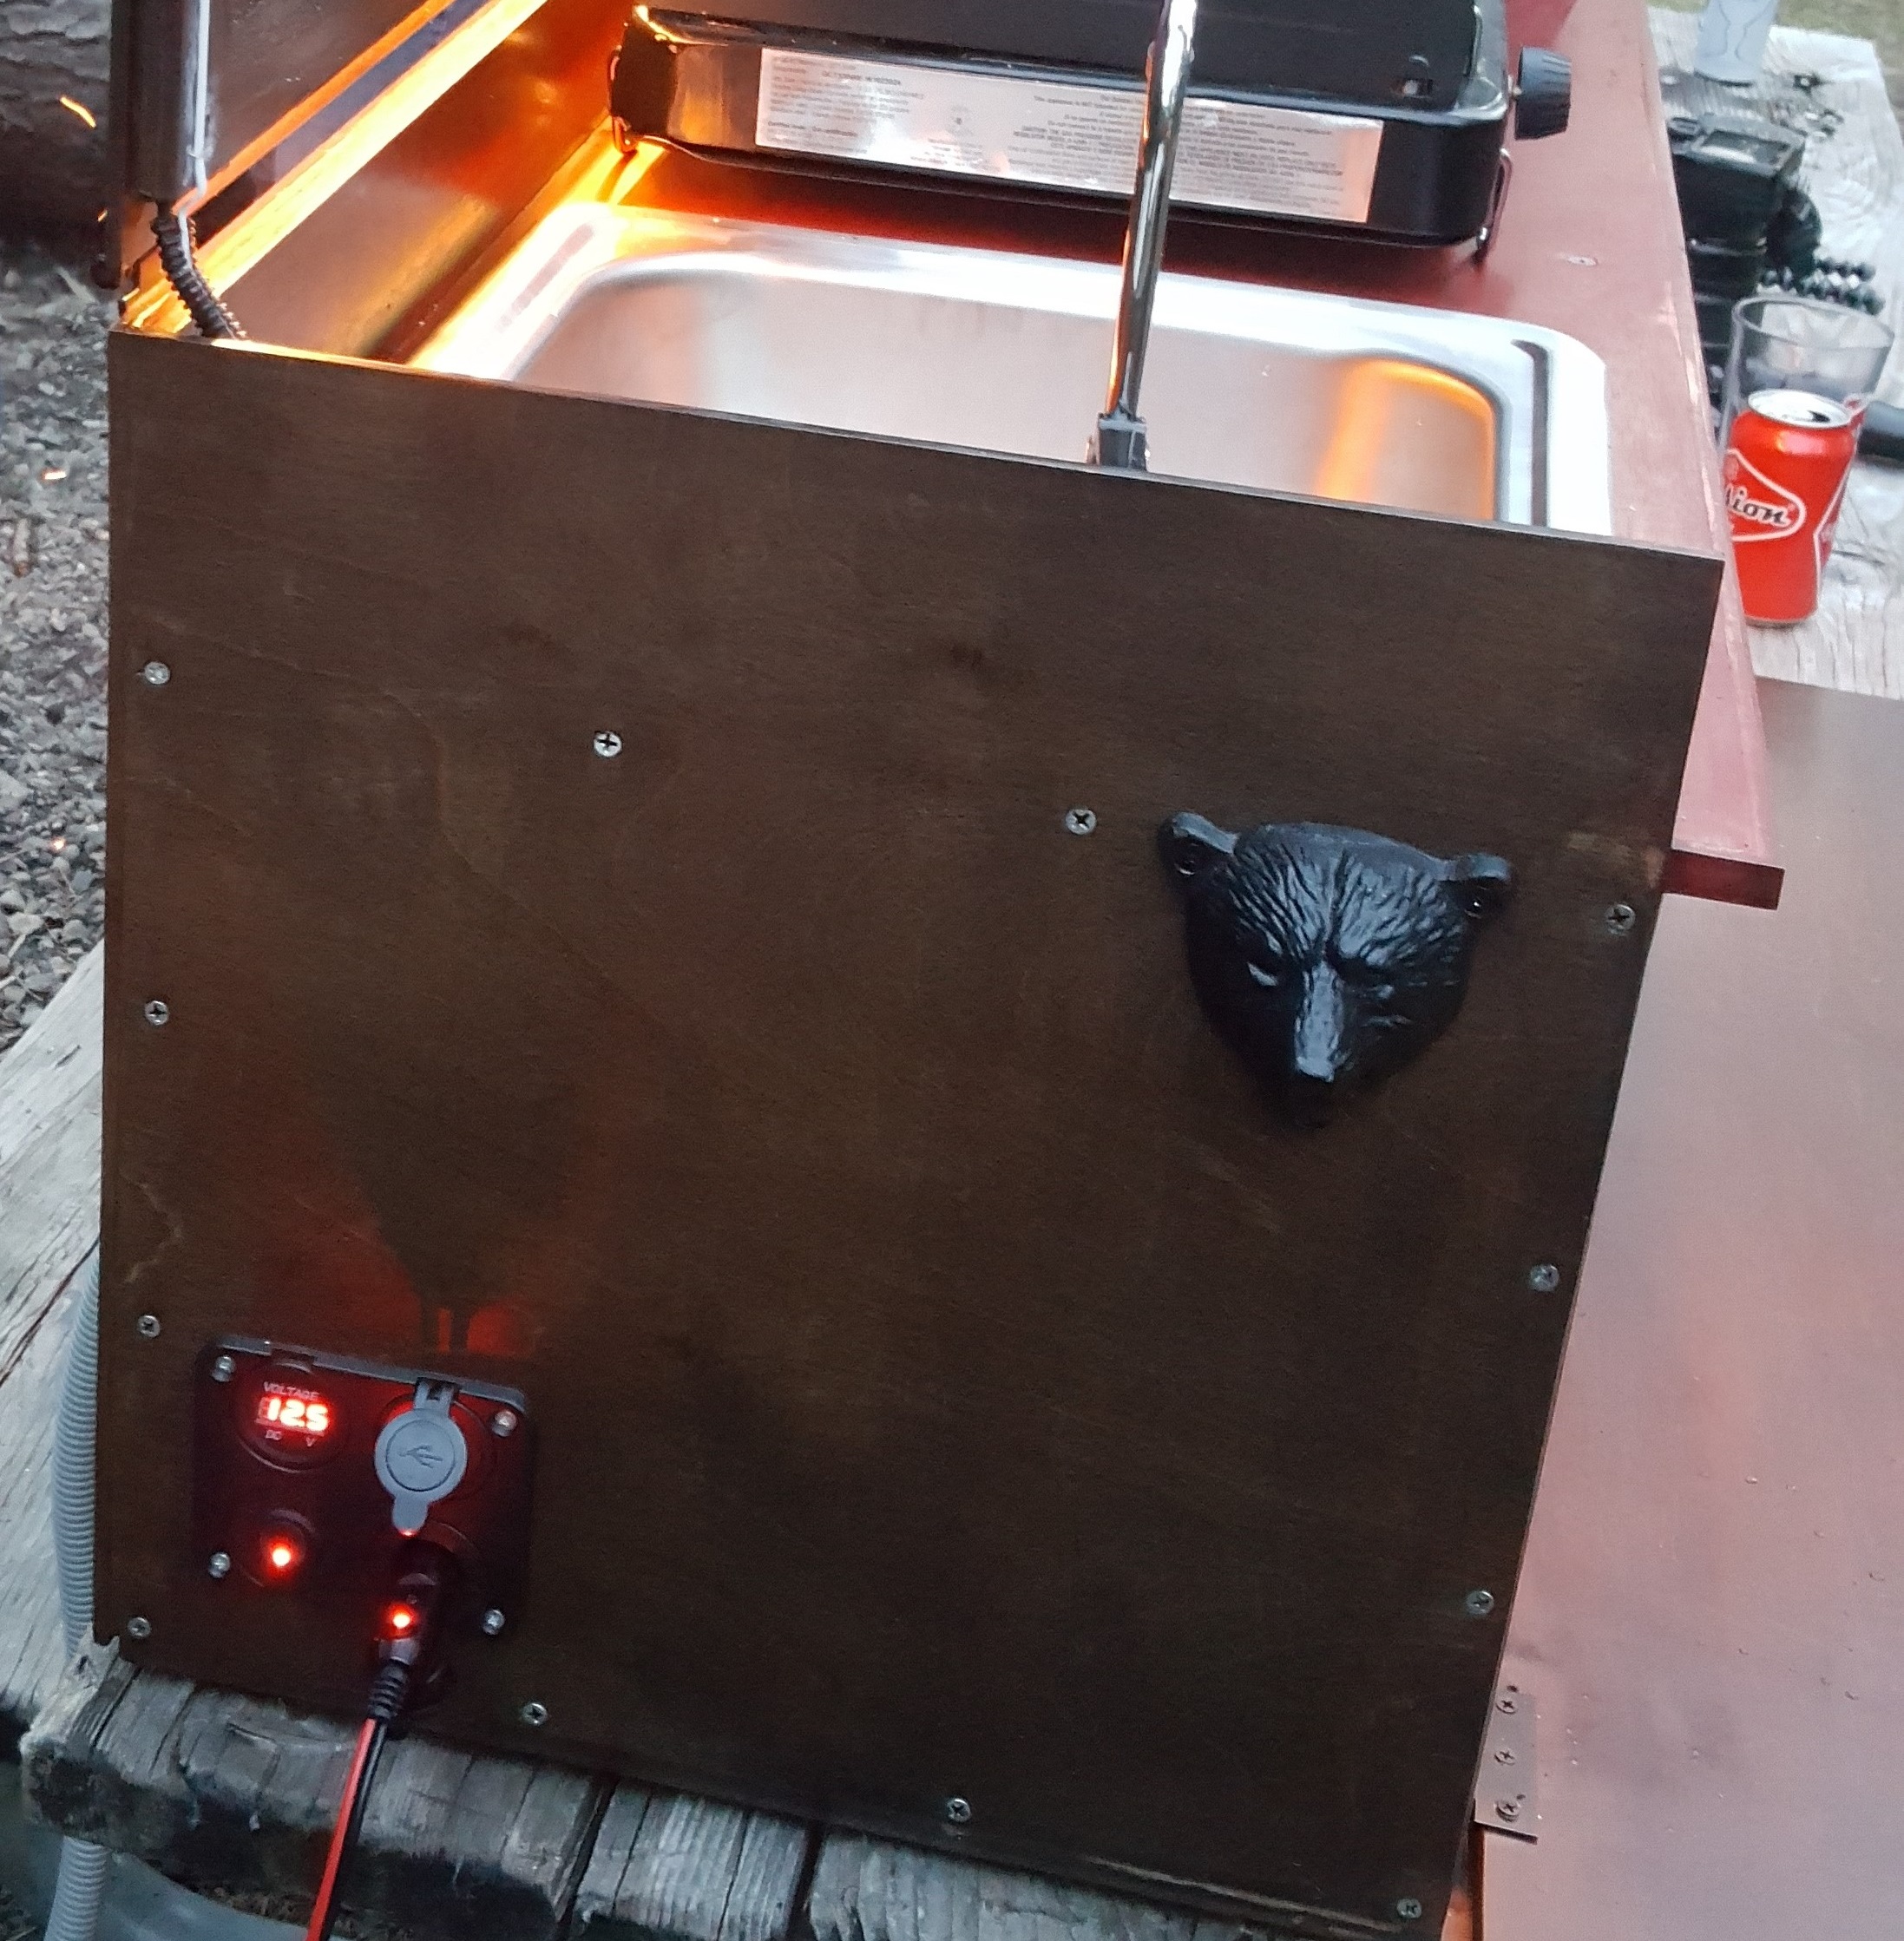
[pointblankjustice] — opting for overkill — built this for his girlfriend instead of the requested box to simply store camping supplies. Glued and screwed plywood forms the frame, drawers, and lid which was then stained and painted to make for an appealing finish. A simple propane camp stove makes a worthy cook-top.
Obviously, one must include a kitchen sink, so a small bar sink and hose faucet are kept running with a cheap, 12V, 35psi pressure pump from Amazon. A little doughnut magnet keeps the faucet secured when not in use. Spent grey-water drains from a hose into a bucket or into a ditch (don’t worry — [pointblankjustice] uses biodegradable soap!).
As an added bonus, [pointblankjustice] has some under-cabinet lighting and accent lighting to keep things cooking late into the night, with power supplied by an extension cord going to their Jeep’s cigarette lighter outlet — plans to add a built-in battery are pending. There’s also a pair of USB ports to keep one’s phone charged and a bear-shaped bottle opener to keep the good times rolling!
The kit packs up nicely and fits snug in the rear of [pointblankjustice]’s Jeep with enough room for other supplies and a pair of dogs.
For longer hauls out into the wilderness, you might consider bringing a solar power supply unit that literally lasts for days.
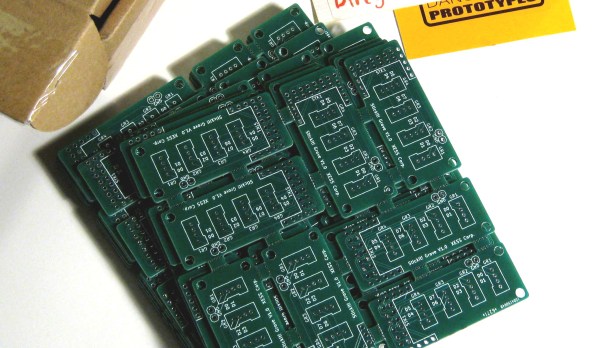
Anyone who’s made a PCB has encountered the conundrum of having to pay for space that you don’t use… for instance, designing a round PCB and seeing the corners go to waste. The solution? Smaller boards added to the blank spots.
One logical stumbling block might be that you simply don’t have a small PCB design ready to go. Latvian hacker [Arsenijs] created a resource of small PCBs that can be dropped into those blank spots, as well as a tutorial on how to combine the gerbers into a single panel.
Great minds think alike, and this guide is following hot on the heels of [Brian Benchoff’s] article on panelization. They’re both a great read. It’s interesting to think that not long ago we would see multiple guides on home etching boards and now we’ve climbed the production ladder to guides that help better utilize PCB fab houses. Neat!
This project seems a logical spinoff of [Arsenijs]’s ZeroPhone Pi smartphone project, a finalist for the 2017 Hackaday Prize that makes a low-cost phone using a stack of PCBs. One imagines that while prototyping the phone [Arsenijs] ended up with a lot of wasted space! Fill that up with smaller designs like breakouts, or decorative items like a hackerspace business card. If you’re looking for small PCBs you can find a few in the files area of the project on Hackaday.io. Otherwise, you can share yours and [Arsenijs] will add them.
[David Brown]’s entry for The Hackaday Prize is a design for a tool that normally exists only as an expensive piece of industrial equipment; out of the reach of normal experimenters, in other words. That tool is a 6-axis micro manipulator and is essentially a small robotic actuator that is capable of very small, very precise movements. It uses 3D printed parts and low-cost components.
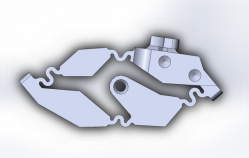
SLS Nylon Actuator Frame. Motor anchors to top right, moves the central pivot up and down to deflect the endpoints.
The manipulator consists of six identical actuators, each consisting of a single piece of SLS 3D printed nylon with a custom PCB to control a motor and read positional feedback. The motor moves the central pivot point of the 3D printed assembly, which in turn deflects the entire piece by a small amount. By anchoring one point and attaching the other, a small amount of highly controllable movement can be achieved. Six actuators in total form a Gough-Stewart Platform for moving the toolhead.
Interestingly, this 6-Axis Micro Manipulator is a sort of side project. [David] is interested in creating his own digital UV exposer, which requires using UV laser diodes with fiber optic pig tails attached. In an industrial setting these are created by empirically determining the optimal position of a fiber optic with regards to the laser diode by manipulating it with a micro manipulator, then holding it steady while it is cemented in place. Seeing a distinct lack of micro manipulators in anything outside of lab or industrial settings, and recognizing that there would be applications outside of his own needs, [David] resolved to build one.
London is one of those cities with an identity problem when it comes to airports. There is no one London airport, instead a group of airports serve the city at various distances from it. London Gatwick is the second largest of these, and sits with its single runway in the Sussex countryside about 30 miles south of the city.
If you follow British news sources, you may have heard a little about Gatwick in the last couple of days. Its runway was closed for two short periods and a selection of flights were diverted, because of what is being reported as a drone sighting. This is an extremely serious matter, responsible multirotor owners will be painfully aware of the distance and altitude regulations surrounding flights near airports.
An oft-shared drone identification guide for airline pilots, of uncertain provenance (phantompilots.com).
If you are familiar with the way that drone stories are reported by the mass media, you will probably not need to click on the link above to the BBC reporting to find out its tone. There is significant concern within the multirotor community that it presents a very one-sided view, and takes at face value the assertion that the sighting was a drone, when in fact there is no proof at all of that being the case. For those of us who have seen many such stories come and go it is difficult not to agree with the drone pilots, there is at best some lazy reporting in the air, and at worst some outright journalistic irresponsibility.
As Hackaday readers, you are used to writers with an in-depth knowledge of the subjects upon which they write. We don’t know all possible facets of technology and we occasionally get things wrong, but we all have very strong backgrounds in the tech, hacker, and maker industries and communities we write about. We have engineering education, we’ve worked in a wide variety of technology industries, we build our own stuff for fun, and we’ve founded and run hackspaces.
By comparison the journalists whose work you will read in the mainstream media are generalists. They will have a specific educational background and a particular set of interests, but in their work they cover whatever stories tumble off the endless conveyor belt of events. Thus when a drone story appears, they find themselves out of their normal comfort zone of politics or local news, and can not rely on their experience to inform their coverage of it. The responsible journalistic approach is to do a little research and ask the pertinent questions asking for concrete proof of drone involvement. We’re still waiting for that to happen in these allege drone encounters.
Multirotor building and flying is a significant feature of our community, and anything that brings the attention of law enforcement to the kind of work we do should be a worry to us all. Multirotors are not the only things covered by Hackaday that could be misrepresented in the same way. We’ve visited this topic before, take a look at our analysis of a series of air proximity reports blamed on drones. Some of them, you couldn’t make up.
You’ve probably heard of Arthur C. Clarke’s third law, suggesting that any sufficiently advanced technology is indistinguishable from magic. Taking this literally and in the best possible way, [Allen Pan] of [Sufficiently Advanced] is using readily available technology to simulate magical wizarding duels in the fashion of Harry Potter.
Entitled the Wizard Analogue No-Magic Dueling Simulator — or W.A.N.D.S. for short — is a slightly more interactive version of laser tag. It’s especially engaging because your body is on the line. A Raspberry Pi using Google’s speech recognition service listens for the spell names and — remember, pronunciation is key — fires off the spell from an infrared LED tipped wand. Each duelist has five spells at their disposal, but their accuracy is up to you.
Once your opponent’s receiver registers a hit, an Arduino triggers transcutaneous electrical nerve stimulation (TENS) devices which sends pulses to various regions on the body to simulate the spell’s effect. What’s a few electrical shocks between wizards, eh?
As a defense from the constant barrage, the spell Protego — aimed at one’s own sensor — grants a few seconds immunity; however all spells have a built-in cool-down to prevent their abuse and an LED on the wand indicates when they’re ready to be used.
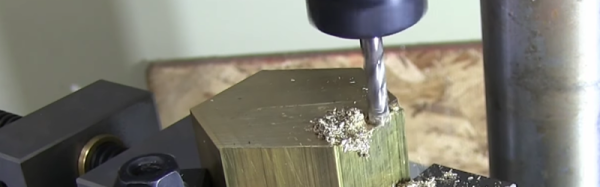
Every time we look at the little short Z axis of our CNC mill, we think about converting a drill press to a mill. In theory, it seems like it ought to be easy, but we never quite get around to it. [AvE] did get around to it and made his usual entertaining video about it that you can see below. If you haven’t seen any of [AvE’s] videos before, be warned: there is a little colorful language in a spot or two.
This isn’t a CNC mill, by the way, although we suspect you could convert it. Essentially, he adds a spindle and an XY table to a Ryobi drill press. It sounds simple, but getting everything to work did take a few tricks, including a blow torch.
Actually, turns out the blow torch didn’t really do it, but we won’t spoil the final resolution to the problem. Once it was resolved, though, he did manage to do some actual milling, accompanied by some music we wouldn’t associate with [AvE].
Although billed as a “poor man’s” build, the XY table alone was about $200. So add in the cost of the drill press, the spindle, and the mill and this is still a fair chunk of cash. We’d love to see it compared to a Harbor Freight milling vise. We suspect the Harbor Freight vise might not be as good, but is the difference worth the $130 difference in price?
We’ve seen this kind of conversion done before without the colorful language. If you do this conversion and want some practice, why not build a magnetic carabiner?

 Great minds think alike, and this guide is following hot on the heels of [Brian Benchoff’s]