University Peristaltic Pump Has Hacker Heritage

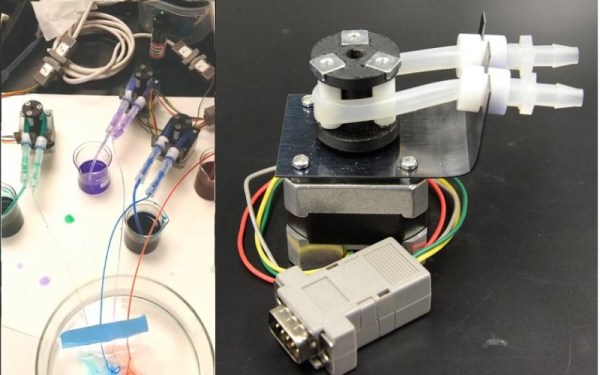
A team at [Vanderbilt University] have been hacking together their own peristaltic pumps. Peristaltic pumps are used to deliver precise volumes of fluid for research, medical and industrial applications. They’re even occasionally used to dose fish tanks.
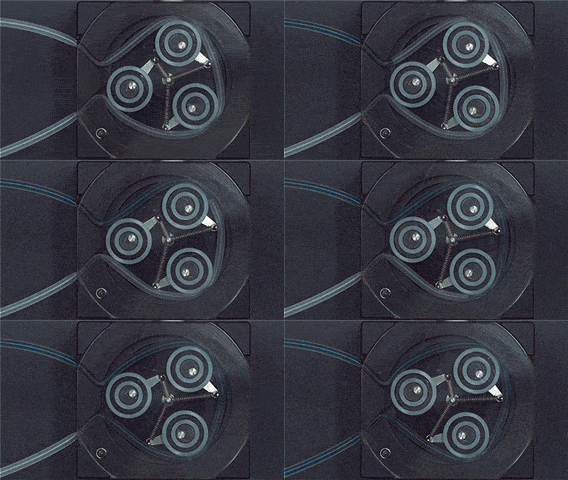
pumpThey work by squeezing the fluid in a flexible tube with a series of rollers (check out the awesome gif from Wikipedia to the right). We’ve seen 3D printed peristaltic pumps before, and cheap pumps have been appearing on eBay. But this build is designed to be lab grade, and while the cheap eBay devices can deliver ~20ml/min this one can deliver flow rates in the microliter/min range. It also has a significant cost advantage over commercial research grade pumps which typically cost thousands of dollars, each of these pumps costs only fifty bucks.

The pump has a clear hacker heritage, using an Arduino Uno, Adafruit Motor shield, and 3D printed mechanical parts. So it’s particularly awesome that they’ve also made their design files and Arduino code freely available!

Continue reading “University Peristaltic Pump Has Hacker Heritage”

The Simplest Steam Engine

[RimstarOrg] has posted an awesome writeup on his Hero’s steam engine . Hero’s engine is a Greek design from the first century and is the earliest known steam engine. It’s amazing to think he developed the engine seventeen centuries before the industrial revolution, and yet it was largely ignored. While you can find more faithful replicas, of this landmark machine [RimstarOrg]’s rig can’t be beaten for simplicity and he does a great job of explaining the principal of operation and construction.

Using a soda can filled with water and a propane torch [RimstarOrg] was able to get the can to rotate rapidly by ejecting steam from two holes in the side of the can. A fishing swivel is used to provide a pivoting joint and allow the can to rotate freely.

While we’ve covered steam engines before, we loved this simple design, and can’t wait to see what [RimStarOrg] comes up with next.

Continue reading “The Simplest Steam Engine”

Hackers Measure Cable Lengths With Time Domain Reflectometers

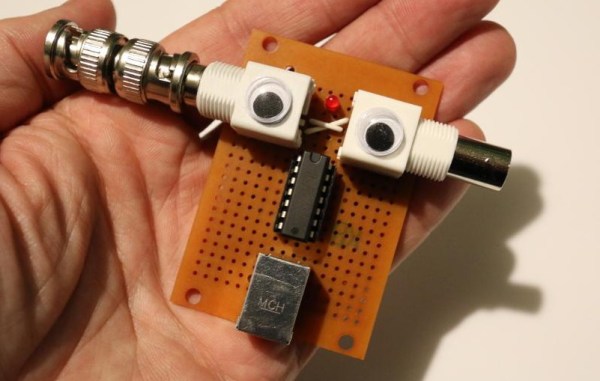
[android] has built up a fast edge pulse generator for time domain reflectometry (TDR). TDR is a neat technique which lets you measure cable lengths using electrical signals and can also be used to locate faults within the cable.

TDR works by sending a pulse down the cable. When the pulse reaches the end of the unterminated cable it is reflected back to the source. By monitoring the delay between the original pulse and its reflection you can determine the length of the cable. We’ve seen projects that use TDR before, and it’s often used in telecoms industry to locate faults in long cable runs.

You can try TDR in your lab using only a scope to observe the delay and a function generator to create the pulse. However, the technique works a lot better with pulses that have very fast rise times. So [android] built a fast edge pulse generator based on [w2aew]s design. Then added googly eyes for good measure. His build works great and is a nice demonstration of the technique.

Hacking Cheap Chinese PID Temperature Controllers

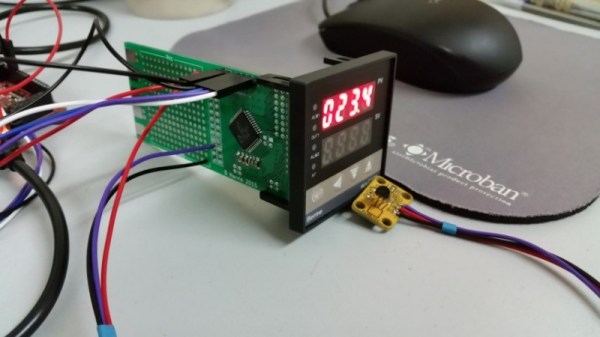
[Harvs] hacked a cheap PID controller he found on eBay to improve its performance. The controller originally used a K-type thermocouple but lacked cold junction compensation. As thermocouples only provide a differential measurement between the measurement junction and cold junction, this meant the controller was assuming the cold junction was at room temperature, and would in many cases be significantly inaccurate. The system also used a no-name brand Chinese microcontroller making firmware hacks impractical.

[Harvs] decided that even with cold junction compensation a K-type thermocouple wasn’t ideal for his application anyway, and designed a replacement PCB to interface to the display and power supply. The new PCB is based around a Cypress PsoC (a popular choice for its great analog functionality) with a DS18B20 temperature sensor. At the lower temperature ranges [Harvs] is interested in the DS18B20 is far more accurate and easy to use than the thermocouple.

Though the project hasn’t been updated recently, [Harvs] was planning on adding an ESP8266 for remote monitoring and control. Great work [Harvs]!

Thanks to Peter for the tip.

Get Biohacking With A DIY CO2 Incubator

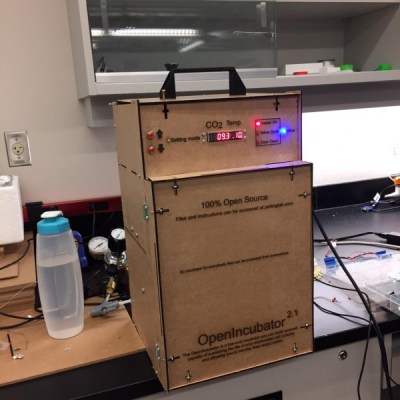
The [Pelling Lab] have been iterating over their DIY CO2 incubator for a while now, and it looks like there’s a new version in the works.

incubator3

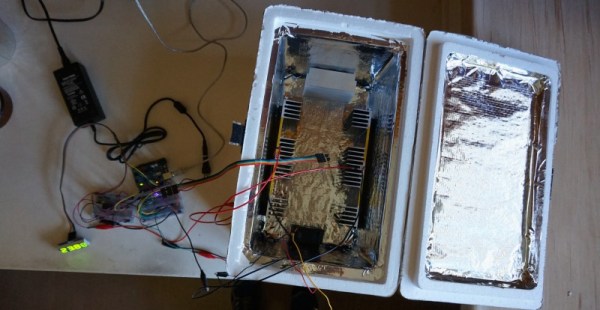
We’ve covered open source Biolab equipment before including incubators but not a CO2 incubator. Incubators allow you to control the temperature and atmosphere in a chamber. The incubator built by the [Pelling Lab] regulates the chambers temperature and CO2 levels allowing them to culture cells under optimal conditions.

While commercial incubators can cost thousands of dollars the [Pelling Lab] used a Styrofoam box, space blanket, and SodaStream tank among other low cost parts. The most expensive component was a CO2 sensor which cost $230. The rig uses an Arduino for feedback and control. With a total BOM cost of $350 their solution is cost effective, and provides an open platform for further development.

The original write up is full of useful information, but recent tweets suggest a new and improved version is on the way and we look forward to hearing more about this exciting DIYBio project!

Self Built Interferometer Measures Nanometer Displacement

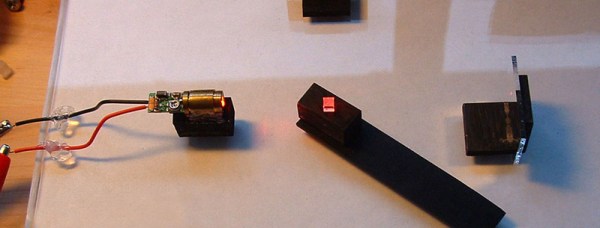
[jrcgarry] hacked together this awesome interferometer which is able to measure displacements in the nanometer range. Commercial interferometers are used in research labs to measure tiny displacements on the nanometer scale, and can cost tens of thousands of dollars. [jrcgarry] used beam splitters from BluRay drives, mirrors from ebay and a 5mw laser diode.

We’ve covered the use of interferometers before. But never an instrument built from scratch like this. Interferometers exploit the wave-like nature of a beam of light. The beam is split and sent down two separate paths, where the beams bounce off mirrors to return to the beam splitter to be recombined. Because of its wave light nature the beams will interfere with each other. And as the beams have traveled different distances they may be in or out of phase. Resulting in either constructive (brighter) or destructive (darker) interference.

Because the wavelength of light is on the order of 100s of nanometers, by observing the interference patterns you can monitor the displacement of the mirrors with respect to each other at nanometer resolution. [jrcgarry] doesn’t use the interferometer for any particular application in this tutorial but it’s a great demonstration of the technique!

Hacking A Telecoms Frequency Standard For Your Lab

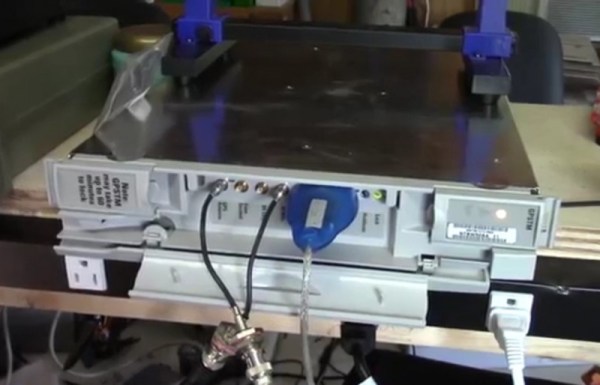
[Shane Burrell] came across a Nortel GPSTM and re-purposed it as a 10MHz reference for his lab. The GPSTM is designed to slot into a backplane, most likely for telecoms applications. So [Shane] needed to hack the board to run from a 48v PSU. Once powered up, it was relatively easy to interface as the card appears to contain the well known Trimble Thunderbolt module and is compatible with its software.

We’ve covered frequency references before and they can be a valuable addition to a lab. On the back of most scopes, spectrum analyzers and function generators you’ll find a 10MHz reference input allowing the user to supply a reference more accurate than that generated internally. Not only is an external reference often more accurate, it also allows you to keep all your equipment in sync with a common reference, which can be particularly important in some measurements. While some hackers opt for Rubidium sources, the GPS disciplined temperature-controlled oscillator in the Nortel unit should provide a nice stable reference.

A word of warning to [Shane] though, get sucked into hacking frequency references and you may become a time nut finding yourself climbing mountains to test the theory of relativity.

Continue reading “Hacking A Telecoms Frequency Standard For Your Lab”